Hello and welcome,
My name is Vicki Boucher, and I am from Melbourne, Australia. This is the latest hop with the design team at Creation Station, if you have come from Mikaela's blog or you may have started with me. Please make sure you hop around and see everyone's amazing projects. I'll pop a link at the end of my blog.
The design team at Creation Station are presenting their projects with the theme "Into the Night" and for my two projects I went with an Aussie themed Christmas using Stampin' Up! products from the 2024 Mini Catalogue and an Online Exclusive.
There's one thing I love to do at Christmas with the family and that's going out looking at Christmas lights in my neighbourhood at nighttime. In December it's usually hot so we love to buy an ice cream and wonder around looking at all of the amazing lights & Christmas displays.
So, this is how I came up with the idea for my two cards using the Snowy Wonder bundle and making it into a non-snow look scene.
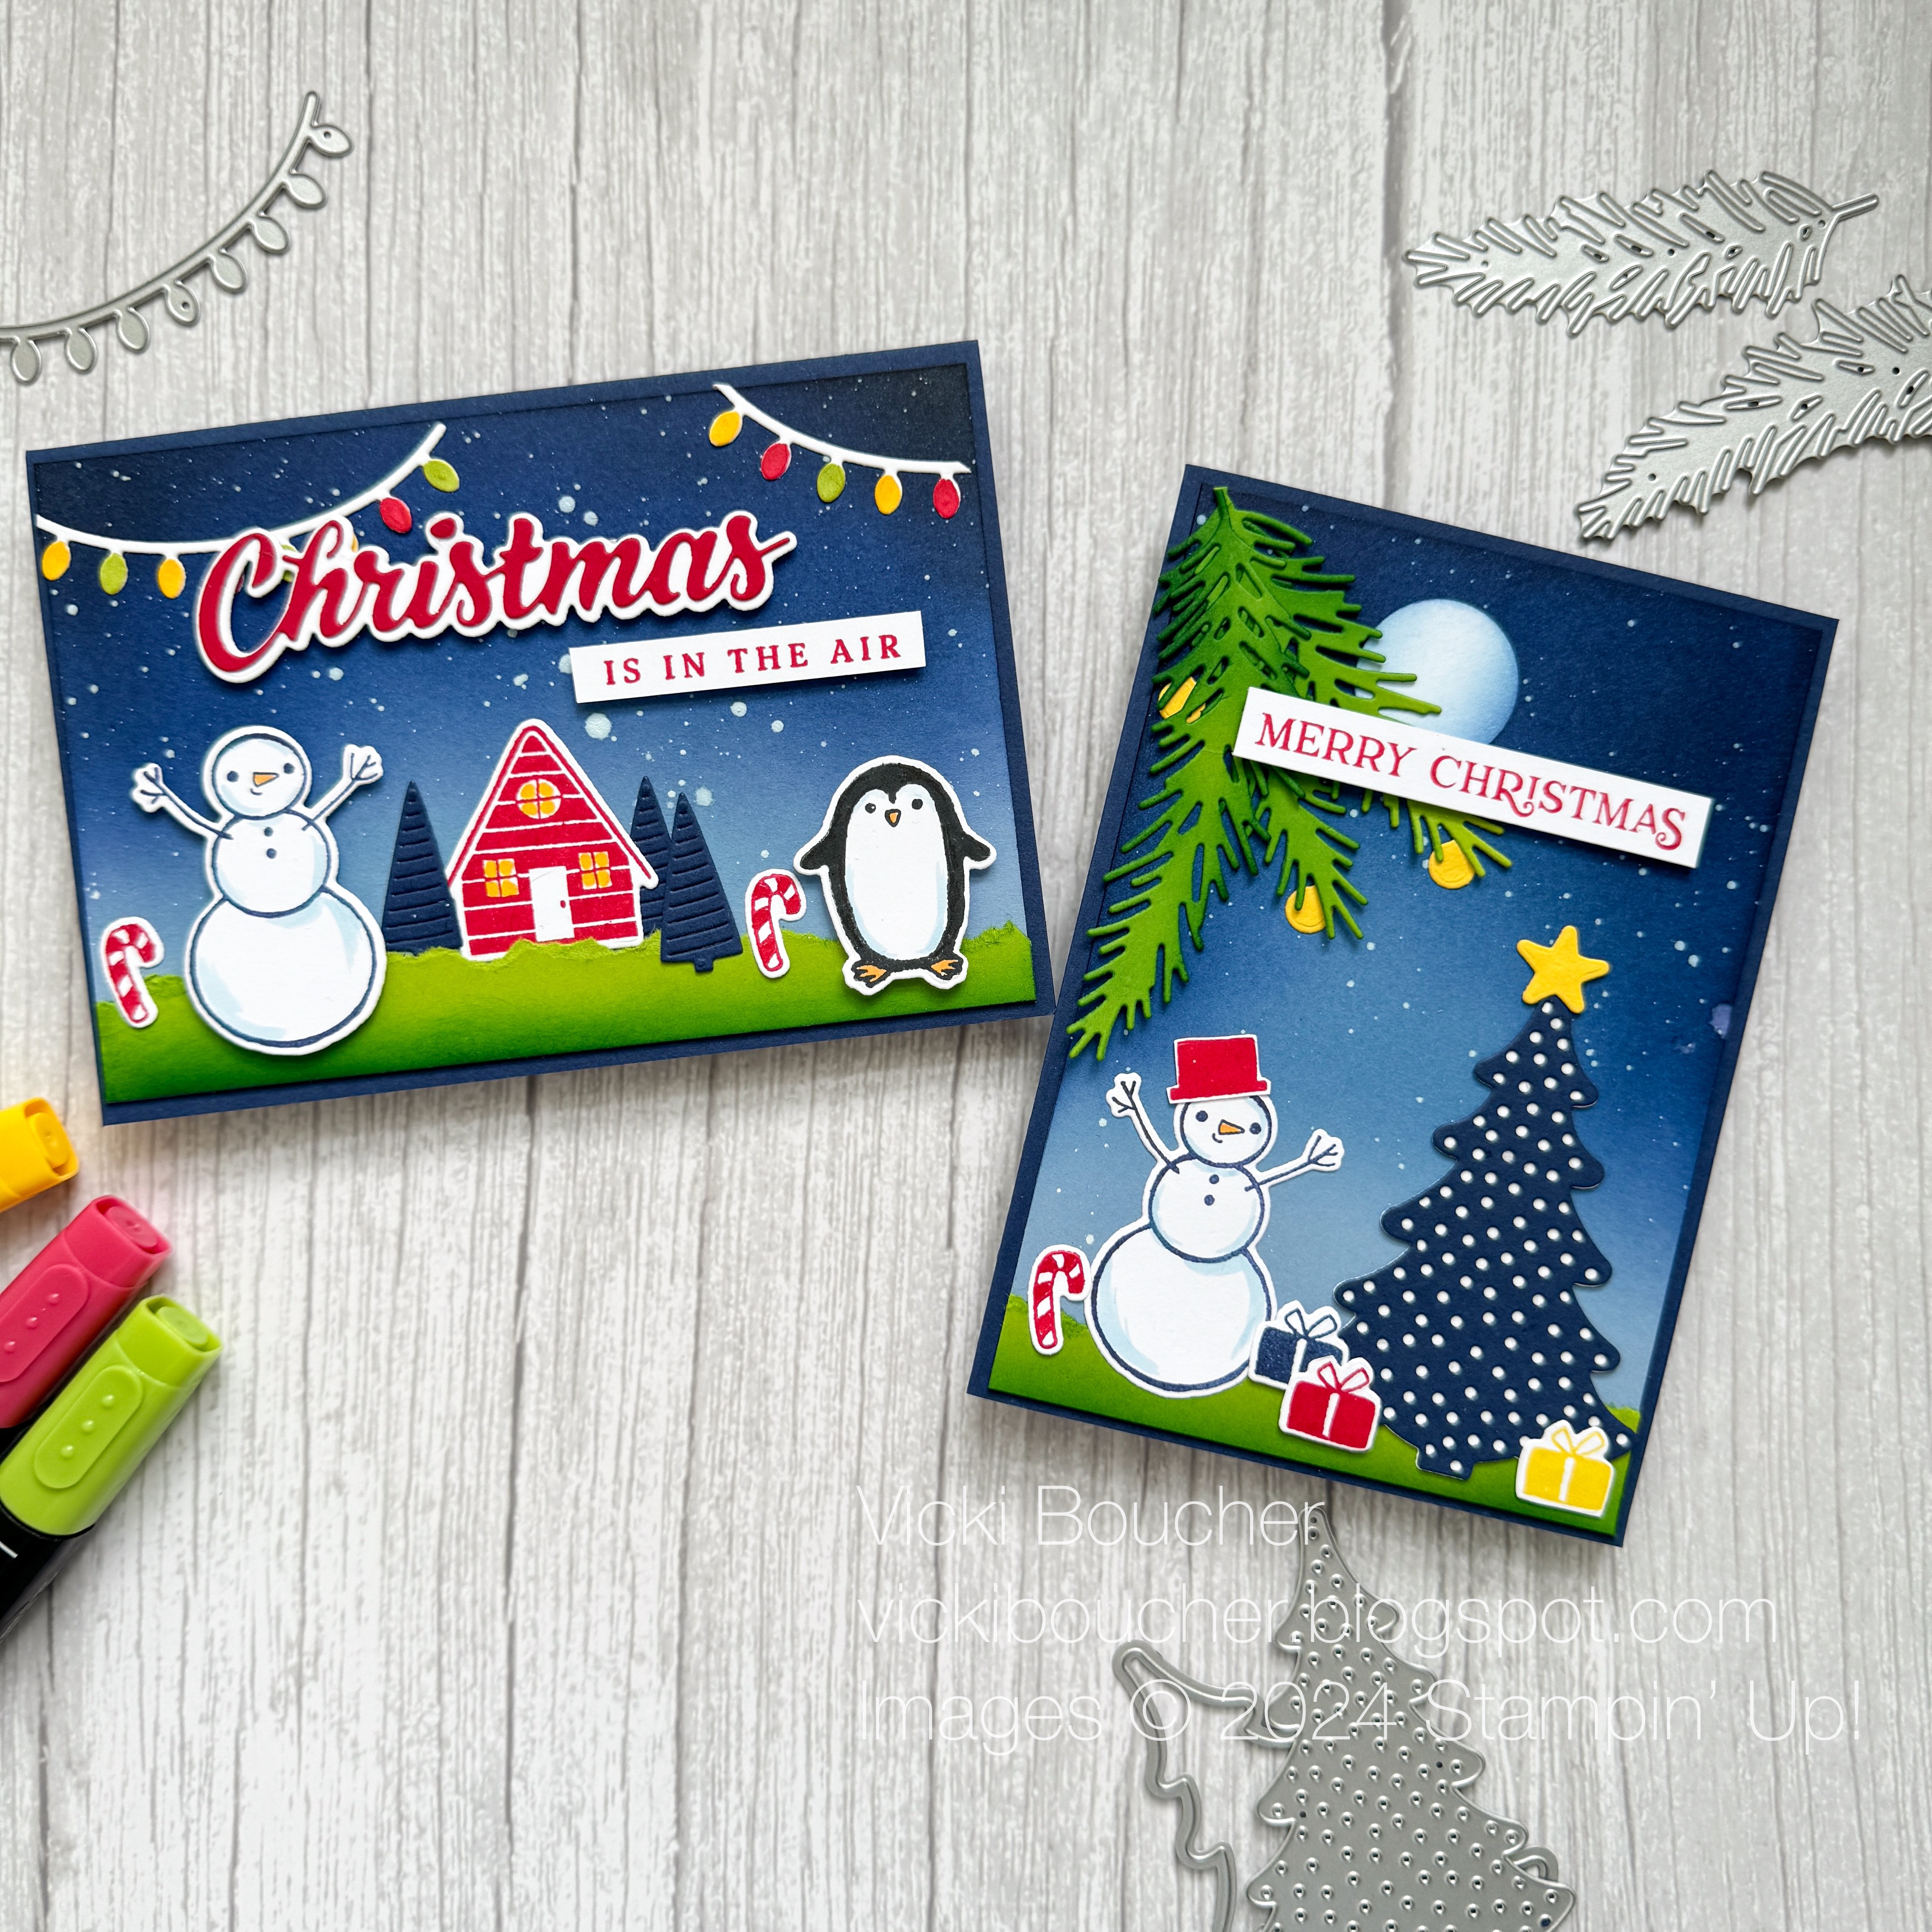
I started with the background panel in Boho Blue cardstock with a Blending Brush I applied from light to dark in the following colours Misty Moonlight, Night of Navy and Black Memento ink. The black ink makes the sky look darker by blending it in at the corners at the top of each background panel.
This next step has been around for some time, and I've always wanted to try it out, thanks to Mikaela for this amazing tip that she shared recently. Next, I wanted to have tiny white stars, so I created the splattered look by using white Craft ink placed in a dish, dilute with a little water and mix using a Water Painter. Then carefully tap the brush against a pencil and splatter away. It's so much fun! Just be careful not to get it onto yourself or the surrounding area. Allow to dry before completing your card.
I placed some of the elements onto the grass and to make the green grass I used the following technique. I used a strip of Granny Apple Green cardstock and torn the cardstock using my fingers giving it an organic look. Then I added Garden Green, Shaded Spruce ink with a Blending Brush to create an ombre look to the cardstock.
Christmas is in the Air Card
I do like to mix up different Stampin' Up! products for this card I used the lights from the Reindeer Fun dies and coloured the lights using Stampin' Blends in the following colours Real Red, Granny Apple Green and Daffodil Delight.
There are so many different images in the Snowy Wonder bundle and I like the penguin he's so cute! I also used the smowman and stamped him in Night of Navy and coloured him in just lightly with the Stampin' Blends.
The house is in Real Red and to make it look like the lights are on I used Daffodil Delight Stampin' Blend. The trees are die-cut using Night of Navy and the tree die from the Snowy Wonder dies.
I used the Peaceful Season bundle for the sentiment combing Real Red and Basic White makes it really pop against the nighttime sky.
Merry Christmas Card
To create my next card, I made a moon by punching out a 1" circle punch (retired) in Basic White cardstock and then I carefully added Boho Blue & Night of Navy ink with a Sponge Dauber to the edges of the moon.
I placed the moon behind the branches to create some depth to the card. I used the Golden Greenery Dies, die-cut out two of the smaller branch and one large branch in Granny Apple Green cardstock. Then I applied Shaded Spruce ink with the Blending Bruch to each of the branches and layered them together with adhesive.
The Christmas tree is from Decorative Trees Dies, using the spotted tree die in Night of Navy cardstock and the open tree die in Basic White cardstock. This gives the impression that the tree has lots of lights all lit up.
I added the snowman again with some presents around the Christmas tree and a candy cane. I used Daffodil Delight cardstock for the star and bauble balls.
The sentiment is from Reindeer Fun stamp set, stamped in Real Red onto a strip of Basic White cardstock.
Thank you for visiting my blog today, I would so love to hear your thoughts on my project by leaving a comment below. Make sure you pop over to see Rachel Traudt's blog for lots of inspiration with her projects.
Make sure you follow me on social media via Facebook, Instagram and Pinterest for more inspiration.
Please email me if you would like a copy of the new Stampin' Up! 2024-2025 Annual Catalogue or Mini Catalogue, please contact me here.
 |
Stampin' Up! 2024 Mini Catalogue coming soon.
|
If you live in Australia and don't have a demonstrator, you can purchase any of the Stampin' Up! products by shopping with me at my Stampin' Up! online store here.
Happy Stamping
Vicki Boucher