29 August 2019

Stampin' Up! Art With Heart Blog Hop - Christmas


Hello and welcome,

Tonight the 
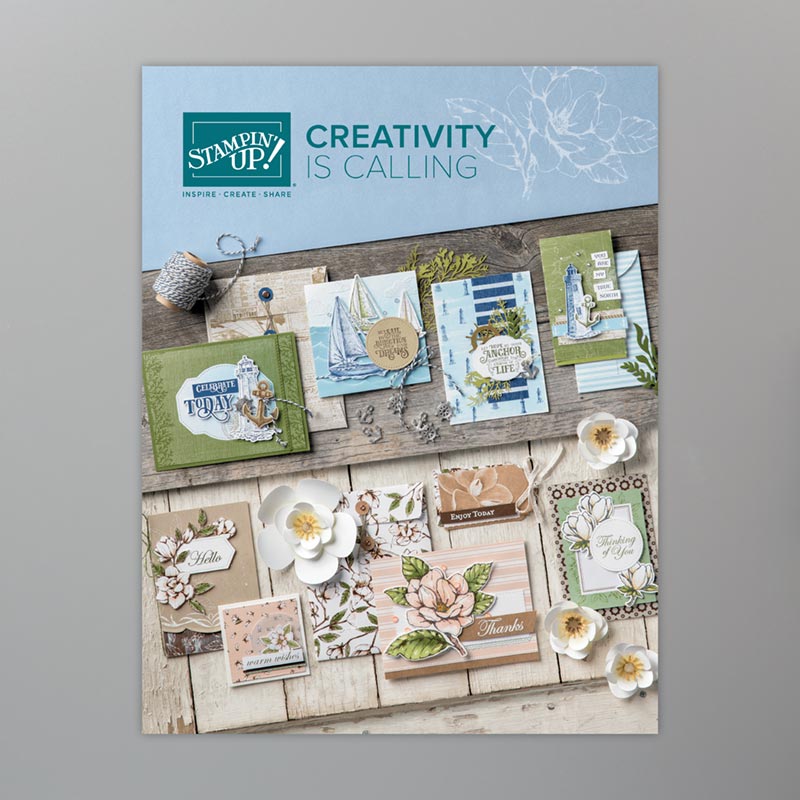
Art with Heart team are sharing creative Christmas projects, many featuring products from the upcoming Holiday Catalogue which starts on the 4th of September.


If you would like a copy of the 2019 - 2020 Annual catalogue or the new Holiday catalogue, contact any of the girls on the blog hop and we will get in touch with you.


When I first had a flick through the Holiday Catalogue the first set that I couldn’t wait to purchase was the beautiful Still Scenes bundle. The bundle includes the Still Scenes Stamp Set and the coordinating Snow Globe Scenes Dies when purchased in a bundle you save 10% off. The thought of creating a Snow Globe Christmas Card was really exciting too!
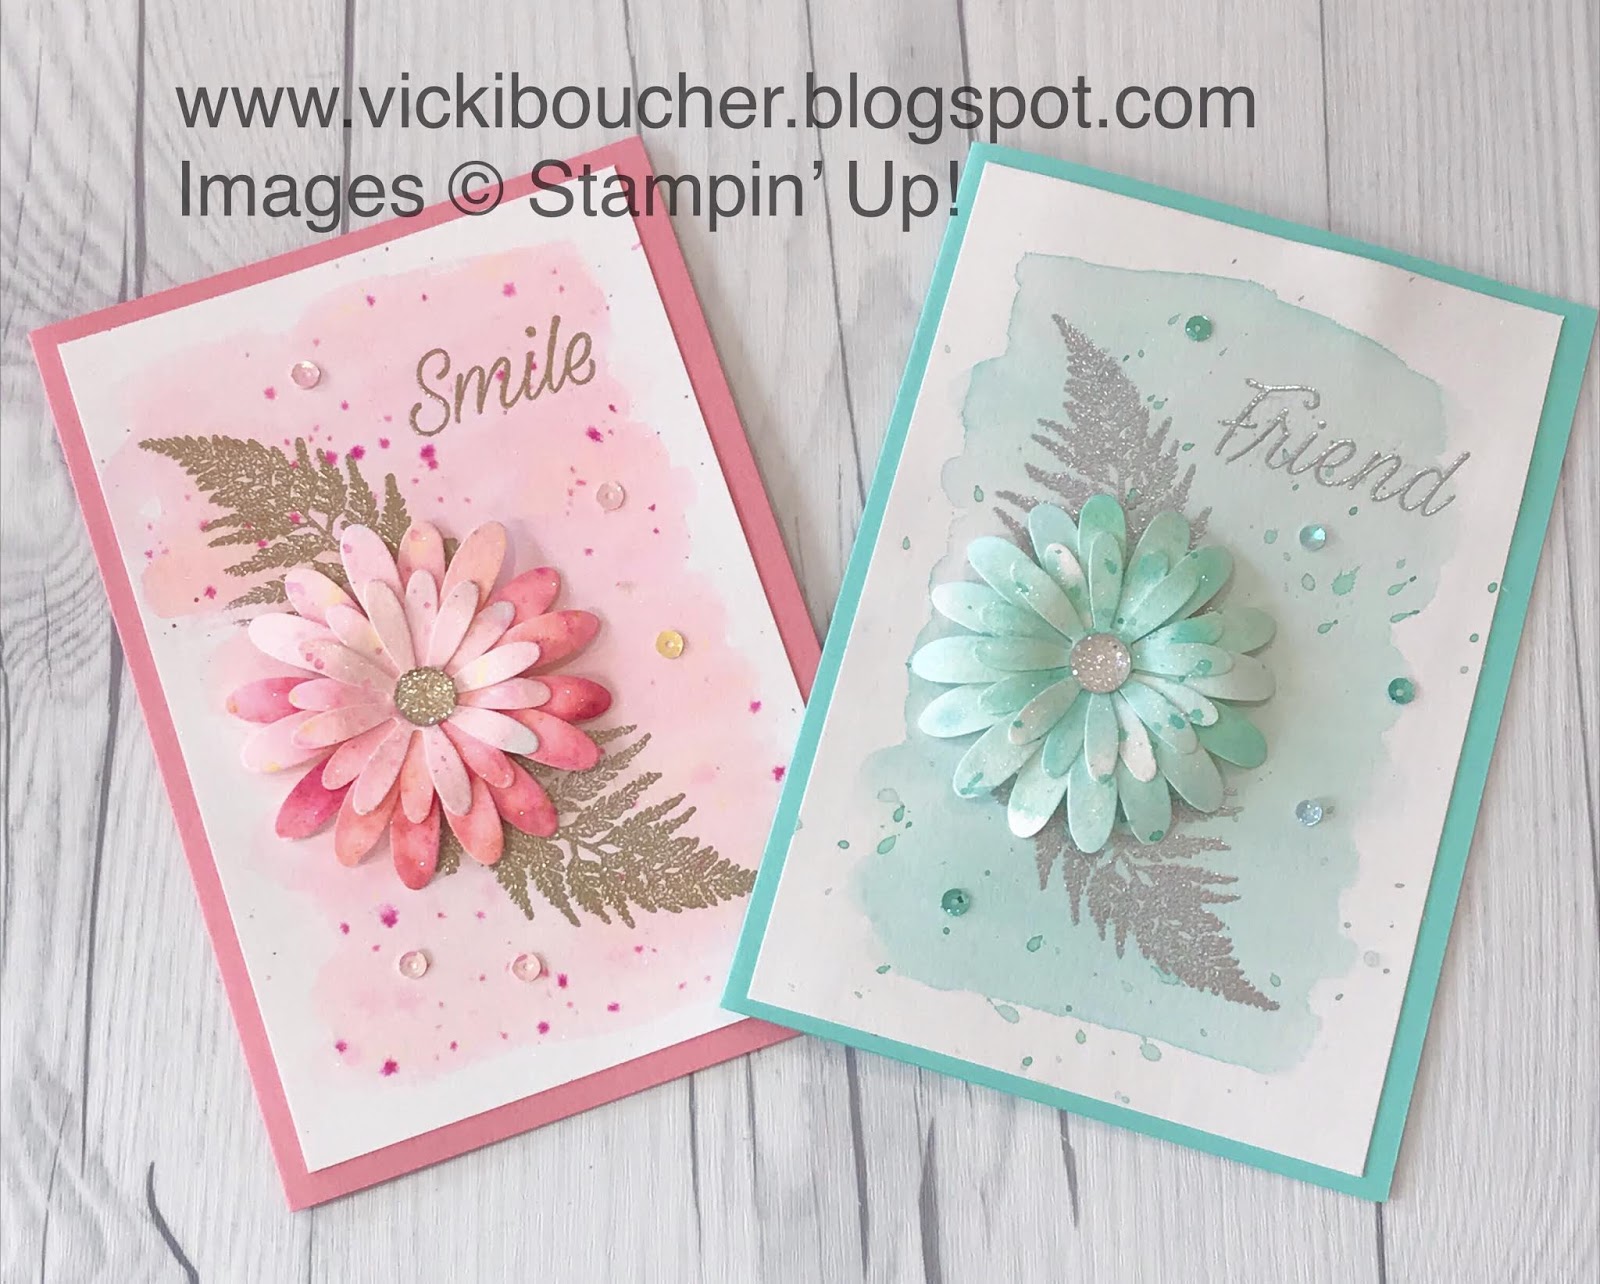

I wanted to create my card by making a snow scene and shaker card using soft colours with 
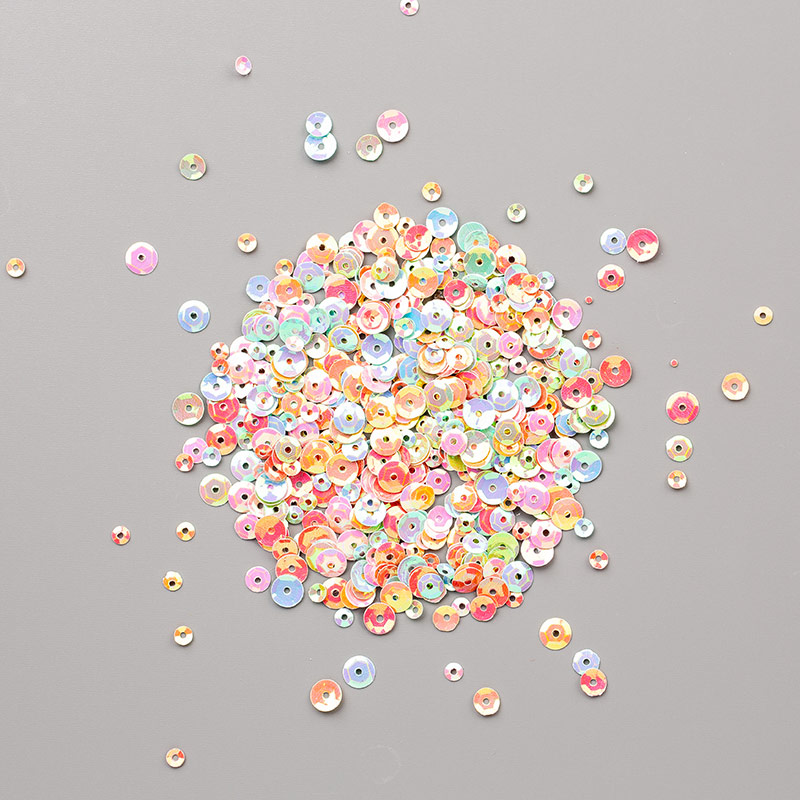
silver, white and lots of twinkles. The Snowflake Sequins are just gorgeous they come in stars, snowflakes and round sequins in clear, iridescent, silver and white.
Before I even started to create the card, I wanted to know a way on how to put the globe part together and I found a YouTube video tutorial by Suzanne Burnett. Click on the video below to see how Suzanne created her gorgeous card.


Once I had die cut the snow globe insert (Whisper White Cardstock), trees (Silver Foil) and church pieces (Whisper White Cardstock & scrap piece of Gold Foil). To create the snow on the trees, I covered the Silver Foil in Versamark Ink, covered in White Emboss Powder, brushed some of the powder off with a brush and then heat set. I love this look and here is a close up of the trees.


The background for the snow scene is sponged in Seaside Spray, White Emboss Powder in stars and snowflakes. For the layers I’ve used Stampin’ Dimensionals for each layer. Tip (from Suzanne Burnett) with the Snow Globe Shaker Dome is to use the Stampin’ Emboss Buddy and lightly dust the globe. This helps with glitter and sequins not sticking.


I’ve used a few layers for the card – Thick Whisper White (card base), Silver Foil (2nd layer), Whisper White (3rd layer) once they all together with the Snow Globe I then finished off my card.


I’ve used Silver Foil for the Snow Globe stand, layered it with Dimensionals, the sentiment is Silver Embossed on a strip of Whisper White Cardstock, layered with a strip of Silver Foil and two silver foil snowflakes from the Christmas Layers Dies.


Thank you for visiting my blog today. Now it’s time to hop on over to our next participant, the very talented, Caroline Manwaring


Happy Crafting

Vicki Boucher

If you find a broken link or have come to this blog hop from a different entry point, you can view the participants below:


To shop with me please click here to go to my Online Store.

Product List

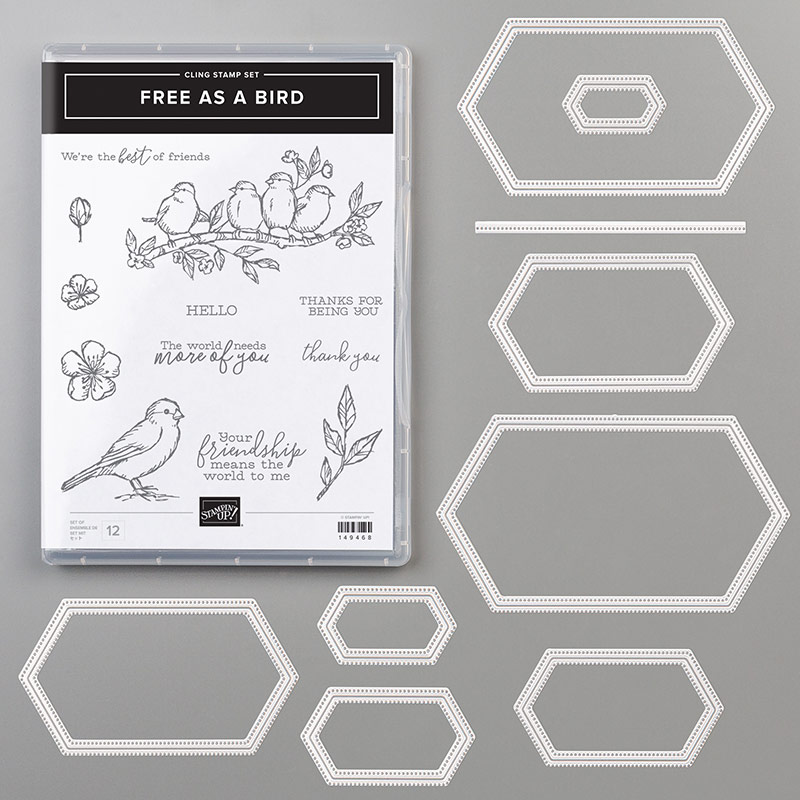
Stamps: Still Scenes

Dies: Snow Globe and Christmas Layers Dies

Cardstock: Thick & regular Whisper White, Silver Foil and Gold Foil

Ink: Seaside Spray

Colouring Tools: Versamark, Sponge Dauber, Embossing Buddy, Heat Tool, Stampin’ Glitter, White Stampin’ Emboss Powder and Silver Stampin’ Emboss Powder

Other Stampin’ Up! Products: Snow Globe Shaker Dome, Snowflake Sequins, Tear & Tape, Multipurpose Glue, Stampin’ Dimensionals and retired Big Shot

28 August 2019

Stampin' Up! 2019 Holiday Catalogue Art With Heart Team Blog Hop Week 2


Hello and welcome,

We will be showcasing products from the new Holiday Catalogue from the lovely ladies at the Art with Heart Team blog hop.
I like having cards sometimes with minimum colour with card I decided to use only white, silver and a twinkle of red from the gorgeous Red Rhinestones.


The gorgeous Silver and White striped DSP is from the Feels Like Frost 6” x 6” Specialty Designer Series Paper. I used the other side of this DSP in last week’s card. I just love the beautiful soft colours on one side and silver foil on the other side.

I've used the Deer from Detailed Deer Dies which is available to purchase now from the Annual Catalogue. I’ve coordinated the Deer in Silver Foil to complement the DSP.

The sentiment is from a new stamp set called Itty Bitty Christmas and it comes in a bundle with Christmas Layers Dies. You are going to love this stamp set as it has 18 greetings to choose from and you will also save 10% off when it’s purchased in a bundle.

I’ve stamped the sentiment in Versamark Ink on a strip of Whisper White Cardstock Embossed it with Silver Stampin’ Emboss Powder and heat set it with the Heat Tool. The strip of the Silver Metallic Edge Ribbon is peaking just under the Cardstock.

The leafy foliage is from the Christmas Layers Dies using Whisper White Cardstock and die cut out. I’ve placed the Red Rhinestones to add some colour and bling.

I’ve used Whisper White Cardstock to die cut out with the second largest Stitched Nested Labels Dies, layered it under the Silver Metallic Thread before adding the Deer and white foliage. The card base is Thick Whisper White Cardstock.

Thank you for visiting my blog today.

You can see the rest of this week’s Christmas creations over at Claire Daly’s blog.

Live in Australia? I would be happy to send you a current Stampin’ Up! Annual Catalogue and the new 2019 Holiday Catalogue out to you. Just send me a message here with your details here.

To shop with me please click here to visit my Online Store.

Product List

Stamps: Itty Bitty Christmas

Dies: Christmas Layers Dies, Detailed Deer and Stitched Nested Labels

Cardstock/Papers: Whisper White Thick & Basic Cardstock, Silver Foil Sheets and Feels Like Frost 6” x 6” Specialty DSP

Ribbon: Silver Metallic Edge Ribbon and Silver Metallic Thread

Other Stampin’ Up! Products: Red Rhinestone Basic Jewels, Retired Big Shot, Dimensionals, Tear and Tape  


27 August 2019

International Highlights Winners Blog Hop August 2019


Hello and welcome,


I have some exciting news to tell you! Just a few weeks ago I shared a card that I created for Kylie’s International Highlights and I was lucky to be in the Top Ten. Thank you to everyone who voted for me.


There is a link at the bottom of this blog to view all of the other winners. I just know you’ll want to see what they’ve been creating too.


Now for my card that I’ve created. I just love the Daisy Lane Bundle and I wanted to make a card using Rococo Rose which is one of the new In-colors and Blushing Bride. I love adding a few layers when creating my card and I think I’ve achieved that too.


The Daisy has been created by using a piece of the Fluid 100 Water Color Paper it's nice and thick for watercolouring. I've inked it up using my Aqua Painter with Rococo Rose and Blushing Bride ink. Once the ink had dried up, I punched out the Daisies using both Daisy Punches, two times each. To give each of the Daisy Petals some added colour, I’ve inked up a Sponge Dauber with Rococo Rose and lightly sponged the tips of the petals. The gold leaf has been gold embossed with Gold Stampin’ Emboss Powder and heat set with the Heat Tool, then fussy cut out.


I’ve used the Scripty 3D Embossing Folder on a piece of Shimmery White Cardstock, I wanted a subtle look by adding Rococo Rose ink with the Aqua Painter and Die cut out the Cardstock with the 3rd largest Stitched Rectangles Die. I just love the detail of the stitching it just gives that little bit extra to a card.


The next layer is a piece of Blushing Bride Cardstock and the Birch Stamp which I stamped off once in Blushing Bride Ink before stamping onto the Cardstock. I used the 2nd largest Stitched Rectangles Die for this piece.


The third layer that I’ve used is Whisper White Cardstock and I've embossed it with the Subtle 3D Embossing Folder. To give the edges a vintage look I used the blade of my Paper Snips and roughly ran it along the edge of the Cardstock. Then I sponged Rococo Rose ink around the edges with the Sponge Dauber. I just love this look, do you?


I like to make the pieces of Cardstock layered on an angle, so you can see the different layers and textures of the card. The Daisy has been placed over the gold leaf and adding some bling to my card by placing a Gold Faceted Gem for the centre.

To finish off the card I wanted to add the beautiful Rococo Rose 1/2” Gathered Ribbon and I've layered it under the sentiment. The Gold Embossed sentiment is from the Magnolia Blooms Stamp Set.

Thank you for visiting my blog today and I hope you enjoy the International Blog Hop.

Until next time....

Happy Crafting

Vicki Boucher

Live in Australia? I would be happy to send you a current Stampin' Up! Catalogue out to you. Please send me a message for more information.

To shop with me please click here to go to my Online Store.

Product List

Stamps: Daisy Lane, Birch and Magnolia Blooms
Dies: Stitched Rectangles
Punches: Daisy and Medium Daisy
Embossing Folders: Subtle 3D and Scripty 3D
Inks: Rococo Rose and Blushing Bride
Cardstock: Rococo Rose, Blushing Bride, Fluid 100 Water Color Paper, Shimmery White and Whisper White
Colouring Tools: Aqua Painter, Versamark, Sponge Dauber, Embossing Buddy, Heat Tool and Gold Stampin' Emboss Powder
Stampin' Up! Other Products: 1/2" Rococo Rose Gathered Ribbon, Gold Faceted Gems, Tear and Tape and Multipurpose Liquid Glue and Dimensionals
Retired Products: Big Shot

23 August 2019

Stampin' Up! Colour INKspiration Challenge #CI61 Heirloom Frames and Stitched Lace Vinatge Card


Hello and welcome,

Today’s card is for the latest Colour INKspiration Challenge #CI61 and the colour palette for this challenge is Whisper White, Soft Suede, Gray Granite and Mint Macaron.


I just love the photos they have chosen for this challenge and I couldn’t wait to create a card using the above mentioned colours they so suit a vintage card.


I’ve used the Stitched Lace Die with a piece of Whisper White Cardstock the detail of the Die is so stunning and with lots of detail. I’ve sponged the Lace Cardstock with Gray Granite Ink and a Sponge Dauber. 


The oval Heirloom Frames Embossing Folder and Die just makes a beautiful addition to the card. The best way to use this set is by running a piece of Cardstock through the Big Shot with the Die and then use the Embossing Folder. I also sponged Gray Granite Ink on the detailed embossed image.


The stamp set I’ve used is First Frost and the coordinating Dies Frosted Bouquet. The soft stamped images are in Mint Macaron, Gray Granite and Soft Suede. Before layering the arrangement of flowers and foliage, I’ve placed a piece of Whisper White Cardstock which was embossed with the Scripty 3D Embossing Folder. 


I like to layer the oval Heirloom Frame with Stampin’ Dimensionals and then add the stamped images to the card. The sentiment has been stamped in Soft Suede and fussy cut out. The card base is Soft Suede which brings out the detail of the Stitched Lace Cardstock.

Thank you for visiting my blog today.
Happy Crafting
Vicki Boucher


Live in Australia? I would be happy to send you a Stampin’ Up! Annual Catalogue for 2019 to 2020 and the 2019 Holiday Catalogue out to you.

To shop with me please click here to go to my Online Store.


Product List

Stamps: First Frost

Dies & Embossing Folders: Heirloom Frames Dies & Embossing Folder, Scripty 3D Embossing Folder and Stitched Lace Die

Ink: Soft Suede, Gray Granite and Mint Macaron

Cardstock: Soft Suede and Whisper White

Other Stampin’ Up! Products: Sponge Dauber, Dimensionals and retired Big Shot,

21 August 2019

Stampin' Up! 2019 Holiday Catalogue Art With Heart Team Blog Hop Week 1


Hello and welcome,

I’m so excited to be sharing with you a new blog hop run by Claire Daly and the ladies from Art With Heart Team. We will be running weekly blog hop on Wednesday night's with a Christmas theme from the new Holiday Catalogue 2019. 
Thank you so much Claire for organizing the Heart of Christmas 2019 Blog Hop. 
Tonight’s card that I have created is using the gorgeous Feels Like Frost 6x6 Specialty Designer Series Paper, beautiful photographic imagery on one side, hand drawn designs with silver foil on the other. 48 sheets: 4 each of 12 double-sided designs. I really like the blues in the DSP, Balmy Blue, Night of Navy, Seaside Spray and I wanted to create a card using these colours with Whisper White.
I’ve used the rectangle from the Heirloom Frames Die and Embossing Folder, with a Sponge Dauber I’ve lightly covered the frame with Frost White Shimmer Paint and layered the piece over the DSP.
The Stamp Set I’ve used is Perfectly Plaid which comes in a bundle with the Pine Tree Punch and you can save 10% when purchased together. The Christmas tree and sentiment has been stamped onto Seaside Spray Cardstock and I used White Stampin’ Emboss Powder and heat set the images with the Heat Tool.
The white snow flakes are from the Christmas Layers Dies which come in a bundle with Itty Bitty Christmas Stamp Set another great purchase as it’s 10% saving. I ran the Snowflake Die through the Big Shot with a scrap of Whisper White Cardstock and with my snips I snipped some of the snowflakes apart.
To finish off the card I’ve placed the DSP onto the base of Thick Whisper White Cardstock and I placed Dimensionals under the rectangle Heirloom Frame to give the card some depth. 
You can see the rest of this week’s Christmas cards over at Claire Daly’s blog

I hope you liked my card and thank you for visiting my blog today.

Live in Australia? I would be happy to send you a Stampin’ Up! 2019 Holiday Catalogue out to you. 

To shop with me please click here to go to my Online Store.
Happy Crafting
Vicki Boucher

Product List

Stamps: Perfectly Plaid

Punch: Pine Tree

Dies & Embossing Folder: Heirloom Frames and Christmas Layers Dies

Papers: Feels Like Frost Specialty 6x6 DSP, Whisper White and Seaside Spray Cardstock

Colouring Tools: Frost White Shimmer Paint, Sponge Dauber, Versamark, Heat Tool, Embossing Buddy and White Stampin’ Emboss Powder


20 August 2019

Stampin' Up! Birthday Card, Pigment Sprinkles and Free As A Bird Bundle


Hello and welcome,

Today I will be sharing with you a card that I made for a friend who just loves yellow, so had to do a yellow card but also add some purple for contrast. 


The Pigment Sprinkles had to be used as I hadn’t used Daffodil Delight & Mango Melody. I just love the bright colours from the Pigment. To use the water colouring I like to place a little of the powder onto a Clear Block with a little water and mix using the Aqua Painter. 
Pigment Sprinkles

The yellows for the birds, flowers, Granny Apple Green for the branch and leaves. I’ve used Free as a Bird Stamp Set and the Stitched Nested Dies. 


Free As A Bird

To make the birds stand out, I’ve used Gorgeous Grape and water coloured around the stamped image of the birds. 


I used a piece of Fluid 100 Watercolor Paper and spritzed water onto the paper. While the paper is wet I sprinkled a few drops of Daffodil Delight Pigment Sprinkles. The colour looks amazing once I was happy on how it all turned out.


To finish off the card I’ve layered the Watercolour Paper onto Mango Melody cardbase. The greeting is from the Beautiful Bouquet Stamp Set, I’ve used White Emboss Powder onto Basic Black Cardstock, heat embossed and then fussy cut around the greeting.

I hope you liked my card and thank you for visiting my blog today.

Tomorrow I will be back for a new and exciting Christmas blog hop! which I can’t wait to share with you.

To shop with me please click here to go to my Online Store.

Live in Australia? I can send you a Catalogue out to you.

Happy Crafting
Vicki Boucher

Product List

Stamps: Free as a bird and Beautiful Bouquet

Dies: Stitched Nested Labels

Papers: Mango Melody, Basic Black, Fluid 100 Watercolor Paper

Colouring Tools: Pigment Sprinkles, Aqua Painter, Stampin’ Spritzer, Versamark, Heat Tool, Embossing Buddy, White Stampin’ Emboss Powder and Stazon Ink


14 August 2019

Stampin' Up! Pigment Sprinkles and Daisy Lane Bundle


Hello and welcome,

Today I will be sharing with you two cards that I’ve created using the Daisy Lane Bundle and Pigment Sprinkles. I just love these two products together.


I recently watch a YouTube video by Eva Dobilos who is a Canadian Stampin’ Up! Demonstrator and she showed how to use the Stampin' Up! Pigment Sprinkles. I love her cards so much.


https://www3.stampinup.com/ecweb/product/149663/pigment-sprinkles
Pigment Sprinkles

Daisy Lane Bundle


My first card I used Melon Mambo from the Pigment Sprinkles, I spritzed water onto the Fluid 100 Water Color Paper and then sprinkled a little of the pigment. Not too much as the colour will be a lot brighter. To wash out the colour I used my Aqua Painter and lightly mixed the water with the pigments. Once completely dry, punch out with the Medium Daisy Punch and the larger Daisy Punch. I also used Wink Of Stella to add some sparkle.


For the water coloured background I’ve used the same colour onto a piece of Shimmery White Cardstock. Just add a little of the Pigment sprinkled onto a Clear Block, with a drop or two of water from my Aqua Painter and then add to the Cardstock.


Once dry I then added droplets of Pigment Ink onto the Cardstock as well as the Daisies. I added Gold Stampin' Powder, heat Embossed the stamped images of the leaves and greeting. Once I layered the punch out Daisies together and placed a Gold Facetted Gem to the center.


My card base is Flirty Flamingo Cardstock I think the colour goes well with Melon Mambo Pigment Sprinkles. I also added a few of the Iridescent Sequin Assortments to finish off the card.


My next card is similar but I just changed the colours by using Bermuda Bay Pigment Sprinkles, Sliver Stampin’ Emboss Powder, Coastal Cabana for the card base, a Clear Facetted Gem and a few of the Woven Threads Sequin Assortments. 


Thank you for visiting my blog today and I would love to hear which card you liked? You can shop for all of these supplies in my Stampin’ Up! Store by clicking here or the above product photos.


Happy Crafting

Vicki Boucher


Stampin' Up! Annual Catalogue 2019-2020
Product List

Pigment Sprinkles, Daisy Lane Bundle, Daisy Punch, Bone Folder, Take Your Pick Tool, Aqua Painter, Stampin' Spritzer, Wink of Stella, Fluido 100 Water Color Paper, Shimmery White Cardstock, Clear Faceted Gems, Gold Faceted Gems, Iridescent Sequin Assortment, Woven Threads Sequin Assortment, Embossing Buddy, Heat Tool, Versamark, Gold Stampin' Emboss Powder, Silver Stampin' Emboss Powder, Flirty Flamingo Cardstock and Coastal Cabana Cardstock 


06 August 2019

Kylie's International Blog Highlights August 2019


Today I am participating in Kylie’s International Blog Highlights. This is my first time in taking part, so I’m supper excited about sharing my card with you.


The theme we are doing for this hop is Encouragement and I would love it if you could vote for my card by clicking on the link below. 


For my card I wanted the vintage look with lots of layers, sponging and stamping. I’ve used Whisper White Cardstock and Sahara Sand Ink. 


I started off by using the Heirloom Frames Dies and 3D Embossing Folder the detail of the embossing is amazing. I've used a piece of Whisper White Cardstock to die cut and embossed.  Then with Sponge Dauber I've lightly sponged the Ink on the embossed Cardstock. The Woven Threads Trim is so beautiful and it's been layered with just scalloped edging peaking under the embossed Frame. 


To give the piece of Subtle Cardstock an old look I’ve used my Paper Snips, ran the edges with the blade and then sponged it with ink. 


The card features two Stamp Sets which have been used a lot by me in my cards over the last couple of weeks. They are in current 2019-2020 Annual Stampin' Up! Catalogue - Fanciful Fragrance and Very Versailles which has the most beautiful leaf stamp. I love it so much that I’ve created my own Designer Series Paper by randomly stamping the leaf stamp on a piece of Cardstock.


To finish off the card I’ve used the Linen Thread which was made into a bow. Have you seen the Bird Ballad Trinkets? They are so very vintage and cute! I’ve used the key, but they also come in a bow, leaf and flower.

Thank you so much for visiting my blog today.

Voting for my card is easy, just by clicking on the link and chose my card.

Happy Crafting

Vicki Boucher

If you would like to follow me on Instagram for more inspiration click here Vicki Boucher.


Product list:

Stamps: Fanciful Fragrance and Very Versailles

Ink: Sahara Sand

Cardstock: Whisper White

Embossing Folder: Subtle, Scripty and Heirlooms Frames Embossing 3D Folder

Dies: Heirloom Frames Dies

Trim: Woven Threads Trim and Linen Thread

Stampin’ Up! Supplies: Bird Ballad Trinkets, Sponge Dauber, Mutipurpose Glue, Tear & Tape, Paper Snips and Stampin’ Dimensionals