Showing posts with label Belly Band. Show all posts

19 November 2023

Stamping Sunday Blog Hop - Stocking Fillers


 Hello and welcome,

My name is Vicki Boucher and I'm from Melbourne, Australia. Today is the Stamping Sunday blog hop for the month of November and for this month's theme is "Stocking Fillers". It's the 3rd Sunday of the month and can you believe it we are not too far away until the end of the year! I'm looking forward to seeing everyone's projects and you'll be able to see them by clicking on their names which will be at the end of my blog.


This was a fun challenge to think about and I went with two cute treat boxes using the Envelope Treat Boxes (159788) and they are for my two daughters; I'll be popping them into their Christmas stockings. 

I recently received a new order from Stampin' Up! and it's always exciting to receive new products which is from the new Mini Catalogue Jan-April 2024. I just love it! There are so many pretty items, and my wish list is very long! One of the items is the Mini Alphabet Dies (162934) which will be available for customers in January 2024. They are perfect for cute labels such as these treat boxes. 


For the Pool Party treat box, I used the Silver & Gold Glimmer 12" x 12" Adhesive Backed Glimmer Paper (162288) for the letters. It's just gorgeous and I love that it has adhesive on the back of the paper.


For the pink treat box, I used the Berry Burst Soft Shimmer Paper 12" x 12" Specialty Paper (161750) for the letters. I just love a little bit of sparkle added to my projects.
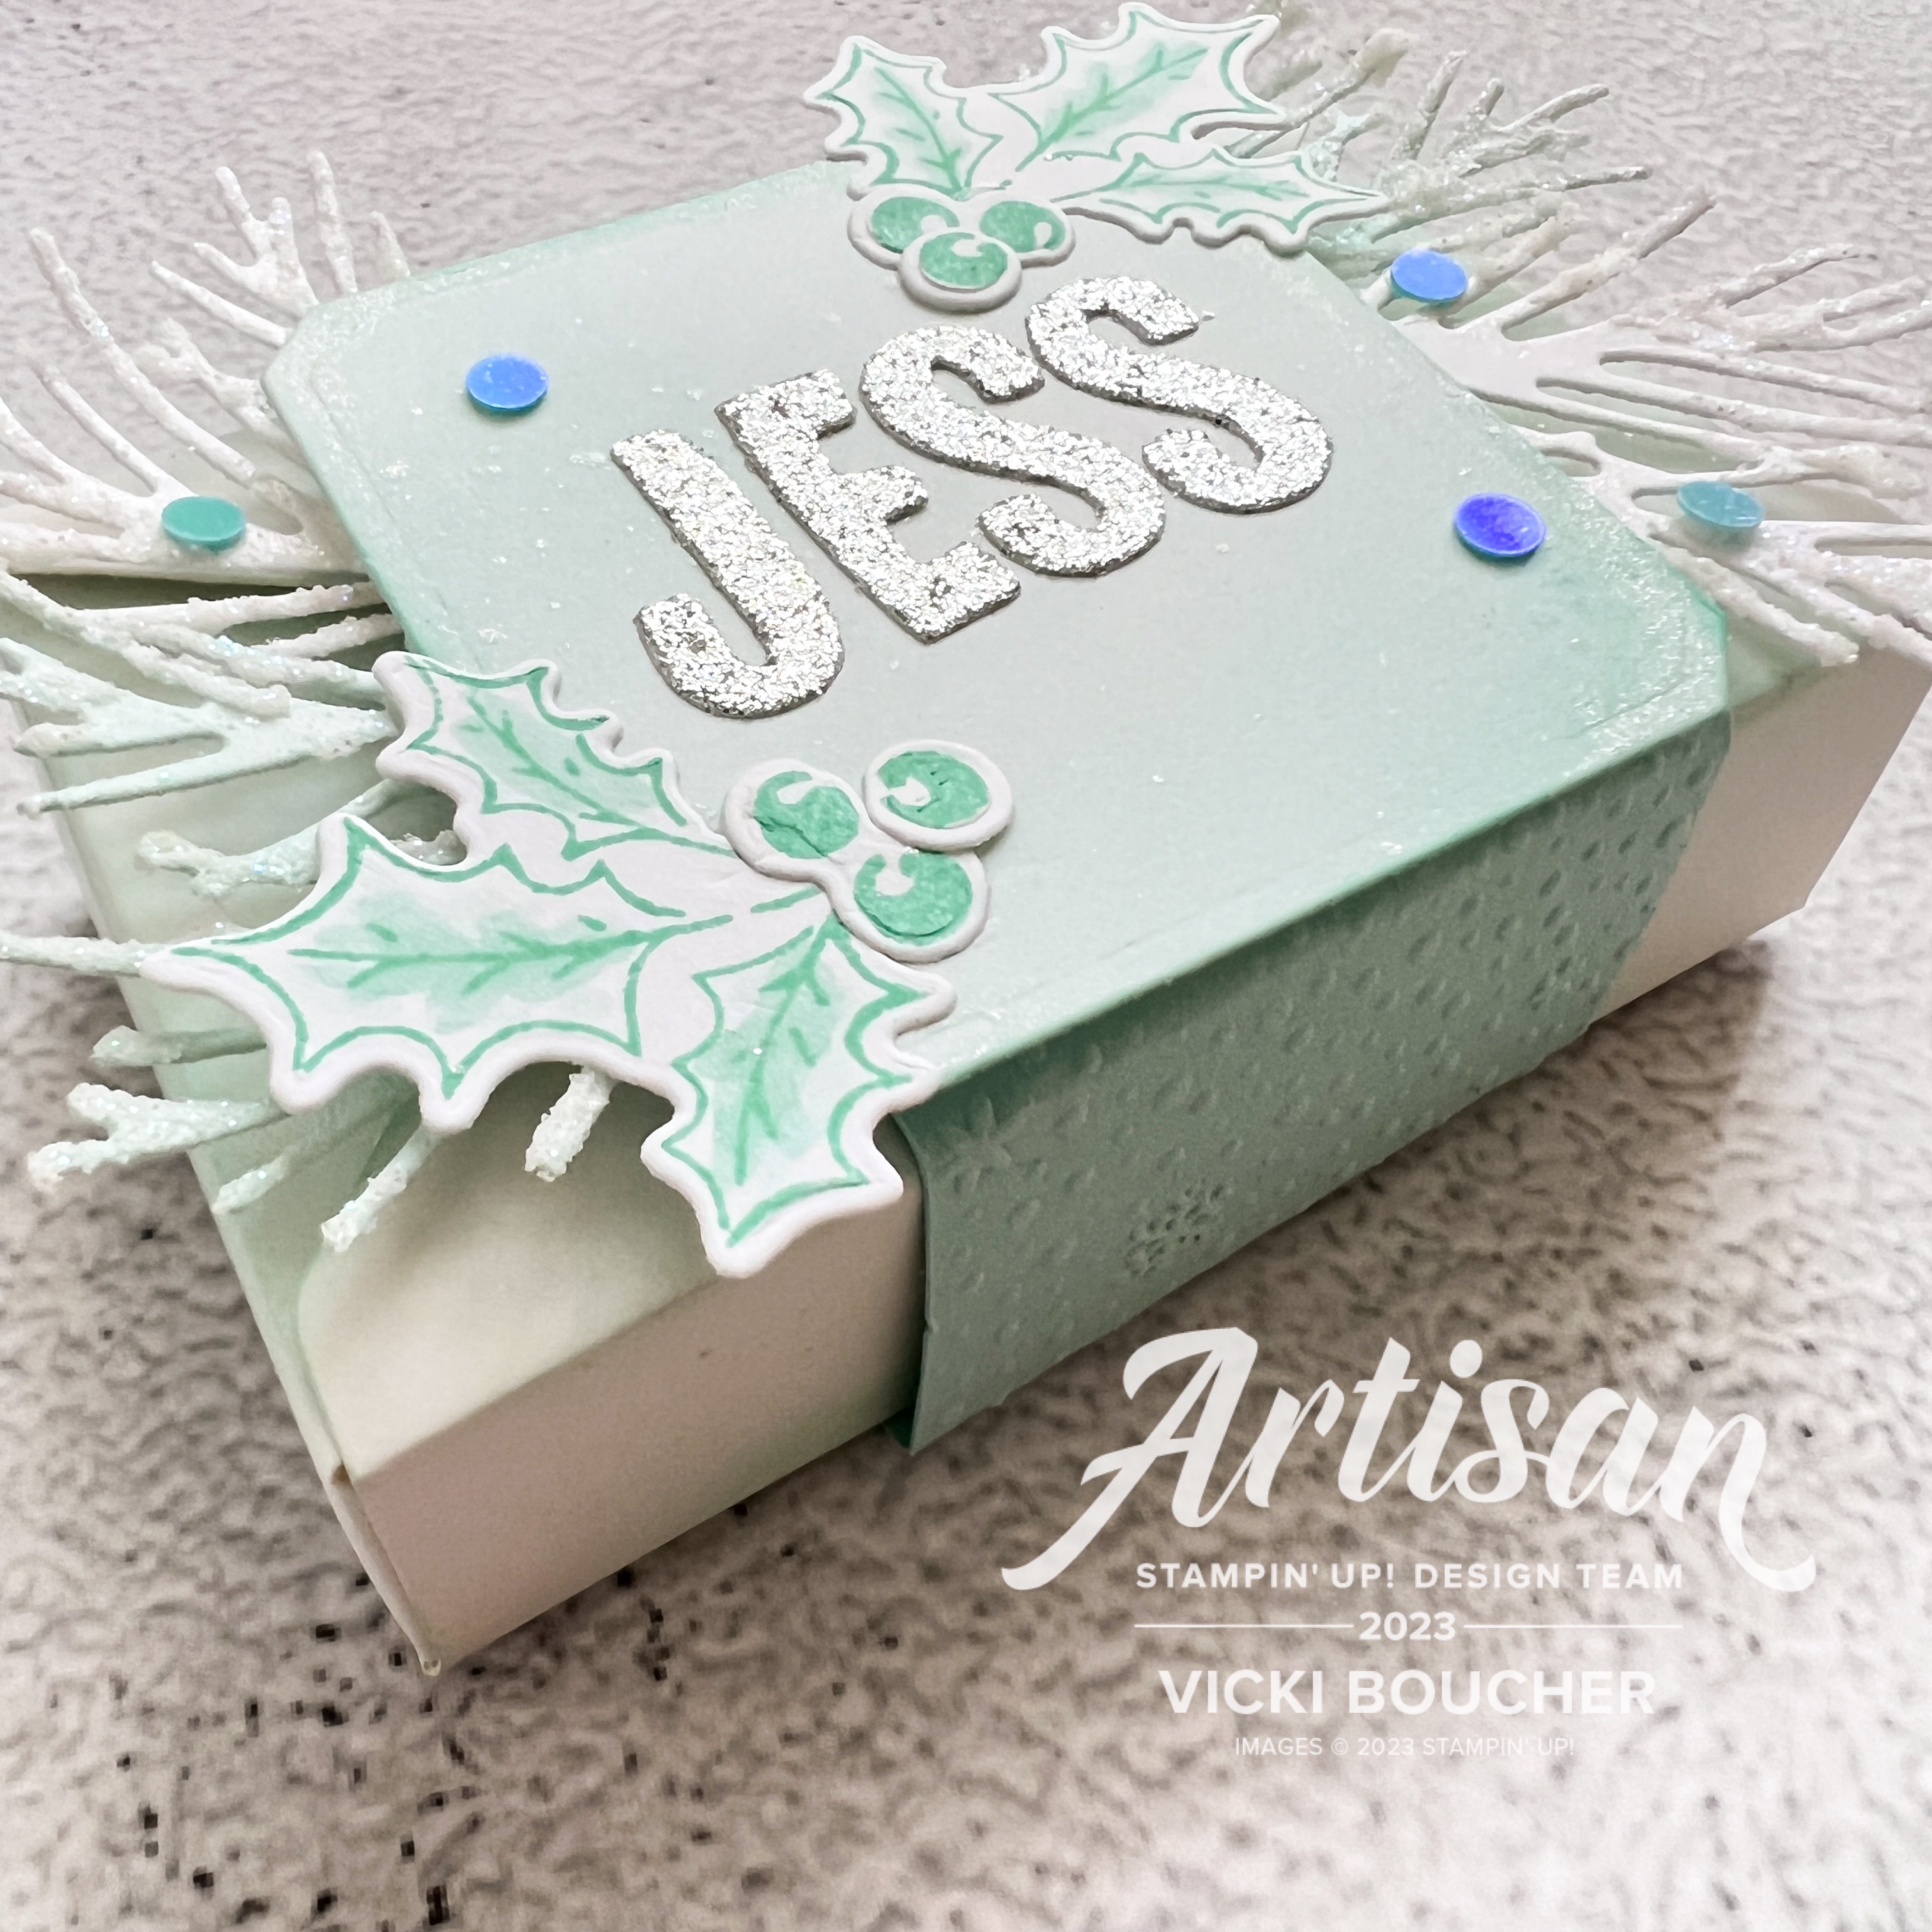


I haven't used Shimmery White Embossing Paste in a while and I recently got this amazing tip from fellow Artisan Mikaela Titheridge, she used White Embossing Paste to create snow and applied to the detailed pine die-cut pieces. I love this die and it's from the Joy of Noel Dies (161965) I also added Clear Wink of Stella and Pool Party ink with the Blending Brush applying to the white die-cut pine pieces. It adds the perfect glimmer to your projects.


The images from the Christmas Classics Dies (161976) makes the perfect focal point for this treat box, die cutting the images in Basic White Cardstock and then adding Bubble Bath and Berry Burst ink with a Blending Brush. Then I added Clear Wink of Stella to the foliage and layered over Berry Burst belly band.  


Thank you for visiting my blog today, I would so love to hear your thoughts on my projects by leaving a comment below.

Please email me if you would like a copy of the new 2023-2024 Annual and Mini Jan-April 2024 Catalogue, please contact me here

If you live in Australia and don't have a demonstrator, you can purchase any of the Stampin' Up! products by shopping with me at my online store here

Make sure you follow me on social media via Facebook, Instagram and Pinterest.


Happy Stamping

Vicki Boucher

To see all of the amazing projects by the Stamping Sunday Design Team please click on their names below. 


11 October 2020

Stamping Sunday Blog Hop Mini Catalog Designer Paper


Hello and welcome 

Today at the Stamping Sunday Design Team we will be sharing our projects using Designer Paper from the Stampin' Up! August to December 2020 Mini Catalogue. We could either create a beginner, casual or avid card. Or create a card and 3D project, which I decided on.


I was drawn to the stunning Snowflake Splendor Designer Series Paper which is on page 37 of the Mini Catalogue. I just love the selection of wintery blues & mauves and the hand-painted snowflakes. Stampin' Up! have a fantastic Designer Series Paper sale on for the month of October 2020 which includes this DSP for more details about the sale I'll have a link at the end of my blog to my on-line store. 

Snowflake Splendor Designer Series Paper

You can do so much when it comes to Designer Series Paper and I'll show you a couple of different examples.

Easel Card


I've used the DSP and Whisper White Cardstock to create an easel card which is very easy to do. I started with a sheet of 12" x 12" Whisper White Cardstock, cut at 6" x 12" and scored at 3" & 6". Then cut another piece at 6" x 6" for the card front. The two smaller pieces of DSP are cut at 2.76" x 5.71 and two larger pieces at 5.71" x 5.71" this gives a nice white boarded around the DSP.


For the front panel the DSP is embossed using the Evergreen Forest 3D Embossing Folder which adds another layer to the card. The tiny snow flakes are stamped on the DSP in Balmy Blue Ink, using the Snowflake Wishes Stamp Set. To set the wintery scene I've used different dies in Whisper White Cardstock, sponged ink with the Sponge Dauber and added Wink of Stella for added sparkle. 


I've stamped the snowflake images and sentiment onto the two smaller panels for the inside of the easel card. The larger piece I've added a strip of Snowflake Splendor Ribbon so the card can sit up. The Dies from the Peace and Joy Bundle using the DSP and Whisper White Cardstock. 


3D Project


The wintery snowflake Mini Pizza Box is my other project for today's blog. I've ink up the box using the Stamping Sponge and Balmy Blue Ink. Then I spritzed the box by filling up a Stampin' Spritzer using a drop of Frost White Shimmer Paint and rubbing alcohol. This gives the box a nice sparkle.


I've made a belly band for the box by using a wide strip of Snowflake Splendor DSP, then wrapping the Snowflake Splendor Ribbon around the box three times. Using the Dies from the Wishes and Wonder Bundle, I've die cut out the stitched gift tag and stitched starburst circle using the DSP. 


I also used the deer and the leaves from the North Pole Dies, it's such a great bundle for your Christmas projects. The Balmy Blue Glimmer Paper is perfect for the So Many Snowflakes Dies adding more sparkle to the Christmas Mini Pizza Box.


A few more added touches such as using the Silver Foil for the Joy die image, clear droplets from the Flowers for every season Gems and Wink of Stella. The Mini Pizza Box makes a nice gift for someone special at Christmas time.


Make sure you click on the below links to see the other designers. I can't wait to see their creations and how they've used Designer Paper in their projects.


1. Sara Levin  
2. Su Mohr  
3. Tami Hewlett  
4. Jay Soriano  
5. Anne Marie Hile  
6. Cheryll Miller  
7. Vicki Boucher  


Happy crafting

Vicki Boucher

To visit my online store and view the 15% off Designer Series Paper please click here


02 December 2019

Creation Station Blog Hop "Put A Ring On It"


Hello and welcome,

I am so excited to be part of this amazing group of Stampin’ Up! Demonstrators who all blog hop at the Creation Station Design Team. The hop is always the first Sunday of every month we have a different theme to create something special. If you’ve started here with me make sure you hop all the through to see Dena Rekow’s amazing creation.


Today’s theme we are going all out “Put a Ring on It” which means creating a Belly Band for cards, boxes, or anything you can think of. I’ve chosen to do a Mini Fold Out Christmas Gift with slide out Gift Tag and Bookmark, plus an area to write a special message.


Have you seen the gorgeous Feels Like Frost DSP? It’s in the current 2019 Holiday Catalogue and it’s just so stunning. There is photographic imagery on one side, hand drawn designs with silver foil on the other side. I just love the colours in the DSP which I’ve used Night of Navy, Seaside Spray, Silver and Whisper White.


The Belly Band has so many layers starting with the strip of Night of Navy Cardstock, I’ve spritzed it with Frost White Shimmer Paint and Rubbing Alcohol combined together in a Stampin’ Spritzer. I’ve used   Feels Like Frost DSP in the band to coordinate with the Mini Fold Out Gift holder.

I’ve added three different types of Ribbon together, Seaside Spray Metallic Ribbon, Whisper White Polka Dot, Silver Metallic Edge Ribbon and wrapping them around the Belly Band. This gives an added soft texture to the Belly Band and I'm happy how I’ve tied the ribbon in a knot.  


The layer of Night of Navy Corrugated Embossed Cardstock has so many elements to it. I’ve used Silver Emboss Powder by lightly placing Versamark Ink Pad in random places on the Embossed Cardstock and sprinkling the Silver Emboss Powder. If I find there’s too much powder, I lightly brush it off before heat setting with the Heat Tool. I wanted to add some more sparkle and go all out with the Shimmery Crystal Effects and Ice Stampin’ Glitter. 


My next layer I’ve used the Beautiful Boughs Dies using the medium size branch die with Whisper White Cardstock and adding Shimmery Crystal Effects with Stampin’ Glitter.


To finish off the Belly Band I’ve placed the Silver Foil die cut image of the deer from the Detailed Deer Dies and Silver Foil Snow Flakes from the Christmas Layers Dies. In each center of the Snow Flakes I’ve added a Clear Epoxy Droplets. The greeting is from the Itty Bitty Christmas Stamp Set using White Stampin’ Emboss Powder, heat set on Night of Navy Cardstock and fussy cut out.


The Belly Band fits nicely over the Mini Fold Out Christmas Gift I found it easier to wrap the band around before sealing it with Tear and Tape. I think this gift would be lovely idea as a teacher’s Thank You gift for my daughter’s teacher. What do you think?

All of the Stampin’ Up! products I’ve used will be at the bottom of this blog and are available at my online store. 


Now it's time to head over to Kathy Brown Kartak on the Design Team and to see her creation.

Be sure to visit everyone’s blog and I’m sure you’ll be inspired to create a Belly Band for someone special too!

Thank you for stopping by!

Happy Crafting


Vicki Boucher

To purchase any of these products I’ve used today you can click on my direct links above or visit my Online Store here.

Product List
Paper/Cardstock: Night of Navy, Whisper White, Silver Foil and Feels Like Frost 6” x 6” DSP
Ink: Night of Navy and Seaside Spray
Stamps: Still Scenes, So Many Stars and Itty Bitty Christmas
Dies: Snow Globe Scenes, Beautiful Boughs, Christmas Layers and Detailed Deer
Punches: Delightful Tag Topper
Embossing Folder: Corrugated 3D
Embellishments: Clear Epoxy Droplets
Ribbon: Seaside Spray ¼” Metallic Ribbon, Whisper White 5/8” Polka Dot Tulle Ribbon and Silver 3/8” Metallic Edge Ribbon
Colouring Tools: Stampin’ Spritzers, Frost White Shimmer Paint, Versamark, Heat Tool, Stampin’ Glitter, Embossing Buddy, Silver Stampin’ Emboss Powder, White Stampin’ Emboss Powder, Ice Stampin’ Glitter and Shimmery Crystal Effects