Showing posts with label Artisan Design Team 2022. Show all posts

13 October 2022

Artisan Design Team - A Secret Santa Case


 Hello and welcome,

My name is Vicki Boucher and I'm from Melbourne, Australia. Today I'll be sharing with you a Christmas card which I've CASED from another Artisan member from the Design Team. We are all doing a secret Santa over on Instagram where each of us will be casing another Artisan. This is so fun, and I can't wait to see who has cased me!! I'll have the link to my Instagram account at the end of this blog.


My CASE of the Secret Santa Case


Here's the card I've created, and my secret Santa is Melodie from @stampingwithmelodie her card is shown here below it has lots of layers and good use of Designer Series Paper. I love her card it's so bright and joyful! Make sure you follow her over on her Instagram account.


Melodie's card Instagram @stampingwithmelodie


I've used the Leaves of Holly bundle and combined it with the Storybook Gnomes Designer Series Paper all of these products can be found in the Stampin' Up! July - December 2022 Mini Catalogue. 


I have taken the colours from the Designer Series Paper and used Pacific Point and Balmy Blue. I like how Melodie splattered the White craft ink onto the card base, it's a fun technique.


I've used three different sheets of DSP from the Storybook Gnomes Desginer Series Paper they combine well together. Under the holly and berries is a snowflake from the Wonderful Snowflakes, they have a nice shimmer shine to them. 


I've stamped the berries in Pacific Point ink onto Balmy Blue cardstock and die-cut them out. The different pieces of holly are die-cut out and I added ink to the die-cut pieces using the Blending Brush.


To finish off the card, I've stamped the sentiment in Pacific Point ink onto Basic White cardstock and die-cut out using the label die. The embellishments are Fine Sparkle Gems, they are so pretty and have a nice sparkle to them.

Make sure you head over to my Instagram page @vickiboucher to view the list of participants

Thank you for visiting my blog today, I would so love to hear your thoughts on my project by leaving a comment below.


Please email me if you would like a copy of the 2022-2023 Annual Catalogue and the July-Dec 2022 Mini Catalogue Catalogue, send me an email here

If you live in Australia and don't have a demonstrator, you can purchase any of the Stampin' Up! products by shopping with me at my Stampin' Up! online store here.

Make sure you follow me on social media via Facebook, Instagram and Pinterest.


Happy Stamping

Vicki Boucher


25 September 2022

Artisan Design Team - Boughs of Holly Suite


 Hello and welcome,

My name is Vicki Boucher and I'm from Melbourne, Australia. Today I'll be sharing three projects using the Boughs of Holly Suite, turning them into two Christmas cards and Christmas decoration.

The Artisan Design Team are featuring the Boughs of Holly Suite on Stampin' Up! Facebook and Instagram page where you'll sure to be inspired by everyone's creations, I'll add the link at the end of my blog. 


The Boughs of Holly Suite Collection (159612) is located on pages 24-25 of the Stampin' Up! July - Dec 2022 Mini Catalogue. The suite collection includes the following items Leaves of Holly Bundle (159608) (Leaves of Holly Stamp Set and Holly Berry Dies 10% bundle savings), Natural 1/2" Woven Ribbon (159611), Textural Elements (159966) and Boughs of Holly 12" x 12" Designer Series Paper (159600).


This suite is gorgeous and I'm so excited to share with you my creations using the above Stampin' Up! products. I just love the natural wood pieces and the detailed holly leaves dies are so elegant.


Season's Greetings Slimline Card

I was looking at the Designer Series Paper to see which Stampin' Up! greens was in the paper and I like to experiment to see which green goes well together. I started with Soft Succulent Cardstock for the panel and stamped the holly leaves in Soft Succulent and Evening Evergreen ink. Then with the Blending Brush I applied the following colours to the Soft Succulent panel, Evening Evergreen, Shaded Spruce, Mossy Meadow, Old Olive and Soft Succulent ink. I also splattered ink with either Stampin' Write Markers or Stampin' Blends.


I used the large label die to die-cut out a sheet from the Boughs of Holly Designer Series Paper and layered it over the Natural Woven Ribbon. Gold works perfectly with green and it's elegant, so I used the Distressed Gold 12" x 12" Specialty Paper for the holly leaves and berries. 


The sentiment is heat embossed using Gold Emboss Powder onto Very Vanilla Cardstock and this time I used the smaller label die. Adding more gold to the card I used Gold Simply Elegant Trim and Champagne Rhinestones. 


I added another panel using the same sheet of Designer Series Paper as the large label die to the slimline Evening Evergreen card base.


Season's Greetings Mossy Meadow Card

For my next card I used Old Olive and Mossy Meadow to go with Very Vanilla, Gold and a touch of Real Red. Starting with the Old Olive Cardstock panel, I stamped the holly leaves in Mossy Meadow ink. 


Then with the Blending Brush I applied Mossy Meadow and Old Olive ink to the edges of the cardstock. Using a different sheet of paper from the Boughs of Holly Designer Series Paper, die-cut out from the large label die and layered over Very Vanilla Baker's Twine.


The holly leaves are a mix of Designer Series Paper and Old Olive Cardstock, I like to add more Old Olive and Mossy Meadow ink to the cardstock for interest. The touches of gold to the holly leaves are Gold Gilded Leafing applied with random applications of Versamark, then add Heat & Stick Powder and heat set with the Heat Tool. Then quickly add the Gold Gilded Leafing and brush off with your fingers. I also added Gold Gilded Leafing to the natural Textural Elements. 


The other elements I've created for the card are the Real Red berries, by sponging Real Red ink to Real Red Cardstock then die-cut out the base for the berries and then place over the top layer using Real Red Glimmer Paper for glitter berries. 


Using Paper Snips Scissors, snip up the middle of the Natural Woven Ribbon to create thinner ribbon and pulled apart a few of the strands away. Then layer under the natural Textural Elements. The sentiment is heat embossed using Gold Emboss Powder onto Very Vanilla Cardstock and die-cut out using the smaller label die.


Christmas Wishes Decoration

These detailed dies are perfect to make not just Christmas cards, but other projects too. I wanted to create something to hang on the Christmas tree. Starting with the base I used a sheet of Boughs of Holly Designer Series Paper and die-cut out using the circle die from the Stylish Shapes Dies. Then use a long enough thread of the Gold Simply Elegant Trim and attached to the backing of the DSP with Tear and Tape. I then added to the backing of the decoration, Evening Evergreen Cardstock die-cut out using the same circle die and adhered together with Multipurpose Glue. 


I used the Distressed Gold Specialty Paper for the top layer of the holly leaves and Soft Succulent Cardstock for the bottom layer, I added Evening Evergreen, Old Olive and Mossy Meadow ink to the cardstock with the Blending Brush. Then I added Gold Gilded Leafing to the inked up holly leaves.

The other elements are the same as the above card, Real Red berries, natural Textural Elements and Natural Woven Ribbon. The sentiment is heat embossed using Gold Stampin' Emboss Powder onto Very Vanilla Cardstock and die-cut out using the smaller label die. Adding a few of the Champagne Rhinestones for some bling!


Thank you for visiting my blog today, I would so love to hear your thoughts on my projects by leaving a comment below. Make sure you pop over onto Stampin' Up! Facebook page for lots of inspiration using the Boughs of Holly Suite Collection.

If you would like a copy of the Stampin' Up! July - December 2022 Mini or the Annual Catalogue 2022 - 2023 please contact me here

If you live in Australia and don't have a demonstrator, you can purchase any of the Stampin' Up! products by shopping with me at my online store here.


Happy Stamping

Vicki Boucher


02 September 2022

Artisan Design Team - Masculine Projects


Hello! My name is Vicki Boucher, and I am from Melbourne, Australia. Today I'll be sharing with you three masculine projects I designed using a variety of amazing Stampin' Up! products.


I made three rustic, vintage-style projects featuring Mountain Air and Grassy Grove Stamp Sets - two cards and a 3D treat cracker box. I like to use masculine colors with lots of layers and textures.

Dad 3D Cracker & Treat Box 

The 3D Cracker & Treat Boxes Dies are perfect for a quick, easy, and fun gift package. To make the masculine cracker box, first place the checked mask over Cajun Craze Cardstock and add Cajun Craze ink with a Blending Brush until you have an even coverage. Then, carefully move the mask along the cardstock to cover and apply ink. 


Use the Cracker & Treat Box Die and die cut using the Stampin' Cut & Emboss Machine. Fold on the scored lines with a Bone Folder and adhere the end pieces together with Stampin' Seal +. Add twine to each end.


Using the Alphabest bundle for the sentiment, stamp the outside image and letters in Evening Evergreen ink onto Crumb Cake cardstock, then punch out using the Best Label Punch and add Crumb Cake ink with a Blending Brush or Sponge Dauber.


Happy Father's Day Card

Father's Day is almost here for us in Australia, and I've used the Majestic Mountain Dies, Grassy Grove and Celebrating You Stamp sets for this project.


For the rustic feel use the Timeworn Type 3D embossing folder, Crumb Cake cardstock and run it through the Stampin' Cut & Emboss Machine. Add colour to the edges in Crumb Cake, Soft Suede and Early Espresso ink with the Blending Brush. Use your Paper Snips and run the blade along the edge of the inked-up cardstock, this will create a vintage look.


To create an impression of depth, apply Evening Evergreen ink to Cajun Craze deer die-cut pieces with the Blending Brush. This adds shading to the deer's body and head. For a darker sky, apply Evening Evergreen ink to the Cajun Craze Cardstock panel.


Lots of Love Masculine Card

To create this masculine card, I've added lots of layers to the card, stamp the mountains and trees in Evening Evergreen ink onto Cajun Craze cardstock panel.


Emboss Crumb Cake cardstock panel with Stripes 3D embossing folder through the Stampin' Cut & Emboss Machine, add Crumb Cake and Soft Suede ink with the Blending Brush. Using the checkered mask from the Artistic Mix Decorative Masks, add Evening Evergreen ink to the cardstock panel. Use your Paper Snips and run the blade along the edge of the each of the panels, this will create a vintage look.


Did you know that the Silver-Threaded Twine can be unraveled by hand to make thinner strands? Just remove the silver thread and there's plenty of twine left over. I've used the twine throughout my projects. I love the natural texture and it's perfect for masculine cards and 3D boxes.


Here are the products you will need: 

Alphabest Stamp Set (158884)
Best Label Punch (158885)
Grassy Grove Stamp Set (157836)
Grove Dies (157844)
Cracker & Treat Box Dies (159182)
Mountain Air Stamp Set (151610)
Majestic Mountain Dies (151608)
Stylish Shapes Dies (159183)
Celebrating You Stamp Set (158028)
Timeworn Type 3D Embossing Folder (156505)
Stripes & Splatters 3D Embossing Folder (157980)
Evening Evergreen Classic Stampin’ Pad (155576)
Soft Suede Classic Stampin’ Pad (147115)
Crumb Cake Classic Stampin’ Pad (147116)
Early Espresso Classic Stampin’ Pad (147114)
Cajun Craze Classic Stampin’ Pad (147085)
Evening Evergreen Cardstock (155574)
Soft Succulent Cardstock (155776)
Crumb Cake Cardstock (120953)
Cajun Craze Cardstock (119684)
Silver-Threaded Twine (159662)
Artistic Mix Decorative Masks (159178)
Blending Brushes (153611)
Bone Folder (102300)
Stampin’ Dimensionals (104430)
Mini Stampin’ Dimensionals (144108)
Stampin’ Seal + (149699)


Thank you for visiting my blog today, I would so love to hear your thoughts on my project by leaving a comment below. 

If you would like a copy of the Stampin' Up! July - December 2022 Mini or the Annual Catalogue 2022 - 2023 please contact me here

If you live in Australia and don't have a demonstrator, you can purchase any of the Stampin' Up! products by shopping with me at my online store here.


Happy Stamping

Vicki Boucher


29 August 2022

Artisan Design Team - Decorated with Happiness


 Hello and welcome,

My name is Vicki Boucher and I'm from Melbourne, Australia. Today I'll be sharing three projects using the Decorated with Happiness Bundle, turning them into two Christmas cards and Christmas treat box.


The Artisan Design Team are featuring the Decorated with Happiness Bundle on Stampin' Up! Facebook and Instagram page where you'll sure to be inspired by everyone's creations, I'll add the link at the end of my blog. 


Decorated with Happiness Bundle (159711)


The Decorated with Happiness Bundle (159711) 10% Bundle Savings is located on page 27 of the Stampin' Up! July - Dec 2022 Mini Catalogue. The bundle includes Decorated with Happiness Stamp Set (159704) and coordinates Decorated Pine Dies (159710). I just love the modern style with scripted fonts and hand-drawn images. The Decorated Pine Dies has 21 dies and jam packed with pine boughs, baubles, bows, bells and more....


Christmas Greetings Slimline Card

I always love creating a slimline card for my projects, here I used Fluid 100 Watercolor Paper as the starting point for my card. The colours I've used are Starry Sky, Pacific Point and Polished Pink for the colour palette. I love these colours together. 


I applied water onto the watercolor paper first using the large flat brush next I added Pacific Point and Polished Pink ink to the paper. I like to have a tissue or kitchen paper handy to help dry off any excess ink that may run or you can use the Heat Tool to help speed up the drying of the ink.

Using the small pine boughs image, I stamped a number of times in Starry Sky and Pacific Point ink. I also heat embossed the pine branch and baubles in Versamark, White Stampin' Emboss Powder and heat set with the Heat Tool.


My tip for when it comes to watercolouring stamped images and using the emboss resist technique, I like to colour outside of the lines. This works well with White Emboss Powder, Water Painters and with any Stampin' Up! colors. 

I've die-cut out a couple of the pine boughs from the Decorated Pine Dies in Fluid 100 Watercolor Paper and applied Polished Pink ink with the Water Painter, let it dry then adhered to the panel with Multipurpose Liquid Glue. 


The sentiment is heat embossed using White Stampin' Powder onto Starry Sky Cardstock and then die-cut out using the large label from the Stylish Shapes Dies. To make a straight edge for your label, die-cut the cardstock across using the stitched die to create a cute, stitched look.

To finish off the card I always like to add some bling, especially for Christmas. Here I've used Sparkle and Shine Sequins with tiny drops of liquid glue.


Boughs of Holly Christmas Card

To create my second Christmas card using the same colours as the slimline card and watercolour background panel using Fluid 100 Watercolor Paper. I also the snow stamp image onto the watercolor paper and heat embossed the images using White Stampin' Emboss Powder.


I added the additional pine boughs both using the stamp image and die-cut in Fluid 100 Watercolor Paper. The stamped image is heat embossed with White Stampin' Emboss Powder and embossed resist using Pacific Point and Starry Sky. The pine boughs die-cut pieces are a watercolor wash using the same colours. 


The pink ornaments are heat embossed using White Stampin' Emboss Powder, watercoloured using Polished Pink and watercolour paper. Then die-cut out using the coordinating dies.


To create the sentiment, I stamped the greeting in Versamark ink onto Polished Pink Cardstock, added White Stampin' Emboss Powder and heat set with the Heat Tool. I used the smallest stitched circle from the Stylish Shapes Dies and die-cut out creating a cute, stitched ornament to hang on the branch.

To finish off the card, I layered the watercolour panel over Poplished Pink Cardstock and Starry Sky Cardstock for the card base. I added the Iridescent Pearls Basic Jewels.


Christmas Treat Box

This cute little Christmas treat box was a last-minute addition to match with the cards. As I already had a few left-over pine boughs and an ornament, I decided to use a white Envelope Treat Box which you can find on page 83 of the Mini Catalogue.


There are 10 boxes with 20 gold foil stickers to use and food safe. They are easy to fold with the Bone Folder, but before I fold the box, I added Starry Sky and Pacific Point ink to the outside of the box with the Blending Brush.


Adding glitter to the box I wrapped around the Glittered Organdy Ribbon and tied into a bow. Plus, I splattered Clear Wink of Stella for more sparkle and used the Iridescent Pearls Basic Jewels.


Thank you for visiting my blog today, I would so love to hear your thoughts on my project by leaving a comment below. Make sure you pop over onto Stampin' Up! Facebook page for lots of inspiration using the Decorated with Happiness Bundle.

If you would like a copy of the Stampin' Up! July - December 2022 Mini or the Annual Catalogue 2022 - 2023 please contact me here

If you live in Australia and don't have a demonstrator, you can purchase any of the Stampin' Up! products by shopping with me at my online store here.


Happy Stamping

Vicki Boucher


26 August 2022

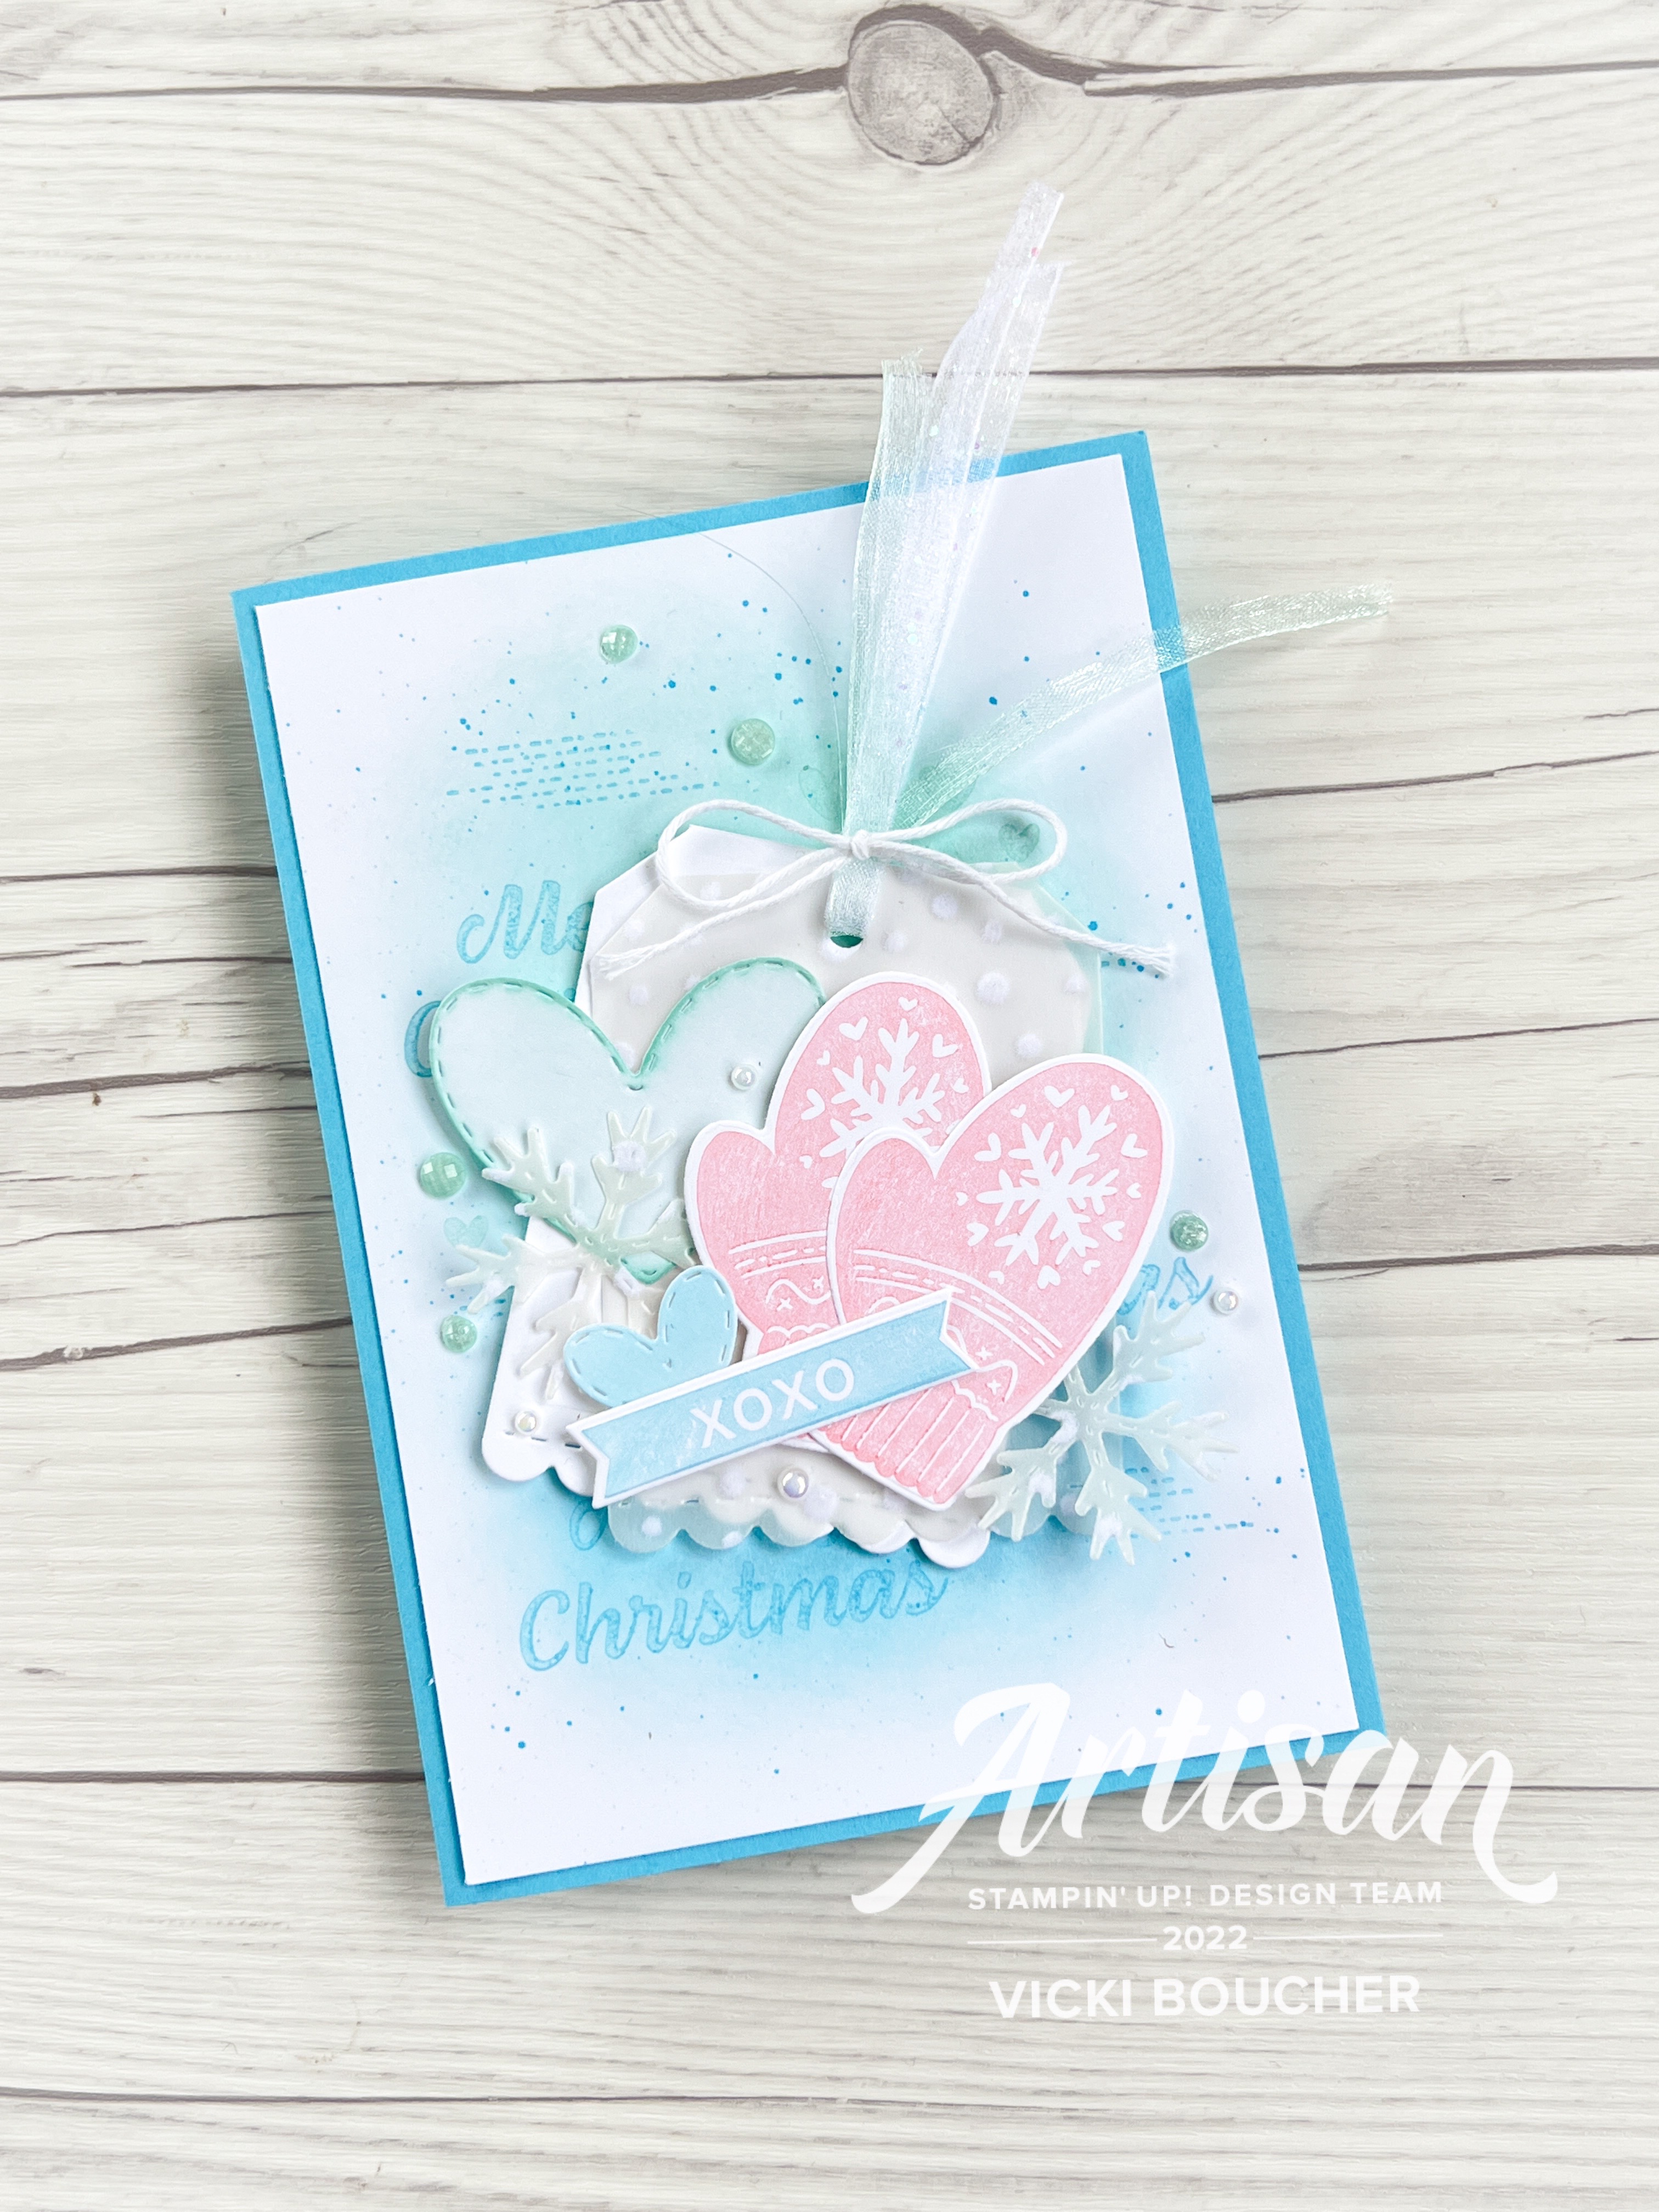
Global Design Project - Colour Challenge #GDP357


Hello and welcome,

My name is Vicki Boucher and I am from Melbourne, Australia. I always love to enter into the Global Design Project #GDP357 and it's a Colour Challenge. I just couldn't resist these pretty colours they've chosen.


Today's project I've used the Celebrate with Tags bundle (159867) which includes Celebrate with Tags Stamp Set (159974) and Celebrations Tag Dies (159866). I also used Snowflake 12" x 12" Specialty Vellum (159832) for the gift tag and snowflakes. I just love the white vellum snowflakes. All of the products I've used today, can be found in the Mini July - December 2022 Stampin' Up Catalogue.


I thought these challenge colours would be perfect for a wintery Christmas card and of course I always love to add lots of layers. The gift tag die is so cute, here I actually cut the tag in half in Basic White Cardstock and Snowflake Specialty Vellum. 


Blending Brushes are my go to when it comes to soft colours and it creates an easy soft background panel. Pool Party and Tahitian Tide blend well together. I've stamped the sentiment onto the background in Tahitian Tide and splattered ink using the Stampin' Write Marker.

To create a soft look for the mittens apply Flirty Flamingo ink with a Blending Brush and add to the mitten stamp. Then stamp the image onto Basic White Cardstock. I just love all of the different die-cut images that come with the Celebrations Tag Dies especially the stitched hearts are so cute.  


Thank you for visiting my blog today, I would so love hear your thoughts on my project by leaving a comment below.


Please email me if you would like a copy of the 2022-2023 Annual Catalogue and the July-Dec 2022 Mini Catalogue, July-August Saleabration Catalogue please contact me here

If you live in Australia and don't have a demonstrator, you can purchase any of the Stampin' Up! products by shopping with me at my online store here.

Make sure you follow me on social media via Facebook, Instagram and Pinterest.


Happy Stamping

Vicki Boucher


24 July 2022

Artisan Design Team - Lovely and Lasting Bundle


 Hello and welcome,

My name is Vicki Boucher and I'm from Melbourne, Australia. Today I'll be sharing two projects using the Lovely & Lasting Bundle, turning them into two cards.


The Artisan Design Team are featuring the Lovely & Lasting Bundle on Stampin' Up! Facebook and Instagram page where you'll sure to be inspired by everyone's creations, I'll add the link at the end of my blog. 


Lovely & Lasting Bundle (158652)


The Lovely & Lasting Bundle  (158652) 10% Bundle Savings is located on page 25 of the Stampin' Up! 2022 - 2023 Annual Catalogue. The bundle includes Lovely & Lasting Stamp Set (158646) and coordinates Lasting Label Punch (158651). This is a great set to have in your crafty stash, I just love the variety of different labels for paper crafting.


Night of Navy Happy Birthday Card

To create this card I've used the following colours Night of Navy, Basic Gray and Fresh Freesia. Starting with Basic White panel I've added Night of Navy and Basic Gray Ink with the Blending Brush. I lightly added the ink to the panel but also leaving white space. Using the brush tip against the lid of the Stampin' Write Markers, I splattered Night of Navy and Basic Gray ink onto the panel.


Next I used the tile stamp in Basic Gray and stamped off before applying to the panel a couple of times. I also used the tile stamp in Versamark ink onto Vellum Cardstock and heat embossed using White Stampin' Emboss Powder and fussy cut the image out.


The images of the flowers have either been stamped in the above mentioned colours or I added ink to the stamp using the Blending Brush, this gives a softer look. Then with the paper snips, I've fussy cut all of the images out.


A great way to save time and create multiple sentiments for your projects. Is to stamp your images multiple times in Versamark onto a strip of Cardstock add Stampin' Emboss Powder and heat set with the Heat Tool. Then with the Lasting Label Punch, punch out your labels to add to your projects.


To finish off the card I've added a fancy bow using the following ribbons, White Glittered Organdy Ribbon, Starry Sky Metallic Woven Ribbon and Silver Simply Elegant Trim. Plus I added a few Rhinestones for some bling.


Gorgeous Grape Thinking of You Card

For my next card, which is in shades of purple and is very similar to my other card with a few changes. Starting with the colours I've used Gorgeous Grape, Smoky Slate, Night of Navy and Fresh Freesia. The card base is Gorgeous Grape and with the Blending Brush I've added Gorgeous Grape ink to the Basic White Panel.


I've stamped off tile image in Smoky Slate ink and applied to the panel. Next I used the sentiment and stamped the image a couple of times onto the panel. I added splattered ink in Smoky Slate with the Stampin' Write Marker. I've roughed up the edges of the panel using the blade of the Paper Snips.


The flower images are stamped in Night of Navy, Fresh Freesia and Gorgeous Grape. I've also heat embossed the flower image using Versamark ink onto Vellum Cardstock, White Stampin' Emboss Powder and heat set with the Heat Tool. Then I've fussy cut the images and arranged under the sentiment.


To finish off the card I've added Pearls, Sliver Simply Elegant Trim and Fresh Freesia Open Weave Ribbon.  


Thank you for visiting my blog today, I would so love hear your thoughts on my project by leaving a comment below. Make sure you pop over onto Stampin' Up! Facebook page for lots of inspiration using the Lovely & Lasting Bundle.

If you would like a copy of the new Annual Catalogue 2022 - 2023 please contact me here

If you live in Australia and don't have a demonstrator, you can purchase any of the Stampin' Up! products by shopping with me at my online store here.


Happy Stamping

Vicki Boucher