Showing posts with label Slimline Card. Show all posts

10 July 2024

Colour INKspiration Challenge #CI169


Hello and welcome, 

My name is Vicki Boucher, and I am from Melbourne, Australia. Tonight, is the latest Colour INKspiration Challenge #CI169 this photo was chosen by Colour INKspiration Crew Member, Cathy Pinchbeck.


The chosen colour combination for #CI169 is Basic Beige, Blueberry Bushel, Misty Moonlight and Night of Navy. As well as the chosen colours you may also like to add Basic White, Basic Black, Very Vanilla, Basic Beige, Crumb Cake and metallics to your project. We also allow 'Ivory', 'Bronze' and 'Natural Tones' in the Stampin' Blends. If you don't have all the colour palette, feel free to use the closest SU substitute (ie: Azure Afternoon instead of Blueberry Bushel.... for example).

The challenge will run for almost 2 weeks until 7pm (AEST) on Monday 22nd July 2024 details to follow at the end of my blog.


This is gorgeous this colour palette, I just love the blues together and with a touch of beige for a masculine birthday card for my farther in-law. I've used the Round We Go Bundle (163730) and is located on page 63 of the Stampin' Up! Annual Catalogue.


I made a slimline card starting off with a panel of Basic White Cardstock, then adding Misty Moonlight, Blueberry Bushel, Night of Navy inks and the Blending Brush to the cardstock. Next, I used the Round We Go Stamp Set and stamped the images directly onto the inked up cardstock. I added multiple circle images using Blueberry Bushel and Misty Moonlight ink. 


Then I used the Round We Go Dies and used the peek-through diamond and circle dies to add some interest to the card, I layered another panel of Basic White Cardstock underneath the top panel. This makes the images pop!


I layered different pinwheels together using the challenge colours in cardstock and with Basic White Cardstock.

To finish off the card I heat embossed the sentiments in white onto Night of Navy Cardstock and I added a small piece of Basic Beige Bordered Ribbon to one of the pinwheels.


I hope I've inspired you with the latest challenge and I do hope you'll join in. We so look forward to seeing a variety of projects using the challenge colours. Please ensure that your project is new and made specifically for this challenge.

Challenge guidelines:

  • Create a NEW project made specifically for this challenge.
  • Use all of the challenge colours (or close substitutions) unless stated.
  • Upload only ONE picture per entry straight to the discussion wall and NOT in an album.

Colour INKspiration Challenge #CI169 will run until 7pm (ADET) on Monday 22nd July 2024.

To get your creative ideas flowing, make sure you check out the Crew's Project in the CI169 Album.

Please click on the link here to join the challenge.


Thank you for visiting my blog today, I would so love to hear your thoughts on my project by leaving a comment below.

Please email me if you would like a copy of the 2024-2025 Stampin' Up! Annual Catalogue send an email to me here. 


If you live in Australia and don't have a demonstrator, you can purchase any of the Stampin' Up! products by shopping with me at my Stampin' Up! online store here.

Make sure you follow me on social media via Facebook, Instagram and Pinterest.


Happy Stamping

Vicki Boucher


07 October 2023

Artisan Design Team - Creative Project - Merriest Trees Bundle


Hello! My name is Vicki Boucher, and I am from Melbourne, Australia. Today I'm sharing two Christmas slimline card ideas using the lovely and versatile Merriest Trees Bundle and other Stampin' Up! products.

When it comes to creating my projects, I love to show a variety of different techniques and add lots of layers. Playing with different colour palettes is always fun! Slimline cards can add another dimension to your paper craft when using Stampin' Up! products.


Here are two magical Christmas cards made using non-traditional colours. I love to create and mix colours together using different tools. I'll add the product details at the end of my blog. 


Spirit of the Season Slimline Christmas Card

For my first card I wanted to create a whimsical watercolour Christmas trees using Fluid 100 Watercolor Paper and have fun mixing inks together.


Create unique watercolour trees by mixing ink with water, then apply sections of colour to Watercolor Paper using a large, flat, brush tip Water Painter. The colors I used are Boho Blue, Orchid Oasis and Blueberry Bushel. Move the ink around on the paper with the Heat Tool until dry. Use the Merriest Trees Dies to die cut several different tree sizes. 


To add interest to the trees, use a Sponge Dauber and apply VersaMark Ink to the edges of the branches. Then, add white Stampin' Emboss Powder, brush off the excess with a brush, and heat set using the Heat Tool. I like to use the Stampin' Up! tweezers to hold onto smaller pieces of images, so I don't heat my fingers with the Heat Tool.

To decorate the trees, I used Soft Shimmer Paper in Bubble Bath, placed Adhesive Sheet to the back of the paper and then die-cut out the tree decorations and stars. 

To add layers to the card, create background snow by tearing up two layers using Basic White Cardstock and add Boho Blue and Orchid Oasis ink using the Blending Brush.


Stamp the stars a number of times to the background panel using VersaMark Ink, add white Stampin' Emboss Powder and heat set with the Heat Tool. Then apply lightly using Boho Blue and Orchid Oasis Ink with the Blending Brush to the background panel. 


Merry Christmas Slimline Card

For my second card I went for a nighttime scene using darker cardstock and inks. This created a totally different look to my first card. 


Create two snow layers for the background by tearing up Basic White Cardstock with your fingers. Next, using a Blending Brush to create contrast and leaving some white space between each of the layers. This helps create a snow effect for your layers. The colours used are Orchid Oasis and Starry Sky inks.


Apply colour to the trees using a Sponge Dauber for smaller sections and Blending Brushes for larger areas. I used Orchid Oasis and Starry Sky inks. Leave some white space to create snow for each of the layers. Then, add water droplets to the trees by tapping the medium tip Water Painter against Paper Snips and set them with the Heat Tool.

To create the background trees, use Starry Sky ink and stamp two of the trees directly onto Orchid Oasis Cardstock slimline panel. The third tree stamp onto a scrap piece of Orchid Oasis Cardstock and then die-cut out using the second largest tree die from the Merriest Tree Dies. 


To finish off the card, heat embossed the sentiment using VersaMark Ink, onto Orchid Oasis Cardstock, add white Stampin' Emboss Powder tap off excess and heat set with Heat Tool. Die-cut out tree using second largest tree die.


Here are the products you will need:

Merriest Trees Bundle (162048)
Starry Sky Cardstock (159263)
Orchid Oasis Cardstock (159267)
Basic White Cardstock (159276)
Fluid 100 Watercolor Paper (149612)
Soft Shimmer Specialty Paper (161750)
Starry Sky Classic Stampin' Pad (159212)
Orchid Oasis Classic Stampin' Pad (159214)
Boho Blue Classic Stampin' Pad (161650)
Blueberry Bushel Classic Stampin' Pad (147138)
Iridescent Adhesive-Backed Discs (161954)
Basics Stampin' Emboss Powders (155554)
Heat Tool (129053)
Embossing Additions Tool Kit (159971)
VersaMark Pad (102283)
Blending Brushes (153611)
Small Blending Brushes (160518)
Water Painters (151298)
Sponge Daubers (133773)
Wink of Stella Glitter Brush (141897)
Adhesive Sheets (152334)
Mini Stampin' Dimensionals (144108)
Multipurpose Glue (110755)
Paper Snips Scissors (103579)


Thank you for visiting my blog today, I would so love to hear your thoughts on my project by leaving a comment below.

Please email me if you would like a copy of the 2023-2024 Stampin' Up! Annual or Mini Catalogue send an email to me here. 

If you live in Australia and don't have a demonstrator, you can purchase any of the Stampin' Up! products by shopping with me at my Stampin' Up! online store here.

Make sure you follow me on social media via Facebook, Instagram and Pinterest.


Happy Stamping

Vicki Boucher


13 September 2023

Colour INKspiration Challenge #CI151


 Hello and welcome, 

My name is Vicki Boucher, and I am from Melbourne, Australia. Tonight, is the latest Colour INKspiration Challenge #CI151 this photo was chosen by Cathy Pinchbeck. These colours are stunning together and I just love the inspiring photo used for the challenge.


The chosen colour combination for #CI151 is Petal Pink, Balmy Blue, Boho Blue and Pecan Pie. As well as the chosen colours you may also like to add Basic White, Basic Black, Very Vanilla, Crumb Cake and metallics to your project. We also allow 'Ivory', 'Bronze' and 'Natural Tones' in the Stampin' Blends. If you don't have all the colour palette, feel free to use the closest SU substitute (ie: Copper Clay instead of Pecan Pie .... you get the drift).

The challenge will run for almost 2 weeks until 7pm (AEST) on Monday 25th September 2023 details to follow at the end of my blog.


Here's my slimline Christmas card I used the Christmas Classics bundle which is in the new Stampin' Up! Sep-Dec 2023 Mini Catalogue. My first time using this bundle and I love it! I went with a soft look using these beautiful colours and one technique I really love to do is the emboss resist technique using White Stampin' Emboss Powder. I really like how the sentiment stands out against Boho Blue. Here I just added Boho Blue ink with the Blending Brush.


I used one of the fancy labels from the Christmas Classics Dies, die-cut a number of them in Basic White Cardstock and cut the label in half. This creates lots of interesting elements to form the card. 


I've used this layout for my slimline cards many times now and I like to create one of the panels with coloured ink by applying Boho Blue ink with the Blending Brush. Starting at the edge and working over towards the other side of the panel and then I tear one side of the cardstock to expose the white paper. 

Another fun way to add interest to your cards is adding White Stampin' Emboss Powder to the edges of the cardstock. I just simply run the VersaMark ink pad along the edges of the cardstock then apply White Stampin' Emboss Powder, brush off any excess that I don't want and heat set with the Heat Tool.


To finish off the card I added Clear Wink of Stella by taping the brush against the lid. I also hadn't used any Petal Pink on the card expect for the Pastel Adhesive Backed Sequins, they are stunning in the pink and Balmy Blue.

I hope I've inspired you with the latest challenge and I do hope you'll join in. We so look forward to seeing a variety of projects using the challenge colours. Please ensure that your project is new and made specifically for this challenge.


Upload only one picture per entry straight to the discussion wall and not in an album

Colour INKspiration Challenge #CI151 will run until 7pm (ADET) on Monday 25th September 2023.

To get your creative ideas flowing, make sure you check out the Crew's Project in the CI151 Album.

Please click on the link here to join the challenge.


Thank you for visiting my blog today, I would so love to hear your thoughts on my project by leaving a comment below.

Please email me if you would like a copy of the 2023-2024 Stampin' Up! Annual or Mini Catalogue send an email to me here. 

If you live in Australia and don't have a demonstrator, you can purchase any of the Stampin' Up! products by shopping with me at my Stampin' Up! online store here.

Make sure you follow me on social media via Facebook, Instagram and Pinterest.


Happy Stamping

Vicki Boucher

23 August 2023

Colour INKspiration Challenge #CI150


Hello and welcome, 

My name is Vicki Boucher, and I am from Melbourne, Australia. Tonight, is the latest Colour INKspiration Challenge #CI150 this photo was chosen by Lou Kitzelman. They are gorgeous happy colours for our 150th birthday. It certainly reminds me of spring which is not too far away.


The chosen colour combination for #CI150 is Pumpkin Pie, Calypso Coral, Sweet Sorbet, Old Olive and Pretty Peacock. As well as the chosen colours you may also like to add Basic White, Basic Black, Very Vanilla, Crumb Cake and metallics to your project. We also allow 'Ivory', 'Bronze' and 'Natural Tones' in the Stampin' Blends. If you don't have all the colour palette, feel free to use the closest SU substitute (ie: Night of Navy instead of Misty Moonlight .... you get the drift).

The challenge will run for almost 3 weeks until 7pm (AEST) on Monday 11th September 2023 details to follow at the end of my blog.


Happy birthday to Colour INKspiration!! 150 colour challenges which is amazing! I just love our design team and the variety of different colour combinations we get to try out each fortnight or sometimes three weeks. I really love a colour challenge because it challenges me to try out different colour palettes I wouldn't normally use. 


Today's slimline card I have created using the new Abundant Beauty Decorative Masks (162331) which will be available to customers in the up incoming Stampin' Up! Sep-Dec 2023 Mini Catalogue. They are amazing and so easy to use. You get 7 masks in total and 4 of them are to create sunflowers and leaves. I used the large sunflower mask by applying Pumpkin Pie ink with the Blending Brush and two smaller sunflowers in Sweet Sorbet ink. The leaves are a mix of Old Olive and Pretty Peacock I love the shading of these colours mixed together. Then I fussy cut the images out.


I combined a few different stamp sets to go with the sunflowers and the flowers from the Sending Smiles Stamp Set was perfect as they are solid images when stamped and white outline space around them. 

The background panel is Basic White Cardstock using the Lighting the Way and Gorgeously Made Stamp Sets I selected some leaf images to create lots of stamping in Old Olive ink.


To finish off the card I added Black & White Gingham Ribbon, heat embossed the sentiment and added a few Blooming Pearls embellishments in gold and Pretty Peacock. 


I hope I've inspired you with the latest challenge and I do hope you'll join in. We so look forward to seeing a variety of projects using the challenge colours. Please ensure that your project is new and made specifically for this challenge.


Upload only one picture per entry straight to the discussion wall and not in an album

Colour INKspiration Challenge #CI150 will run until 7pm (ADET) on Monday 11th September 2023.

To get your creative ideas flowing, make sure you check out the Crew's Project in the CI150 Album.

Please click on the link here to join the challenge.


Thank you for visiting my blog today, I would so love to hear your thoughts on my project by leaving a comment below.


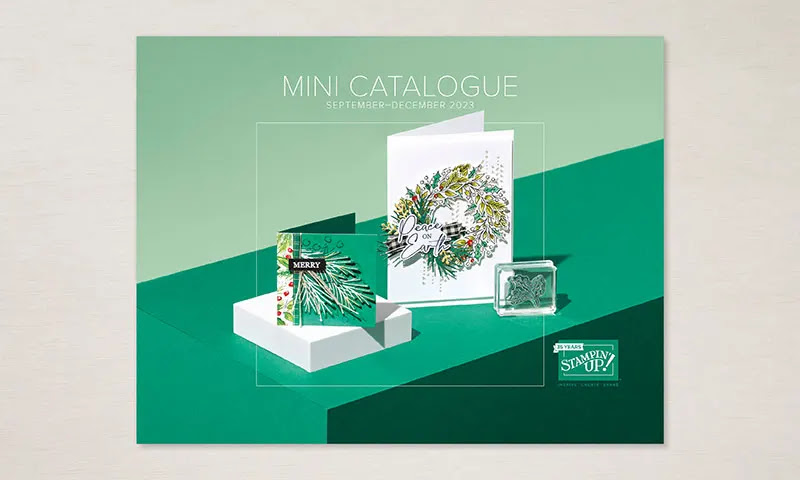
Stampin' Up! Mini Catalogue Sep-Dec 2023

Please email me if you would like a copy of the 2023-2024 Stampin' Up! Annual or Mini Catalogue send an email to me here. 

If you live in Australia and don't have a demonstrator, you can purchase any of the Stampin' Up! products by shopping with me at my Stampin' Up! online store here.

Make sure you follow me on social media via Facebook, Instagram and Pinterest.


Happy Stamping

Vicki Boucher


30 April 2023

Artisan Design Team - By The Bay Suite


Hello and welcome,

My name is Vicki Boucher and I'm from Melbourne, Australia. Today, I'll be sharing with you three projects I created for Stampin' Up! earlier this month for my Monthly Artisan Assignment using the By The Bay Suite which was shared on Stampin' Up! socials. The design team did such an amazing job on their projects so make sure you check out their creations. I'll have the link at the bottom on my blog.


By The Bay Suite Collection 160450


The By the Bay Suite is in the Mini Jan - April Catalogue 2023 and is only available until supplies last or until the 1st of May 2023. The Seaside Bay Stamp Set 160436, Seaside Bay Dies 160444, Balmy Blue & White Variegated Ribbon 160448 and Flat Adhesive Backed Pearls 160449 will all be carrying over into the Stampin' Up! 2023 - 24 Annual Catalogue. The only item retiring will be the gorgeous By The Bay 6" x 6" Specialty Designer Series Paper 160434 I'm so glad I have this DSP in my stash! I'll certainly will be using it for future cards and gift tags. 


Now for my projects I created a slimline card, standard size card and gift tag using all of the products from the suite. I just love anything blue so that was my go-to when deciding which colours to use.


For the slimline card I created a under the sea blended background using Basic White cardstock, Blending Brushes and the following colours - Balmy Blue, Nighth of Navy, Starry Sky, Orchid Oasis, Pool Party and Coastal Cabana. I like to leave a corner of white cardstock as well as create light and dark with the different shades of blues. Then my go to at the moment is using my fingers and flicking water onto the ink blended background. This is so much fun!


To create the different layers of seashells, grass, crab I used inked up watercolor paper, stamped images and DSP. I also like to add color using either a Sponge Dauber or Blending Brush to the images. Adding different ribbons and accessories adds texture and sparkle to your project.


I used a lot of By The Bay Specialty Designer Series Paper for the standard size card to create layers and elements to the card. The addition of rippled ribbon layered under the strip of DSP and Gold Elegant Trim tied in a bow.


I used the Stampin' Write Markers to colour in the birds and stamp the images onto Basic White Cardstock and die-cut the birds out using the Seaside Bay Dies. Then using the By The Bay Specialty Designer Series Paper and Balmy Blue Cardstock to die-cut out using Stylish Shapes Dies for the gift tag.  


Thank you for visiting my blog today, I would so love to hear your thoughts on my projects by leaving a comment below. Make sure you pop over onto Stampin' Up! Facebook page or Stampin' Up! Instagram page for lots of inspiration using the By The Bay Suite Collection. You will just need to go back a couple of weeks to view their projects.


If you would like a copy of the Stampin' Up! Annual Catalogue 2023 - 2024 please contact me here. 

If you live in Australia and don't have a demonstrator, you can purchase any of the Stampin' Up! products by shopping with me at my online store here.


Happy Stamping

Vicki Boucher


26 October 2022

Colour INKspiration Challenge #CI132


 Hello and welcome,

My name is Vicki Boucher, and I am from Melbourne, Australia. Tonight, it's the latest Colour INKspiration Challenge #CI132 and this photo was chosen by Cathy Pinchbeck. I just love this tropical photo; it makes me want to go on a holiday and preferably where it's not raining! 


The colour combination for #CI132 is Tahitian Tide, Orchid Oasis, Starry Sky and Old Olive. As well as the chosen colours you may also add Basic White, Very Vanilla, Basic Black, Crumb Cake, Sahara Sand and metallics to your project. We also allow 'Ivory' and 'Bronze' in the Stampin' Blends. If you don't have all the colour palette, feel free to use the closest SU substitute (ie: Pear Pizzazz instead of Old Olive .... you get the drift).

The challenge will run for almost 2 weeks until 7pm (AEST) on Monday 7th November 2022 details to follow at the end of my blog.


Today's card is a slimline birthday card using the True Beauty bundle (158984) (visit my Stampin' Up! store to purchase) which can be located on page 67 in the Stampin' Up! 2022-23 Annual Catalogue. I just love the soft watercolour look of the floral images and this stamp set is perfect for lots of stamping in the challenge colours.

Starting with a sheet of Basic White cardstock measured at 8.5cm x 21cm. I always start with the largest image then work my way around the cardstock with the different images and colours. I finish off by using the Blending Brush and add ink in Orchid Oasis and Starry Sky ink. This way I don't leave any white space around the edges. I also like to splatter ink by using the Stampin' Write markers in the challenge colours.


Next, I added a few torn strips of Starry Sky 2022-2024 In Color 6"x 6" DSP to the stamped panel. I used the Organic Beauty and Forever Flourishing Dies to die-cut out some of the images and layered them under the sentiment.


A fun way to use the Old Olive Twill Ribbon is to unravel the threads of the ribbon and you'll end up with lots of fine strands. 


To finish off the card I used the sentiment from Artistically Inked stamp set and stamped in Starry Sky ink. I added a few of the In Color 2022 - 24 Matte Decorative Dots to the card.


I hope I've inspired you with the latest challenge and I do hope you'll join in. We so look forward to seeing a variety of projects using the challenge colours. Please ensure that your project is new and made specifically for this challenge.


Upload only one picture per entry straight to the discussion wall and not in an album

Colour INKspiration Challenge #CI132 will run until 7pm (ADET) on Monday 7th November 2022.

To get your creative ideas flowing, make sure you check out the Crew's Project in the CI132 Album.

Please click on the link here to join the challenge.


Thank you for visiting my blog today, I would so love to hear your thoughts on my project by leaving a comment below.


Please email me if you would like a copy of the 2022-2023 Annual Catalogue and the July-Dec 2022 Mini Catalogue Catalogue please send me an email here. 

If you live in Australia and don't have a demonstrator, you can purchase any of the Stampin' Up! products by shopping with me at my Stampin' Up! online store here.

Make sure you follow me on social media via Facebook, Instagram and Pinterest.


Happy Stamping

Vicki Boucher


25 September 2022

Artisan Design Team - Boughs of Holly Suite


 Hello and welcome,

My name is Vicki Boucher and I'm from Melbourne, Australia. Today I'll be sharing three projects using the Boughs of Holly Suite, turning them into two Christmas cards and Christmas decoration.

The Artisan Design Team are featuring the Boughs of Holly Suite on Stampin' Up! Facebook and Instagram page where you'll sure to be inspired by everyone's creations, I'll add the link at the end of my blog. 


The Boughs of Holly Suite Collection (159612) is located on pages 24-25 of the Stampin' Up! July - Dec 2022 Mini Catalogue. The suite collection includes the following items Leaves of Holly Bundle (159608) (Leaves of Holly Stamp Set and Holly Berry Dies 10% bundle savings), Natural 1/2" Woven Ribbon (159611), Textural Elements (159966) and Boughs of Holly 12" x 12" Designer Series Paper (159600).


This suite is gorgeous and I'm so excited to share with you my creations using the above Stampin' Up! products. I just love the natural wood pieces and the detailed holly leaves dies are so elegant.


Season's Greetings Slimline Card

I was looking at the Designer Series Paper to see which Stampin' Up! greens was in the paper and I like to experiment to see which green goes well together. I started with Soft Succulent Cardstock for the panel and stamped the holly leaves in Soft Succulent and Evening Evergreen ink. Then with the Blending Brush I applied the following colours to the Soft Succulent panel, Evening Evergreen, Shaded Spruce, Mossy Meadow, Old Olive and Soft Succulent ink. I also splattered ink with either Stampin' Write Markers or Stampin' Blends.


I used the large label die to die-cut out a sheet from the Boughs of Holly Designer Series Paper and layered it over the Natural Woven Ribbon. Gold works perfectly with green and it's elegant, so I used the Distressed Gold 12" x 12" Specialty Paper for the holly leaves and berries. 


The sentiment is heat embossed using Gold Emboss Powder onto Very Vanilla Cardstock and this time I used the smaller label die. Adding more gold to the card I used Gold Simply Elegant Trim and Champagne Rhinestones. 


I added another panel using the same sheet of Designer Series Paper as the large label die to the slimline Evening Evergreen card base.


Season's Greetings Mossy Meadow Card

For my next card I used Old Olive and Mossy Meadow to go with Very Vanilla, Gold and a touch of Real Red. Starting with the Old Olive Cardstock panel, I stamped the holly leaves in Mossy Meadow ink. 


Then with the Blending Brush I applied Mossy Meadow and Old Olive ink to the edges of the cardstock. Using a different sheet of paper from the Boughs of Holly Designer Series Paper, die-cut out from the large label die and layered over Very Vanilla Baker's Twine.


The holly leaves are a mix of Designer Series Paper and Old Olive Cardstock, I like to add more Old Olive and Mossy Meadow ink to the cardstock for interest. The touches of gold to the holly leaves are Gold Gilded Leafing applied with random applications of Versamark, then add Heat & Stick Powder and heat set with the Heat Tool. Then quickly add the Gold Gilded Leafing and brush off with your fingers. I also added Gold Gilded Leafing to the natural Textural Elements. 


The other elements I've created for the card are the Real Red berries, by sponging Real Red ink to Real Red Cardstock then die-cut out the base for the berries and then place over the top layer using Real Red Glimmer Paper for glitter berries. 


Using Paper Snips Scissors, snip up the middle of the Natural Woven Ribbon to create thinner ribbon and pulled apart a few of the strands away. Then layer under the natural Textural Elements. The sentiment is heat embossed using Gold Emboss Powder onto Very Vanilla Cardstock and die-cut out using the smaller label die.


Christmas Wishes Decoration

These detailed dies are perfect to make not just Christmas cards, but other projects too. I wanted to create something to hang on the Christmas tree. Starting with the base I used a sheet of Boughs of Holly Designer Series Paper and die-cut out using the circle die from the Stylish Shapes Dies. Then use a long enough thread of the Gold Simply Elegant Trim and attached to the backing of the DSP with Tear and Tape. I then added to the backing of the decoration, Evening Evergreen Cardstock die-cut out using the same circle die and adhered together with Multipurpose Glue. 


I used the Distressed Gold Specialty Paper for the top layer of the holly leaves and Soft Succulent Cardstock for the bottom layer, I added Evening Evergreen, Old Olive and Mossy Meadow ink to the cardstock with the Blending Brush. Then I added Gold Gilded Leafing to the inked up holly leaves.

The other elements are the same as the above card, Real Red berries, natural Textural Elements and Natural Woven Ribbon. The sentiment is heat embossed using Gold Stampin' Emboss Powder onto Very Vanilla Cardstock and die-cut out using the smaller label die. Adding a few of the Champagne Rhinestones for some bling!


Thank you for visiting my blog today, I would so love to hear your thoughts on my projects by leaving a comment below. Make sure you pop over onto Stampin' Up! Facebook page for lots of inspiration using the Boughs of Holly Suite Collection.

If you would like a copy of the Stampin' Up! July - December 2022 Mini or the Annual Catalogue 2022 - 2023 please contact me here. 

If you live in Australia and don't have a demonstrator, you can purchase any of the Stampin' Up! products by shopping with me at my online store here.


Happy Stamping

Vicki Boucher