08 February 2021

Creation Station February Blog Hop - Cute Critters


Hello and welcome,

Today's projects for February 2021 Creation Station blog hop is all about four legged "Cute Critters" Stampin' Up! have a number of different stamp sets in both the Mini and Annual Catalogues. I'm so looking forward to seeing all the other design Team Members creative projects so make sure you click on the link at the bottom of my blog. 


I recently purchased the Baby Pull Toys Stamp Set which is in the Mini 2021 Catalogue this set is perfect for baby gifts, tags, cards and so much more. The stamp set consists of three cute critters, an elephant, lion and giraffe. Plus sentiments and other images.


It's a cling stamp set and guess what happened? The giraffe stamp went missing! It's a crafter's nightmare when a stamp or die goes missing from your creative space. Has this ever happened to you? I've been looking for days, everywhere! But nothing, it just disappeared! 


Then I finally found the stamp it was clinging to a plastic bag I had on my crafting table (non related to crafting). Those cling stamps sure know how to cling to things! Next time I'll be placing my stamps straight back in their container.


For my projects I created a Double Z-fold card, a gift tag and a mini card all coordinating together. Using Blushing Bride, White, Basic Gray and Smoky Slate for my colour palette. As there isn't any Blushing Bride in the Stampin' Blends, I used the light Flirty Flamingo in the Blends and blended it with the Color Lifter. You get a nice pale pink. 


I just love the cute polka dot pattern, it just screams baby and all cute things! The paper comes in Subtles range 6 x 6" DSP in the Annual Catalogue. 


The stamped images are in inked up in Basic Gray onto Whisper White Cardstock, coloured in using the Stampin' Blends in light Flirty Flamingo, light Smoky Slate and Color Lifter. Then die cut out using the largest Stitched Square Die. I gave dimension to the lion by layering the head and mane with dimensionals. The three Blushing Bride hearts are die cuts from the Floral Hearts Dies.

Measurements for the Double Z-Fold Card 

  • Thick Whisper White Cardstock cut card base 4-1/2" x 11"
  • Score at 2-3/4" and 5-1/2" 
  • Blushing Bride Cardstock cut 3-1/4" x 9-3/4"
  • Score 3-1/4" and 6-1/2"
  • Blushing Bride polka dot DSP 5" x 4-1/4"
  • Blushing Bride script DSP 4-1/4" x 2-1/2"
  • Whisper White cut x3 pieces 3-1/4" x 3-1/4" 
  • Die cut using largest Stitched Square Die
  • Have scraps of Blushing Bride and Whisper White Cardstock for sentiments and mini heart die images
  • Basic Gray Twine from the Well Suited Twine combo pack


For the gift tag I've used Blushing Bride Cardstock for the tag 2" x 4" punch using the Delightful Tag Topper. Blushing Bride polka dot DSP 1-3/4" x 3-3/4", scraps of Whisper White for sentiment, stamped elephant image in Basic Gray Ink and use the second smallest Stitched Circle Die. Color in with Stampin' Blends and finish off with Gray Granite Shimmer Ribbon.


The mini card is using all the same above products. The card measures 3" x 6" with layered scraps of DSP cut to fit and layered under the second largest Stitched Square Die in Whisper White. I've sponged Blushing Bride Ink on the white cardstock before layering the lion with adhesive. The sentiment is stamped in Basic Gray Ink on a piece of scrap Whisper White Cardstock and adhered with dimensionals.

Now it's time to visit the lovely Antoinette and see her amazing creations. I can't wait to visit her blog and read all about her Cute Critters!


Thank you for visiting my blog today. You can purchase any of the above mentioned products by visiting my online store here or send me a direct message.

Mini 2021 Stampin' Up! Catalogue


Until next time and make sure your stamps don't cling to something else other than your clear block!

Happy Stamping

Vicki Boucher


03 February 2021

Week 34 Art With Heart Colour Creations Weekly Showcase Petal Pink


Hello and welcome,

It's been awhile since my last Colour Creations blog with the Art With Heart Team, but I couldn't miss out on Petal Pink as it's one of my all time favourite Stampin' Up! Colors. I just love the softness and it was the perfect colour for my Happy Anniversary card.


Each week the lovely Catherine Proctor runs the Colour Creations Showcase with a selection of members from the Art With Heart Team join in and show off their beautiful projects using Stampin' Up! Colors. Make sure you click on the link at the end of my blog to see their creations.


I've used the Always in my Heart Bundle which is in the Mini Catalogue January to June 2021 on page 12. I won the Always in my Heart Stamp Set at last years On Stage At Home being a Demonstrator has it's perks, so all I needed was the Dies to complete the set. I love how the sentiment fits in the stitched banner die perfectly.


To create the large detailed heart using the new Blender Brush, I've lightly sponged Petal Pink Ink onto a sheet of Basic White Cardstock and die cut the image out. As you can see I've given the heart a light subtle pink look. The solid center heart is a lot darker than the outer flower images.


The stamp set has some beautiful floral and leaf images to add to your projects. Using scrap pieces of White Cardstock I've stamped the images in Petal Pink, Sahara Sand and Balmy Blue this is a beautiful colour combo. Using the Stampin' Blends to colour in the images in the following colours - Petal Pink L & D, Balmy Blue Light, Ivory, Crumb Cake Light and Color Lifter to blend in the colours. The Ivory and Crumb Cake works well together with Sahara Sand. There are matching dies for the smaller pieces.


Sponging Petal Pink Ink onto a scrap piece of (make sure it's wide and long enough for the Banner Die) Basic White Cardstock with the Blender Brush. The sentiment is silver embossed onto the Cardstock, by stamping the image in Versamark Ink use Sliver Stampin' Emboss Powder and heat set with the Heat Tool. Then die cut out the sentiment using the Stitched Banner Die. There are two score lines on each side of the banner to give you a raised look. 


As the banner is raised you can add many layers underneath by using Stampin' Dimensionals for the stamped images and the solid part of the heart. 


The panel under the die cut pieces is the Pearlescent Specialty Paper which is in the Mini Catalogue, I love the shimmer of the paper and blends in well with the colours I've used. This is layered over a half sheet of Petal Pink Cardstock.


To finish off the card I've added the Basic Pearls Jewels to my project.

Thank you for visiting my blog with the Colour Creations Weekly Showcase and I can't wait to see everyone's projects.

Click on the link here to see Cathy's and all of the other participants names for Petal Pink creations.

Happy Stamping 

Vicki Boucher

To visit my online store at Stampin' Up!, please click here.


14 January 2021

Colour INKspiration Challenge #92


Hello and welcome,

It's the first Colour INKspiration challenge for 2021 #CI92 and this beautiful photo was taken by Cheryll Miller one of the Design Crew Member who recently joined our team late last year. Isn't it just stunning? I would so love to be in the field of tulips and see so much colour.


The colours for #92 challenge are Daffodil Delight, Calypso Coral, Magenta Madness, Merry Merlot and Garden Green. As well as the chosen colours you may also add Basic White, Very Vanilla, Crumb Cake, Sahara Sand, Basic Black and metallics to your project. We also allow 'Ivory' and 'Bronze' in the Stampin' Blends. If you don't have all the colour palette, feel free to use the closest SU substitute (ie: Pumpkin Pie instead of Calypso Coral .... you get the drift). 

The challenge will run up to almost 4 weeks until 7pm on the 8th Feb 2021 details to follow at the end of my blog.


I've used new Stampin' Up! products from the January to June 2021 Stampin' Up! Mini Catalogue. The Blending Brushes is a must have! They come in a pack of three item code 153611 for only $21. I now have two sets of these and I'm sure to buy at least another set. I use certain brushes for shades of yellows, reds, blues, greens etc..


Using a panel of Basic White Cardstock I started with Daffodil Delight then blending with Calypso Coral, Magenta Madness and finished off with Merry Merlot. 


Adding to my card I've used the Pretty Perennials Bundle stamp set and dies, save 10% when purchase as a bundle item code 156234 for $78.25. The flowers are stamped in Magenta Madness, Daffodil Delight, Calypso Coral and the leaves are in Garden Green. Adding die cut pieces in coordinating colours for the flowers. The center pieces are clear gems from the Flowers for Every Season Gems.


The sentiment is also from the Pretty Perennials Stamp Set. Using the Happy image stamped in Memento Ink onto Basic White Cardstock and fussy cut out. The birthday image is stamped Versamark Ink onto Basic Black Cardstock adding White Stampin' Emboss Powder and heat set with the Heat Tool.


To finish off my project I've added black and white Baker's Twine to my project which coordinates with the greeting.

We hope you can participate this round and we look forward to seeing a variety of projects using the challenge colours. Please ensure that your project is new and made specially for this challenge.

#CI92 will run until 7pm (ADET) on Monday 8th February.

Please click on the link here to join the challenge.

Just a reminder to upload your challenge pics straight to the discussion wall and not in an album.

Thank you for visiting my blog today, I would so love hear your thoughts on my project by leaving a comment below.

You can purchase any of the Stampin' Up! products by shopping with me at my online store here.

Happy Stamping!

Vicki Boucher


12 January 2021

#TGIFC298 Sketch Challenge

 Hello and welcome,


I'm excited to share with you my latest project a masculine card and I've entered my creation in the latest TGIF Sketch Challenge. I just love the layout of the sketch which the design team have chosen and it makes creating a card so much easier! 


I came across Narelle Farrugia's seashell card on Instagram and I just had to case it for a friend's masculine birthday card. This challenge was perfect timing.


For my card I started with a panel of Whisper White Cardstock, sponged Pool Party Ink with the Blending Brush and then ran it through die cutting machine with the Painted Texture 3D Embossing Folder. This folder is amazing, it reminds me of seawater and so much depth to the Cardstock. I ran my Paper Snips along the edge of the Cardstock and curled back a corner to give it more character. 


The new Friends Are Like Seashells Bundle is in the Stampin' Up! January to June 2021 Mini Catalogue and it was perfect for my masculine card. The colours for the seashells are Sahara Sand, Cinnamon Cider and Misty Moonlight for the starfish. I also added a little sponging to the seashells and starfish using the Blending Brushes. 


Using the Pretty Perennials for the sentiment is stamped in Misty Moonlight onto Whisper White Cardstock and I fussy cut out the word happy. Layering the Whisper White strip of Cardstock over a strip of Misty Moonlight and then my card was complete.


Make sure you visit TGIF Challenges here to see all of their amazing projects.

Thank you for visiting my blog today, I would so love hear your thoughts on my project by leaving a comment below.

You can purchase any of the Stampin' Up! products by shopping with me at my online store here.

Happy Stamping

Vicki Boucher


10 January 2021

Stamping Sunday Blog Hop - Sale a bration Favorites 2021


 Hello and welcome, it's the latest Stamping Sunday blog hop and we are sharing our favorite free Saleabration products from Stampin' Up! for the month of January and February 2021. 


It's always exciting to receive free Stampin' Up! goodies when you purchase from either the Mini or Annual Catalogues. For every $90 or $180 AUD you spend, you'll earn exclusive Sale-a-bration products for FREE! Stampin' Up! have a variety of Stamp Sets and Designer Series Paper to choose from. 


The products I've chosen is the Berry Blessings Stamp Set and Berry Delightful Designer Series Paper these products are free when you spend $180 of Stampin' Up! products (before shipping and handling). Saleabration is the best time of year and we also just launched the new Stampin' Up! January to June 2021 Mini Catalogue. I just love more goodies to play with! 


For my projects I've used the blueberries from the Berry Blessings Stamp Set, I started off with a strip of Whisper White Cardstock and stamped the Blueberry images in Balmy Blue Ink. Using Watercolor Pencils in Balmy Blue, Pacific Point, Night of Navy, Gorgeous Grape colouring in the Berries with the pencils and blending in with Clear Wink of Stella, I love the brightness of the colours and a little sparkle from the pen. 


The Berry Delightful DSP has these gorgeous prints on either side of the paper and I've used the bright blues to follow through with the Blueberries. I've cut the front of the card 1cm shorter to show off strip of DSP, giving you the impression that it's on the outside of the card when closed. 


Using the Stitched So Sweetly second largest die cut in Whisper White Cardstock, inking up the stamped images in Balmy Blue for the berries and Granny Apple Green for the foliage. Using the Watercolor Pencils and Wink of Stella to add more depth.


The additional pieces include the butterflies from the Butterfly Gala Stamp Set and punched out with the Butterfly Duet Punch. Fussy cut out the flowers from the Berry Delightful DSP. I don't have the Strawberry Builder Punch as of yet, but I believe the flowers in the DSP can be punched out.


The Mini Pizza Box was easy to create once I had the idea for the card, making the cute little box was simple. Using the new Blending Brushes and Pacific Point Ink I lightly added ink to the box. The application was nice and smooth and so quick to cover all over the outside of the box.


Layering with Berry Delightful DSP, Stitched So Sweetly die in Whisper White but this time I used a smaller die for the box, butterflies, stamped images in blueberries and foliage. To finish of the Mini Pizza Box I've added the Night of Navy Ribbon around the box and tied in a bow.


To see all of the amazing projects by the Stamping Sunday Design Team please click on their names below.

1. Sara Levin  
2. Su Mohr  
3. Tami Hewlett  
4. Cheryll Miller  
5. Mikaela Titheridge  
6. Vicki Boucher  
7. Jay Soriano  

To purchase any of the above mentioned Stampin' Up! products, please visit my online store here.

Happy Stamping

Vicki Boucher


04 January 2021

Creation Station January Blog Hop - How to design your own stamp set


Hello and welcome to my first blog for 2021! It's the new year, Stampin' Up! have the new January to June Mini Catalogue and there are some amazing bundles/suites to purchase. My wish list for new products is getting longer each day. 

For this month's Creation Station theme is 'How to design your own stamp set' at Stampin' Up! designing your own stamp set can be achieved by reaching a million dollars in sales. Reaching this milestone is not typical for Stampin' Up! demonstrators. Fewer than 1% of demonstrators actually achieve this extraordinary result. 


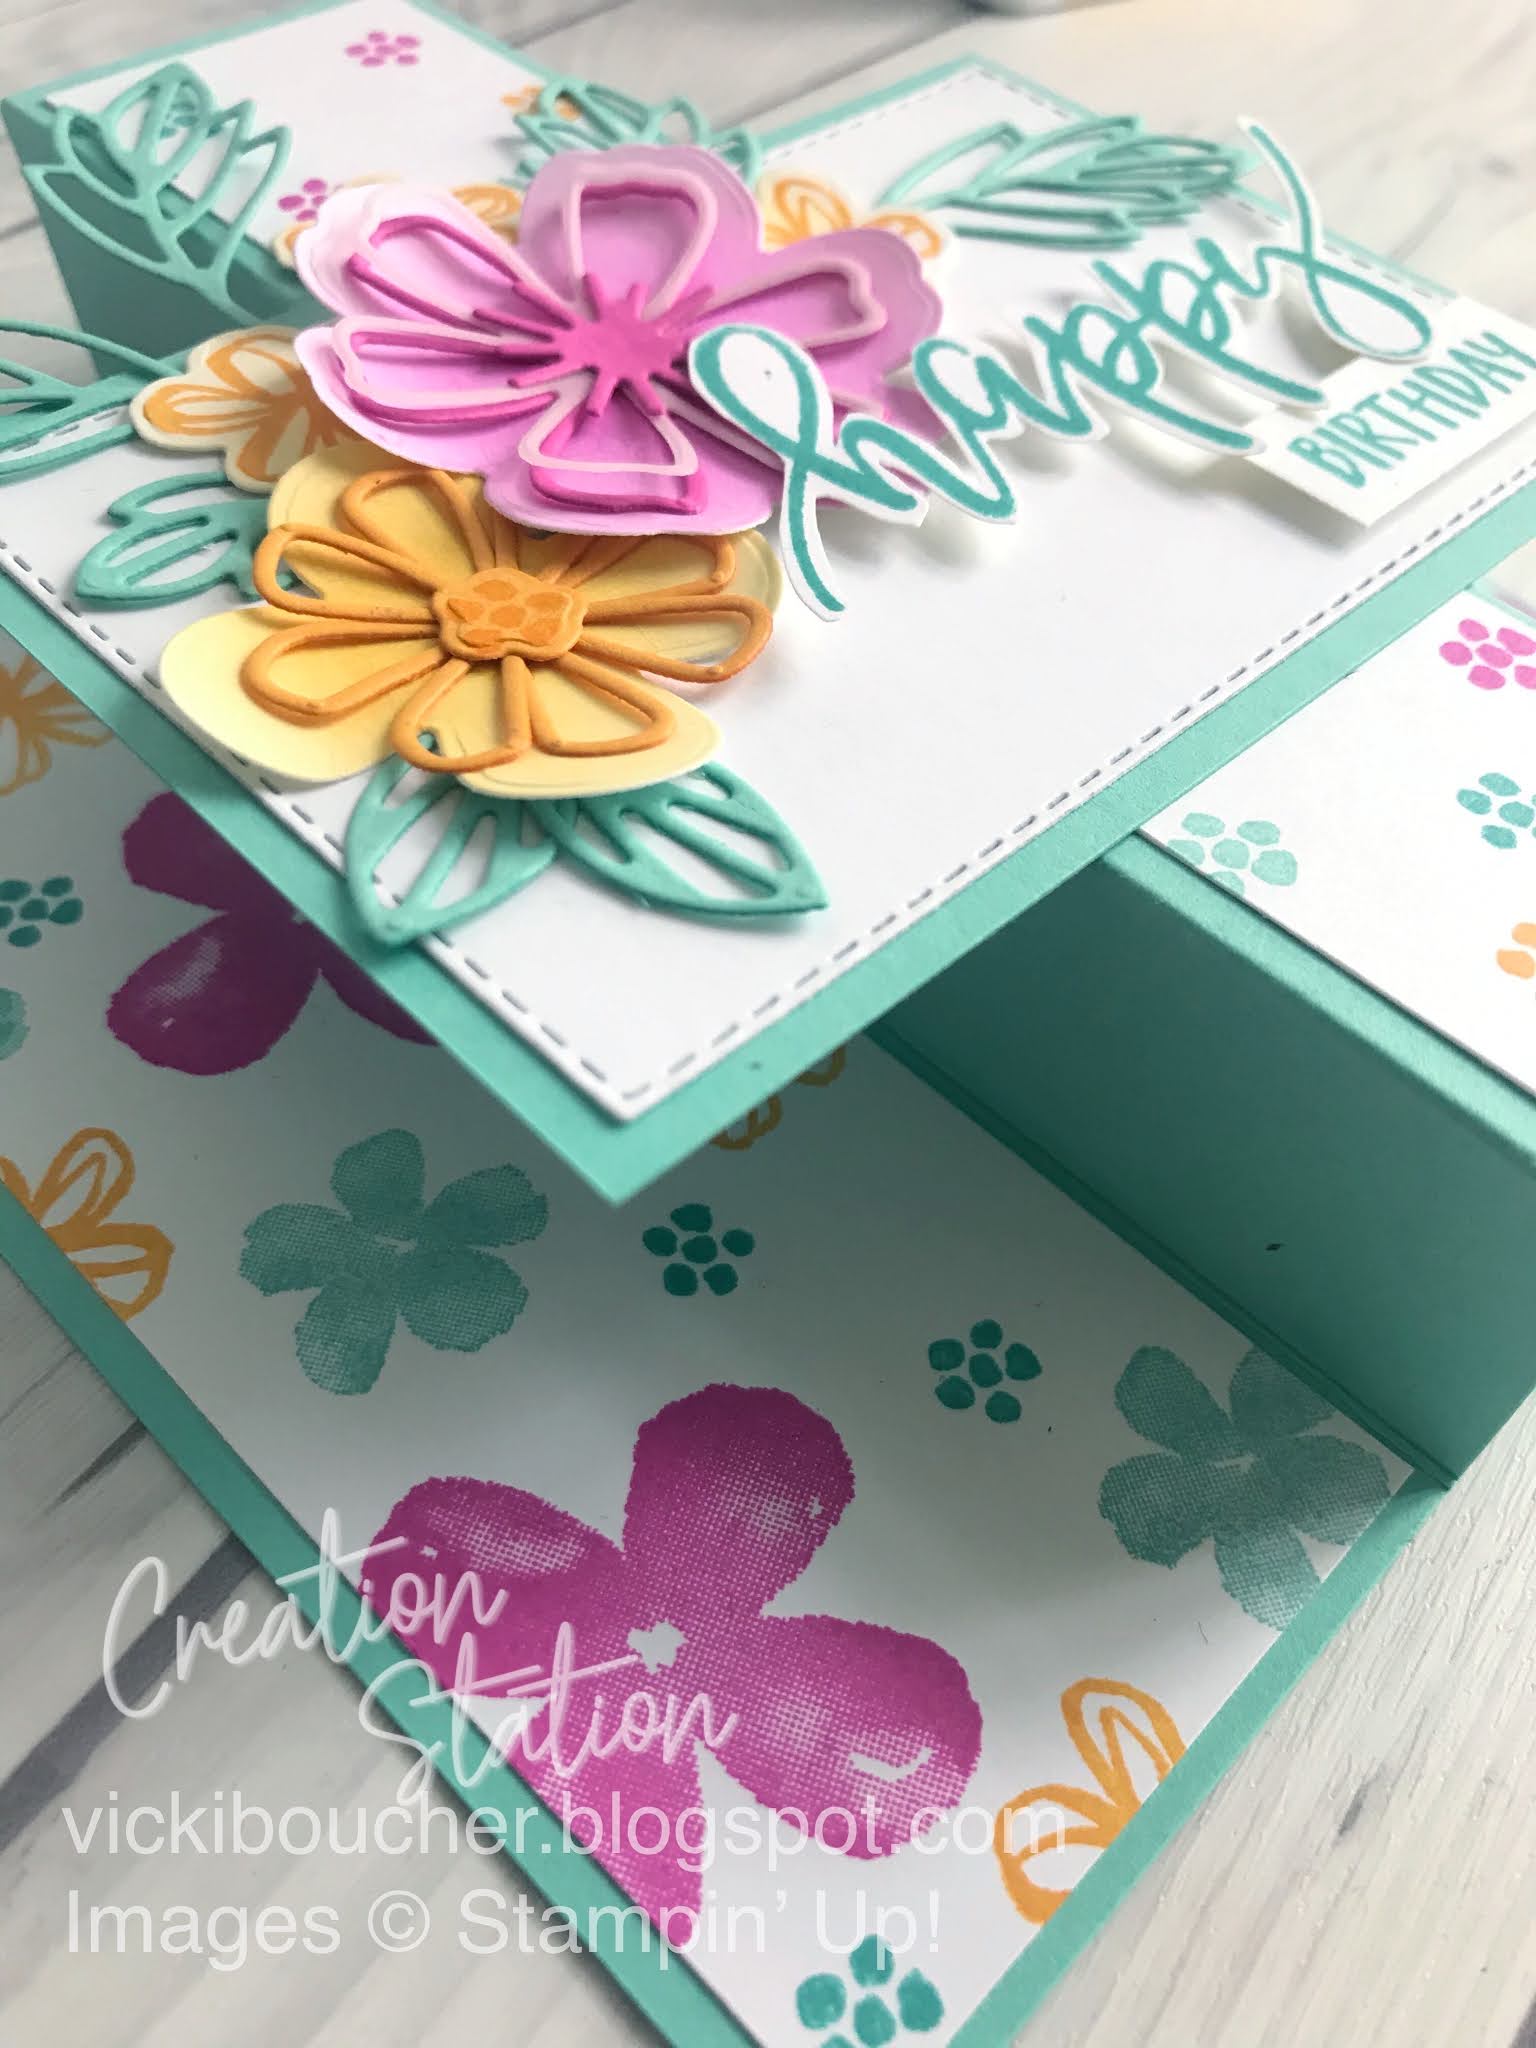
I've chosen the lovely Dena Rekow a fellow design team member of Creation Station and her new Pretty Perennials Stamp Set which is available from the Mini Catalogue on Jan 5th 2021. I always love watching her YouTube lives, she makes me laugh and shares lots of great tips when it comes to card making. Her signature greeting is that she always puts on her Stampin' lips at the start of her lives.


The project that I'll be sharing with you today is using Dena's new stamp set Pretty Perennials and the coordinating Perennial Petals Dies which has 23 Dies. This stamp set is so Dena, it has a happy vibe about it and you can buy this in a bundle and save 10%.


The colour combo I've used is Magenta Madness, Mango Melody, Bermuda Bay and of course Coastal Cabana (Dena's favourite Stampin' Up! Color).


The layout of the card is a fun fold, cased from Patty Bennett who is another million sales achiever. I recently watched one of her latest YouTube videos on making this fun layout. As she is in America I've changed the measurements to Australian card size.


The fun fold can open and close and fits inside a normal size envelope. Dimensions for cutting and scoring are listed below. I created my own DSP with the Pretty Perennials Stamp Set and Whisper White Cardstock.

Measurements: 

Card Base - Cut at 21cm x 14.9cm

                     Score and fold at 5.5cm, 8.5cm, 12.5 and 15.5cm


Whisper White (DSP) - Cut two at 14.4cm x 5cm each

                                        Cut middle piece at 14.4cm x 3.5cm

Stamp images onto Whisper White panel in the above mentioned colors. I always start with the larger image and work my way down to the smallest. 


Main front panel

Stitched Rectangle Die - Use 10.4 x 6.9cm in Whisper White 

Coastal Cabana  - Cut 10.5 x 7.2cm

To create flowers I've used the Blending Brushes in Magenta Madness and Mango Melody adding ink onto Whisper White Cardstock then die cut out the images. I've also used coloured Cardstock and Vellum for the die images. The sentiment is in Bermuda Bay and fussy cut out the Happy. 


I've also stamped images onto the back of the envelope for a fun way to use the stamps. I especially like the sentiment Happy Mail, as who doesn't like to receive a card in the mail!


I had some left over die cuts from making the card, so I decided to create a quick bookmark which also fits nicely inside the envelope with the card. Coastal Cabana Ribbon to finish off nicely.

Well that's it for me today, I hope you enjoyed my happy projects. I'm so looking forward to seeing all of the Design Team's creativity, so make sure you complete the hop. Next up is the lovely Sara click on the link below to see her project.


Happy Stamping

Vicki Boucher