Showing posts with label Heat Embossing. Show all posts

23 September 2024

Heart of Christmas Blog Hop - Week 8


Hello and welcome my friends,

My name is Vicki Boucher and I'm from Melbourne, Australia. Today, I'll be sharing with you a Christmas card I've made for the latest blog hop with the team from Art With Heart in Australia and we are now onto week 8.

The Heart of Christmas blog hop will be on Monday at 8pm each week until November 25th. I'm looking forward to seeing everyone's beautiful creations, so make sure you visit everyone's blog. The link for the next person will be at the end of my blog.


Here's my card for tonight's blog hop I used the Decorative Trees bundle (164085) which is located on page 42 of the Stampin' Up! Mini Catalogue. I created a whimsical Christmas card using soft tones from the three colours I used and made a magical watercolour wash background.


Starting with the three Christmas trees I heat embossed them using white Stampin' Emboss Powder and used the emboss resist technique. The colours I used for the trees are Summer Splash, Blueberry Bushel and Fresh Freesia all three colours are beautiful when used for a colour combination. I applied the inks using a Blending Brush for each of the colours and keeping it soft for a pretty look.


I used the same colours for the watercolour wash background using lots of water with the inks to dilute the colours when applied to the watercolour paper. Tip; I like to use the wide brush tip Water Painter and a bowl of water this gives me more control when adding water to the coloured inks. I use the Heat Tool to speed up the drying process and then add more colour to the watercolour paper. 

Afterwards I added lots of splattered ink to the background using the same Water Painter. I also mixed together white Kraft ink diluted with a little water in a bowl. Then tap the brush against a pair of scissors or a pencil to achieve the splattered look. Make sure it's dry before adding your next layer (I found out the hard way that kraft ink takes a lot longer to dry out on watercolour paper than normal cardstock).


As you can see, I used the Iridescent Striped Ribbon it is so pretty and it complements the three colours so well together. Using the ribbon, I made a faux bow to be placed under the trees. I placed Stampin' Dimensionals under the trees for some added dimension. 

The sentiment is from the Decorative Trees stamp set and is stamped in Fresh Freesia ink onto Basic White cardstock. The stitched label die from the Cheerful Daisies dies fits the greeting perfectly and finishes the card off nicely. I used white Iridescent adhesive-backed discs for a little sparkle! They blend in well with the other colours used.


Thank you for visiting my blog today, I would so love to hear your thoughts on my project by leaving a comment below.


Now it's time to visit Judy May's blog, I can't wait to see her beautiful Christmas project.


If the link is broken Sharon is our host for the Heart of Christmas blog hop with all of the list of the participants, click on Sharon Davern's name to see the list.


Please email me if you would like a copy of the 2024-2025 Stampin' Up! Annual Catalogue or Mini 2024 Catalogue send an email to me here


Stampin' Up! 2024 Mini Catalogue


If you live in Australia and don't have a demonstrator, you can purchase any of the Stampin' Up! products by shopping with me at my Stampin' Up! online store here.

Make sure you follow me on social media via Facebook, Instagram and Pinterest.


Happy Stamping

Vicki Boucher


07 April 2024

Creation Station Blog Hop - Heat Embossing


 Hello and welcome,

My name is Vicki Boucher, and I am from Melbourne, Australia. This is the latest hop with the design team at Creation Station, if you have come from Julie Mercer Beltramo or you may have started with me. Please make sure you hop around and see everyone's amazing projects. I'll pop a link at the end of my blog.

The design team at Creation Station are presenting their projects with the theme "Heath Embossing" which is something I just love to use when it comes to creating for my projects. It was certainly a wow factor for me when I first used this technique and one of the reasons I started using Stampin' Up! products. 

The tools you'll need are Versamark Ink 102283, Stampin' Emboss Powders they come in Basics (black, white & clear) 155554 and Metallics (copper, gold & silver) 155555, Heat Tool 129056, Embossing Additions Tool Kit 159971 which includes an Embossing Buddy, Powder Pal, tweezers and small brush. I used White Stampin' Emboss Powder for my projects.


I created two projects using new products by Stampin' Up! called Layers of Beauty bundle (163519) which includes a stamp set, dies and 5 decorative masks. The 5 masks are meant to be layered, one by one to create a special image and they are numbered 1-5 so you know which layer comes next. I absolutely love this bundle and it's available to customers in May 2024. 

I used White Stampin' Emboss Powder for both projects, simply stamp the image in Versamark ink then stamp image onto the cardstock, add the powder shake off any excess powder and then heat set with Heat Tool.


Happy Anniversary Card

I used the large front-sized floral stamp image for my first card once heat embossed, I used the masks starting off with a new In Color Pretty in Pink it's so soft and pretty, I lightly added the ink to the three roses with a small Blending Brush, I found I had more control when adding colour to the cardstock. 


Then I added Lemon Lolly to the small daisies and then finishing off with Boho Blue ink for the leaves.


I added a couple of Smoky Slate leaves die-cut out from the detailed dies, then I added Versamark ink to tip of the leaves and added White Stampin' Emboss Powder. I removed some of the powder with the brush and then heat set with the Heat Tool.


The sentiment is from the Layers of Beauty Stamp Set, heat set using White Stampin' Emboss Powder onto Smoky Slate cardstock and then I used a label die from the Unbounded Love Dies (163383) which is also available in the new Stampin' Up! catalogue. I added Lemon Lolly Solid Gems to finish off the card.


Now for my second card.


For You Card

For my second card I used the same large front-sized floral image and heat embossed it in Stampin' White Emboss Powder. I used the masks again but this time changing up the colours with Moody Mauve for the roses, Pretty in Pink for the smaller flowers and Boho Blue for the leaves.


I layered the large floral image over the Basic White large circle die from the Stylish Shapes Dies. The Boho Blue Cardstock panel has been stamped a few times using a dotted image stamp from the Layering Leaves Stamp Set and then heat embossed with White Stampin' Emboss Powder.


To create the detailed die-cut leaves, I used Basic White Cardstock and die-cut out the leaves from the Layers of Beauty Dies and then I added Boho Blue ink with a Blending Brush. Next, I added Versamark ink to the leaves, then White Stampin' Emboss Powder, brush off any excess with the brush and heat set with the Heat Tool.  


As the images are very small to handle and we don't want to burn our fingers, so I use the tweezers to hold onto the smaller images when heat embossing. It's a lot safer to do it this way.


The sentiment is also from the Layering Leaves Stamp Set, I've stamped the image onto Boho Blue Cardstock, then heat embossed it and die-cut out using a circle die from the Unbounded Love Dies. I added a few of the Boho Blue Solid Gems to finish off the card.


Thank you for visiting my blog today, I would so love to hear your thoughts on my project by leaving a comment below. Make sure you pop over to Teri West for lots of inspiration with her projects.


Make sure you follow me on social media via Facebook, Instagram and Pinterest for more inspiration.

Please email me if you would like a copy of the new Stampin' Up! 2024-2025 Annual Catalogue, please contact me here


Stampin' Up! 2024-2025 Annual Catalogue


If you live in Australia and don't have a demonstrator, you can purchase any of the Stampin' Up! products by shopping with me at my Stampin' Up! online store here.


Happy Stamping

Vicki Boucher


11 June 2023

Artisan Design Team - Les Shoppes Suite Collection


 Hello and welcome,

My name is Vicki Boucher and I'm from Melbourne, Australia. Today, I'll be sharing with you two projects I created for Stampin' Up! earlier this month for my Monthly Artisan Assignment using the Les Shoppes Suite Collection which was shared on Stampin' Up! socials. The design team did such an amazing job on their projects so make sure you check out their creations. I'll have the link at the bottom on my blog.


Les Shoppes Suite Collection


The Les Shoppes Suite Collection (161337) is in the Stampin' Up! Annual Catalogue 2023-24 and is on page 30 of the catalogue. The collection includes Let's Go Shopping Bundle - Photopolymer Stamp Set & Dies (161333), Les Shoppes 12" x 12" Designer Series Paper (161322) and Loose Silver Sequins (161626). For the month of June 2023 a selection of Designer Series Paper is on sale now and the Les Shoppes is one of them. More details below.

Here are my two projects that I have created using the Les Shoppes Suite Collection.


Hello Shoppes Card

I used the Les Shoppes 12" x 12" Designer Series Paper for most of my card and very little stamping at all. I've fussy cut out the buildings and layered them over background DSP. The cobble stone foot path has been coloured in using Misty Moonlight ink with the Blending Brush.


I just love all of the different pieces of dies you can use to create a scene for your shop. My favoutite would have to be the bench set and street lamp which fits perfectly behind the background design pattern of the DSP.


I wanted my shop to be a plant shop so added a few of the die-cut plant images to create plants hanging on the shop front. I also added a few of the Loose Silver Sequins to the green die-cut plants. They look like fairy lights and I could imagine them lighting up at nighttime.


I popped a few stamped potted plants behind the shop. I used Pecan Pie Stampin' Blends by added interest to create depth to the pots and Granny Apple Green Stampin' Blend to colour in the plants.


Bakery Shoppes Card

This was a fun card to create and I so could eat some of those delicious treats from the bakery. I wanted to keep most of the card in a black & white format and only focus on the sweats in colour. Plus, the striped Designer Series Paper in Petal Pink and Flirty Flamingo.


The bakery shop front is heat embossed by stamping the images in VersaMark onto Basic Black Cardstock, White Stampin' Emboss Powder and heat set with the Heat Tool. 


The shop window has been die-cut out using the window die and then I placed the coloured treats behind the shop. The awning is created by using die-cuts in Basic Black & Basic White Cardstock from the Let's Go Shopping Dies.


I've layered the bakery over Basic Black gift tag and black & white stamped background panel. 


To create the stamped panel, I used Stazon Black ink as I found it was better than Memento Black ink. I used most of the sentiments from the stamp set and the sweats, pot plant and shop sign. I stamped them free hand and in random places until there was no more room left, but still leave some white space.


Thank you for visiting my blog today, I would so love to hear your thoughts on my project by leaving a comment below.

Great news is Stampin' Up! have a fantastic sale on at the moment with a selection of Designer Series Paper on sale 15% off from 1-30 June 2023. More details here 


Make sure you pop over onto Stampin' Up! Facebook page or Stampin' Up! Instagram page for lots of inspiration using the Les Shoppes Suite Collection. You will just need to go back to the first weekend of June 2023 to view our projects.

Please email me if you would like a copy of the 2023-2024 Stampin' Up! Annual Catalogue send an email to me here

If you live in Australia and don't have a demonstrator, you can purchase any of the Stampin' Up! products by shopping with me at my Stampin' Up! online store here.

Make sure you follow me on social media via Facebook, Instagram and Pinterest.

Happy Crafting

Vicki Boucher


01 June 2023

#TGIF422 - What Would You Do...


Hello and welcome,

My name is Vicki Boucher and I'm from Melbourne, Australia. Today, I'll be sharing with you a card I've made for TGIF Challenge #TGIFC422 and the challenge is "What would you do ... with a Navy Blue background?" Make sure you check out the design team and see their amazing projects. 


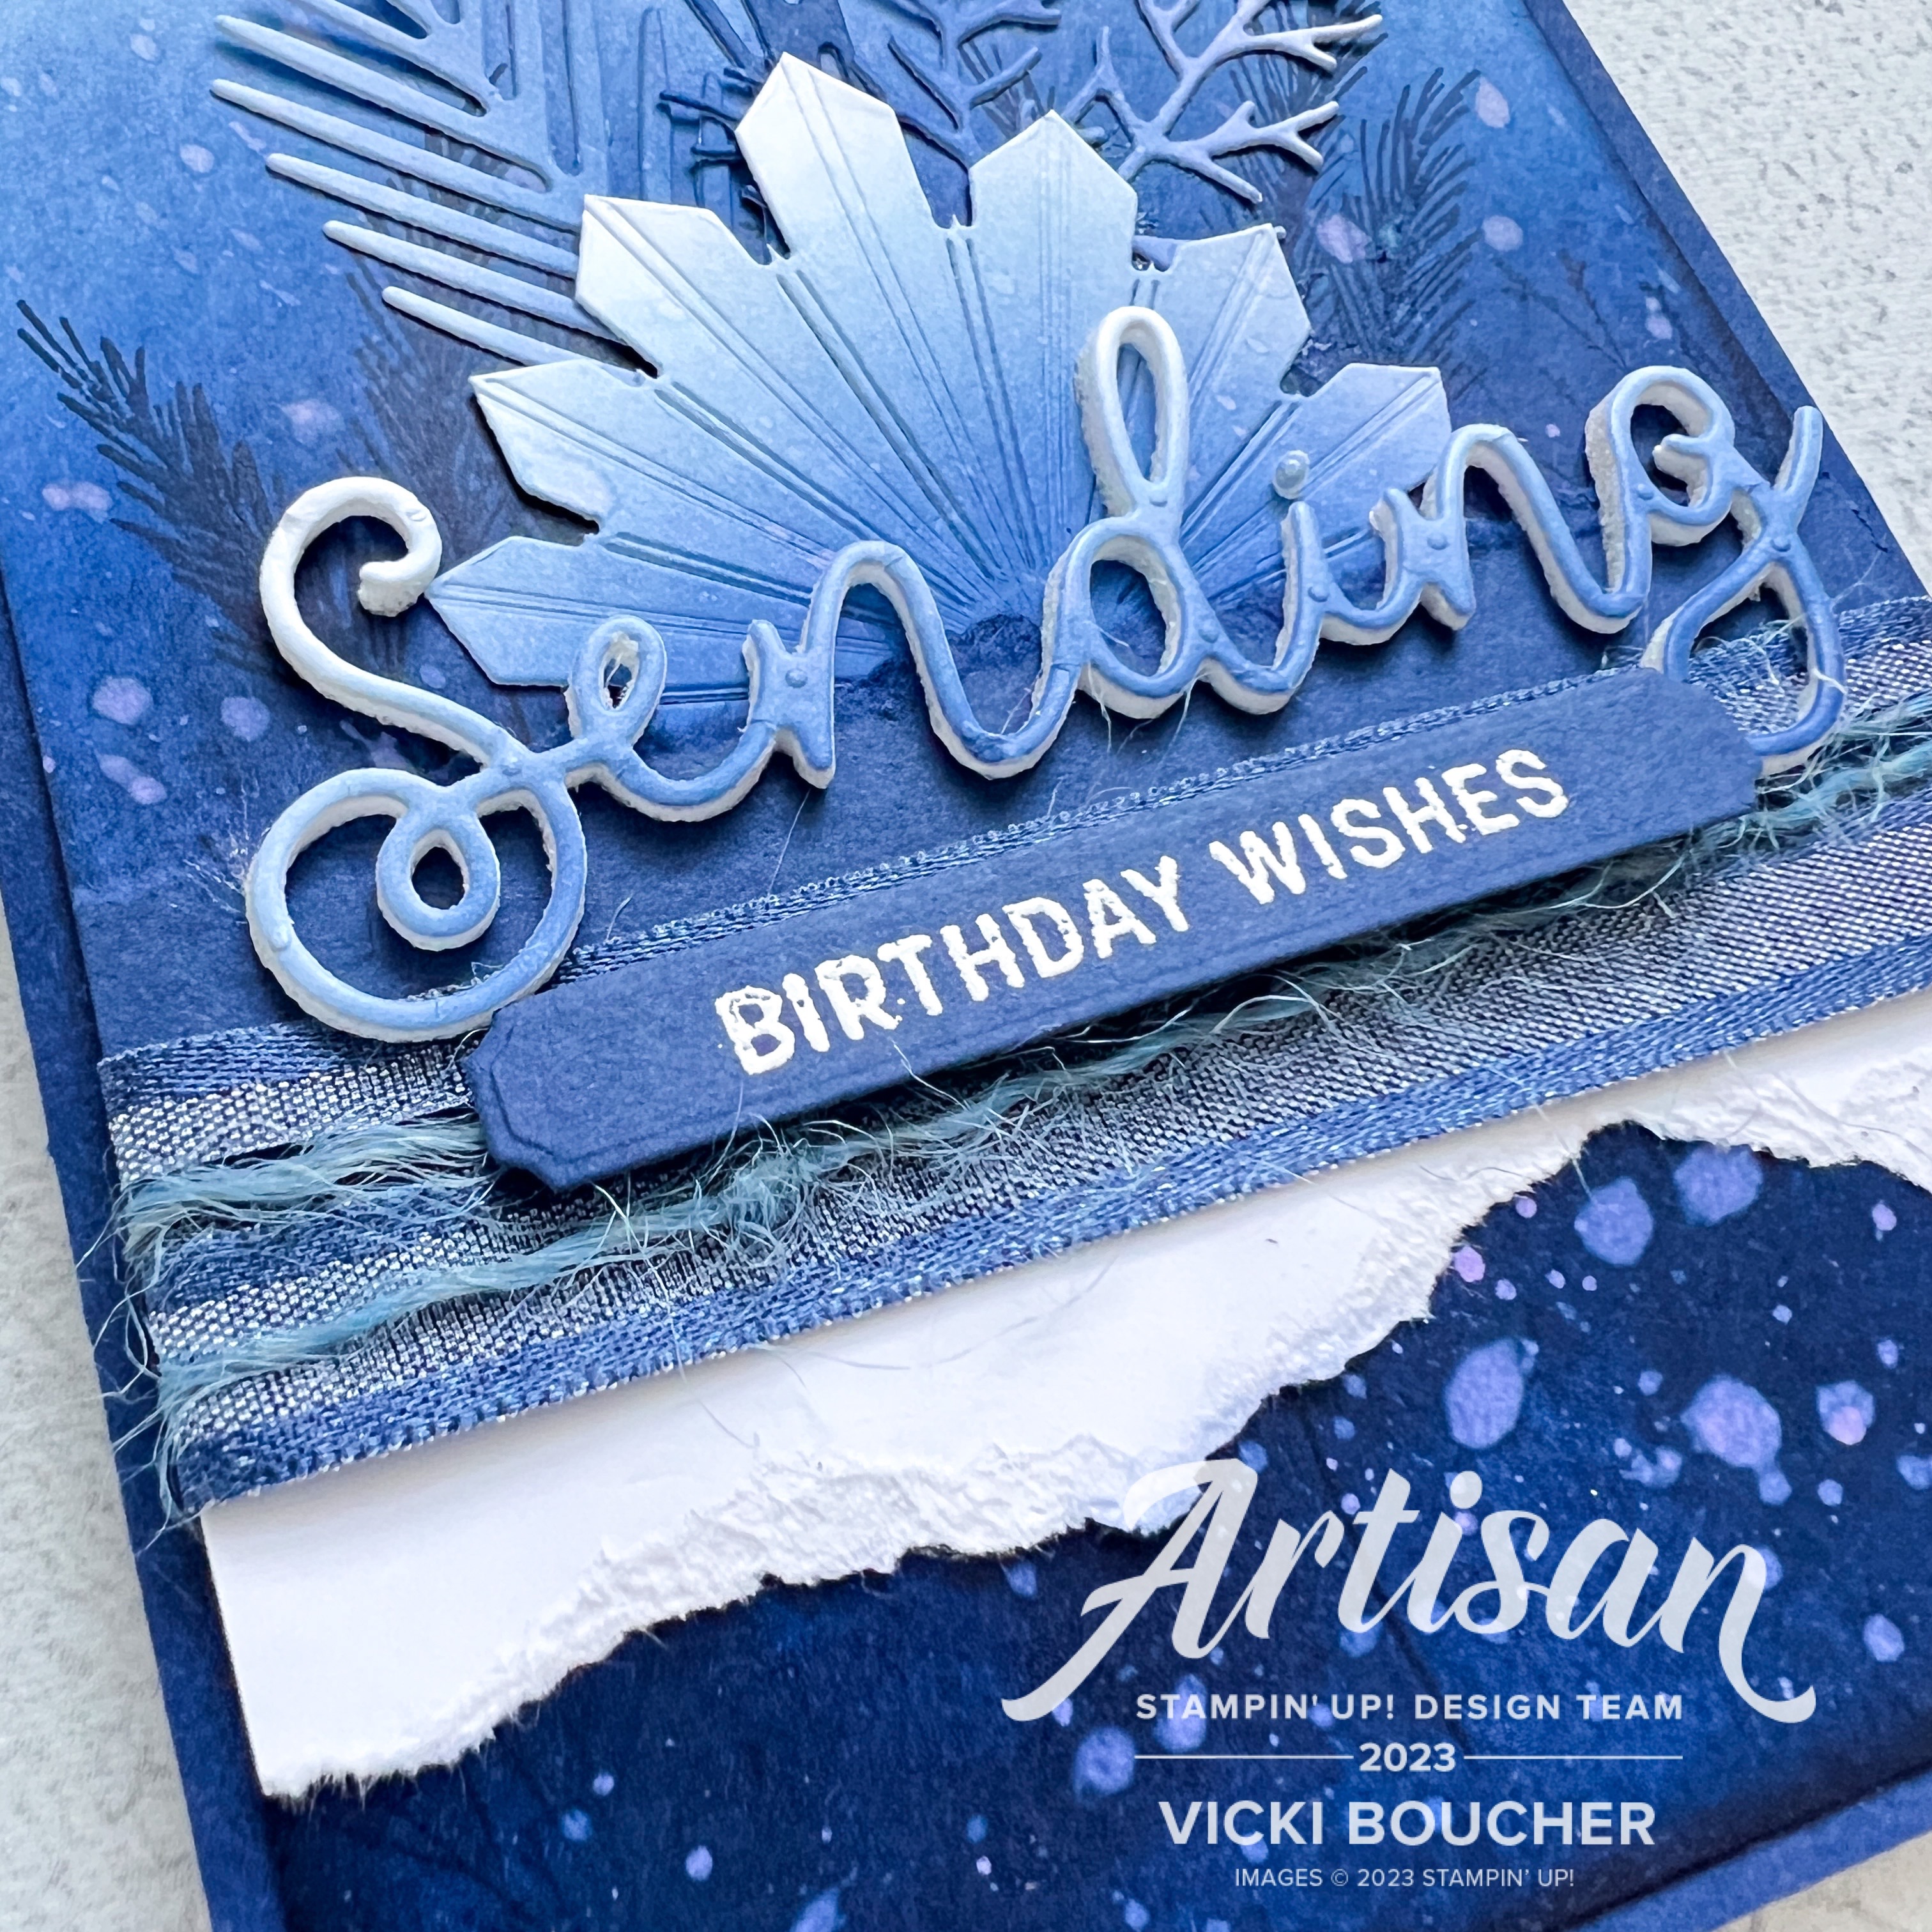
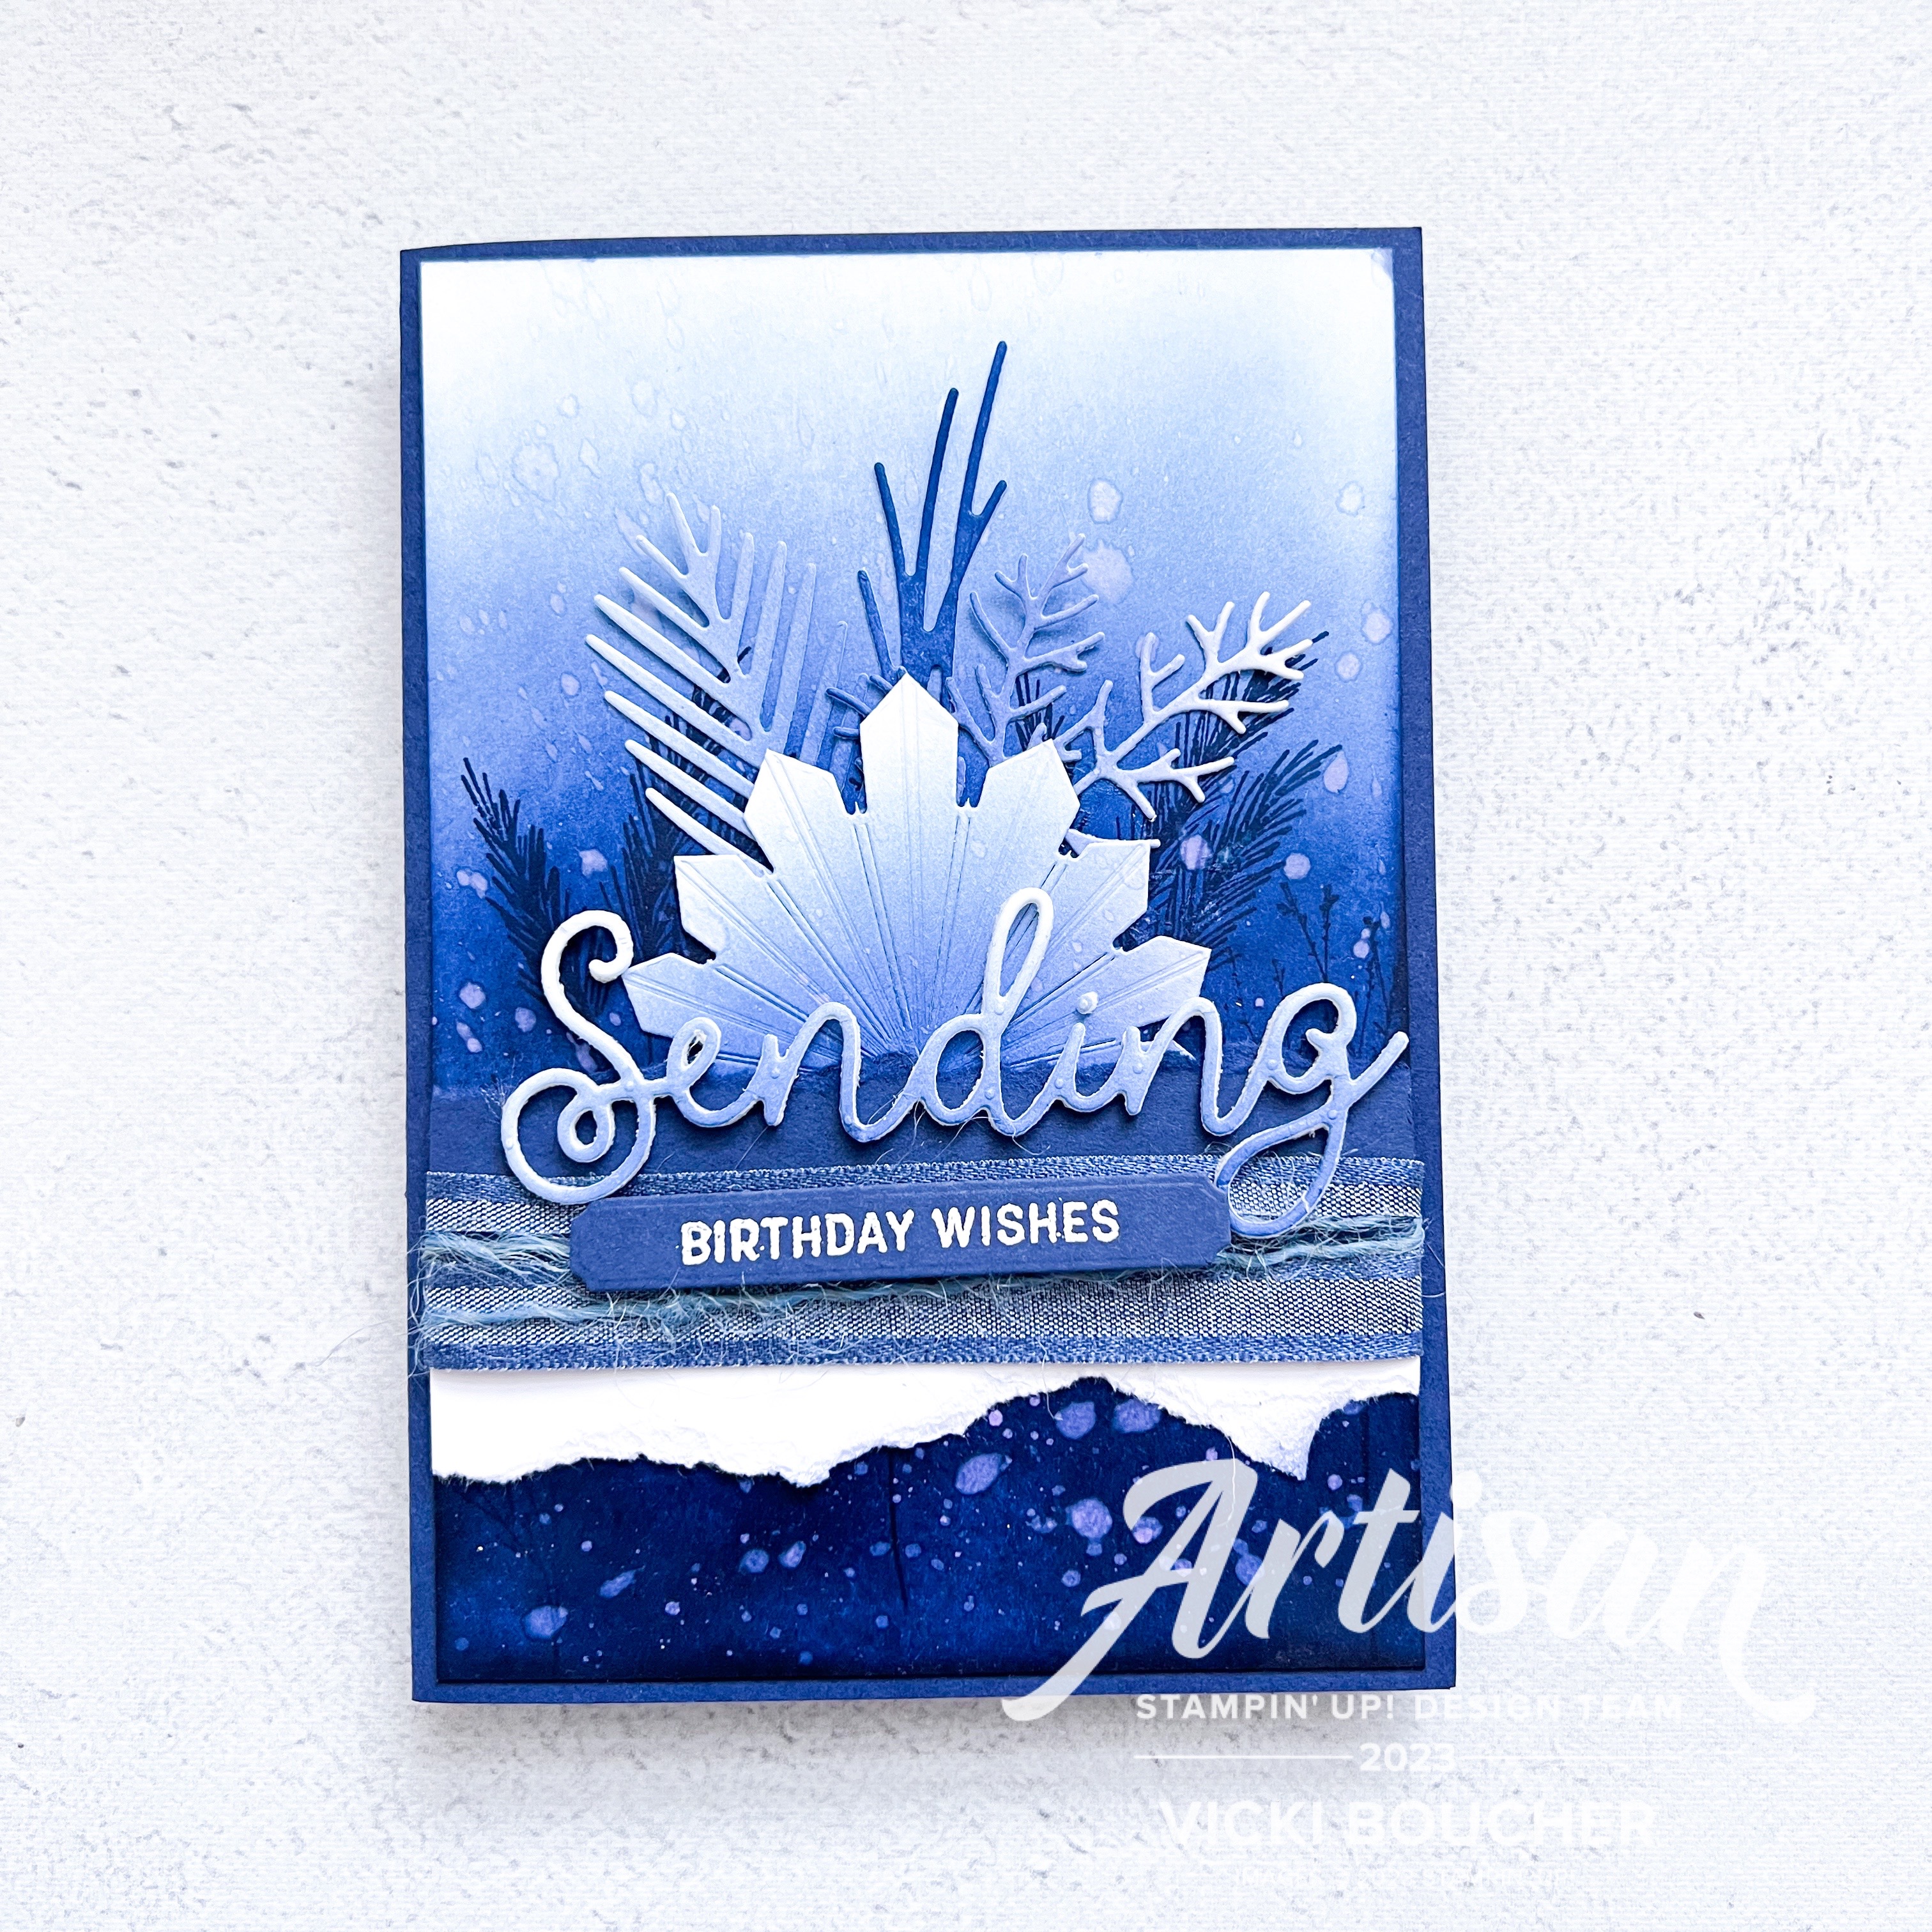
I love anything blue and especially when it comes to Night of Navy it's such a beautiful colour. I just had to enter into the challenge and I needed to create a card for my dad whose birthday is coming up next month. 


Exciting news! I just found out that I was the lucky winner to win the #TGIF422 challenge! Thank you so much to the Design Team for choosing my card!


To create the background panel, I used Basic White cardstock and added my three favourite blues from Stampin' Up! inks. Using a Blending Brush, I started with Boho Blue which is a new In Color for 2023 - 2025, then Misty Moonlight which is a returning color and then to finish off with Night of Navy ink. I love to create an ombre look for my cards. Then I added water droplets to the panel by flicking water using my fingers. It's such a fun technique.


I've used the Earthen Textures stamp set and stamped the images in Night of Navy ink to the background panel. Next, I added layers to the panel starting with torn strips of cardstock in Night of Navy and Basic White. I like to add different textures, so I placed Night of Navy Bordered Ribbon and Boho Blue Jute Trim.

Other elements are die-cut pieces using Earthen Textures Dies and Basic White cardstock by adding colour to the cardstock with the Blending Brush in Boho Blue and Misty Moonlight. Then die-cut out the images.


Then the final touch is using the Sending Smiles Dies and coordinating stamp set. By creating a soft ombre look for the sentiment and heat emboss using Versamark, White Stampin' Emboss Powder onto Night of Navy cardstock and set with the Heat Tool for the sentiment.  


Thank you for visiting my blog today, I would so love to hear your thoughts on my projects by leaving a comment below.

Please email me if you would like a copy of the new 2023-2024 Annual Catalogue, please contact me here


Great news is Stampin' Up! have a fantastic sale on at the moment with a selection of Designer Series Paper on sale 15% off from 1-30 June 2023. More details here 


If you live in Australia and don't have a demonstrator, you can purchase any of the Stampin' Up! products by shopping with me at my online store here

Make sure you follow me on social media via Facebook, Instagram and Pinterest.


Happy Stamping

Vicki Boucher

10 August 2022

Colour INKspiration Challenge #CI127


 Hello and welcome,

My name is Vicki Boucher and I am from Melbourne, Australia. Tonight, it's the latest Colour INKspiration Challenge #CI127 and this photo was chosen by Bronwyn Eastley. Gorgeous combination of colours and it certainly feels like spring from the photo.


The colour combination for #CI127 is Daffodil Delight, Orchid Oasis and Pear Pizzazz. As well as the chosen colours you may also add Basic White, Very Vanilla, Basic Black, Crumb Cake, Sahara Sand and metallics to your project. We also allow 'Ivory' and 'Bronze' in the Stampin' Blends. If you don't have all the colour palette, feel free to use the closest SU substitute (ie: Granny Apple Green instead of Pear Pizzazz .... you get the drift).

The challenge will run for almost 2 weeks until 7pm (AEST) on Monday 22nd August 2022 details to follow at the end of my blog.


Today's card is using the Blessings of Home bundle (157939) which includes Blessings of Home Stamp Set and Flowers of Home Dies and I also used Honeybee Home bundle (157952) for the bee image. All of the products I've used in today's project can be found in the Annual Stampin' Up 2022 - 2023 Catalogue.

I would have to say that Orchid Oasis would have to be one of my favourite of the new In Colors and I wanted to use it as the main focal point. I just love the richness of the colour so I embossed it using the Hive 3D Embossing Folder and added Orchid Oasis ink with the Blending Brush.


I used Shimmery White Cardstock Stazon Ink for the flower and bee. I used the fine tip brush from the Water Painters to colour in the images. The water colour wash background is Daffodil Delight and I like to use the large flat brush tip for a quick block of colour.


The sentiment is from the Blessings of Home Stamp Set, I've heat embossed it using Versamark, Basic Black Cardstock, White Stampin' Emboss Powder and heat set with the Heat Tool. Orchid Oasis comes in a variety of Stampin' Up! products and I really like it in the Baker's Twine and Matte Decorative Dots. 


I hope I've inspired you with the latest challenge and I do hope you'll join in. We so look forward to seeing a variety of projects using the challenge colours. Please ensure that your project is new and made specifically for this challenge.

Upload only one picture per entry straight to the discussion wall and not in an album

Colour INKspiration Challenge #CI127 will run until 7pm (ADET) on Monday 22nd August 2022.

To get your creative ideas flowing, make sure you check out the Crew's Project in the CI127 Album.

Please click on the link here to join the challenge.


Thank you for visiting my blog today, I would so love hear your thoughts on my project by leaving a comment below.


Please email me if you would like a copy of the 2022-2023 Annual Catalogue and the July-Dec 2022 Mini Catalogue, July-August Saleabration Catalogue please contact me here

If you live in Australia and don't have a demonstrator, you can purchase any of the Stampin' Up! products by shopping with me at my online store here.

Make sure you follow me on social media via Facebook, Instagram and Pinterest.


Happy Stamping

Vicki Boucher