Showing posts with label Decorative Masks. Show all posts

26 June 2024

Colour Creations Blog Hop - Basic Gray


Hello and welcome my friends,

My name is Vicki Boucher and I'm from Melbourne, Australia. Today, I'll be sharing with you another colour for Colour Creations blog hop and we are now at week 9 with the Art With Heart Team in Australia. 

The next colour is Basic Gray which is part of the Neutrals range and it's a colour I don't normally use that often, but I'm happy on how this colour palette works so well together in my project. Basic Gray comes in Cardstock, Classic Ink Pad, Ink Refill, Embellishments and Designer Series Paper. 


Today's card I went with the Layers of Beauty bundle (163519) and the coordinating Layers of Beauty Decorative Masks (163517). I used the large size floral image, stamped in Basic Gray ink onto Basic White Cardstock and then I stamped the same image again twice in Melon Mambo ink onto Basic White Cardstock.


Layers of Beauty bundle and Decorative Masks 


The Layers of Beauty Decorative Masks makes colouring easy when using Blending Brushes and ink. The set includes 5 masks that are meant to be layered, one by one, to create pretty coloured roses. The masks are numbered 1-5 so you know which layer comes next. There are also notches in the masks to help with perfect alignment. I only used the first three masks to colour in the flowers and I didn't colour in the leaves. Using the masks gives you variation in colour and depth. 

Exciting news is that this bundle plus many more are all on sale with an extra 10% off the bundle from 5th June - 30th June 2024, so take advantage of the sale and add some new bundles to your collection. 


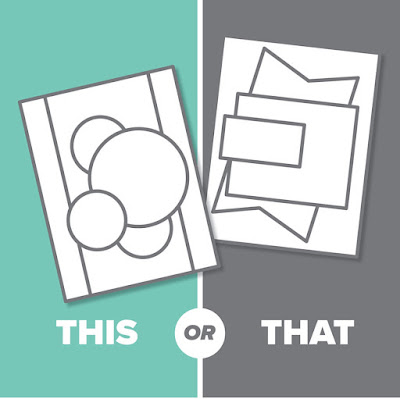
Last week I went with a sketch challenge called THIS or THAT for the month of June and it's located over on Stampin' Up! Official Instagram page. You can also find lots of helpful sketches on page 22 of the Stampin' Up! Annual Catalogue. So, this week I decided to use the other sketch and go with THIS.


I used the second largest circle die from the Spotlight on Nature Dies (163580) and die-cut out part of the Basic Gray Layers of Beauty stamped image. I used the Layers of Beauty large die to die-cut out a section of Melon Mambo floral stamped image and layered them together under the Basic Gray floral image. I also die-cut out a few of the detailed leaves in Basic White Cardstock and placed them under the stamped floral images.


I used the Distressed Tile 3D Embossing Fold (162189) and embossed a panel in Basic White Cardstock. I'm loving white on white detail at the moment when it comes to card making.


I heat embossed the sentiment which is from the Something Fancy Stamp Set (160416) onto Basic Gray Cardstock and die-cut the sentiment out using the second smallest circle die from the Spotlight on Nature Dies. To finish off the card I added a few of the Basic Gray Pearls to the card.


Thank you for visiting my blog today, I would so love to hear your thoughts on my project by leaving a comment below.


Now for the next blog please visit the very talented Catherine Proctor click on the link below.


If the next button link is not working or you'd like to see the entire list of participants go to Catherine Proctor's blog.


Please email me if you would like a copy of the 2024-2025 Stampin' Up! Annual Catalogue send an email to me here

If you live in Australia and don't have a demonstrator, you can purchase any of the Stampin' Up! products by shopping with me at my Stampin' Up! online store here.

Make sure you follow me on social media via Facebook, Instagram and Pinterest.


Happy Stamping

Vicki Boucher


17 October 2021

Global Design Project #GDP313 Color Challenge


Hello and welcome,

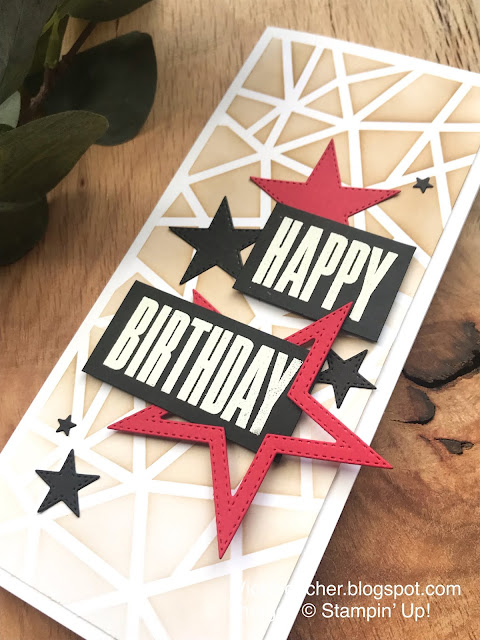
I just had to enter myself in the latest Global Design Project #GDP313 Color Challenge which ends very soon. I love the challenge colors combined together they are Real Red, Sahara Sand and Basic Black. These colors scream Christmas to me but I needed to make a masculine birthday card, so I was up for the challenge! 


I've created a slimline card for the challenge using the Stampin' Up! Decorative Masks - basic patterns there are 4 masks and you'll find them on page 128 in the Annual Catalogue for 2021 - 2022. 


To create my Ombre design I've used a panel of Basic White Cardstock applied Sahara Sand Ink with the Blending Brush and lightly added ink to the paper. As the mask is only 6" x 6" I've moved the mask up the panel and added more ink.


The Stitched Stars Dies are perfect for masculine cards, I've die-cut the stars out in different sizes using Basic Black and Real Red Cardstock. 


To finish off the card I've used the Biggest Wish Stamp Set for the sentiment I love the big bold words and they go well with the card. I've heat embossed White Stampin' Emboss Powder onto Basic Black Cardstock. 

Thank you for visiting my blog today, I would so love hear your thoughts on my project by leaving a comment below.

If you live in Australia and don't have a demonstrator, you can purchase any of the Stampin' Up! products by shopping with me at my online store here.


Happy Stamping

Vicki Boucher

04 July 2021

Creation Station Blog Hop - Texture


Hello and welcome,

Can you believe it we are already into July, the months are flying bye so quickly! Today's project for July 2021 Creation Station blog hop is all about 'Texture' using Stampin' Up! products. We can use Embossing Powder, Embossing Paste and or Embossing Folder. These products are available to purchase in the Stampin' Up! 2021 - 2022 Annual Catalogue and in my online store.


When it comes to creating my projects and using different mediums, I just love to have some fun! I finally purchased the Shimmery White Embossing Paste (I have no idea why it's taken me so long) and it was perfect to go with the new Plenty of Patterns Decorative Masks to create my under the sea birthday card.


Creating with texture is always fun, I've used lots of glitter, sparkle, sequins and gold. I love how it shimmers against the light. I'll show some tips and tricks on how to create this magical card.


I started with a panel of Shimmery White Cardstock, coloured the panel in using the Blending Brushes and Ink in the following Stampin' Up! Colours - Fresh Freesia, Gorgeous Grape, Magenta Madness, Coastal Cabana and Bermuda Bay.


Using the scalloped Decorative Mask which reminds me of a mermaid, place over the coloured panel and secure the mask with Washi Tape. Run the Versamark Ink Pad over the mask, then sprinkle Heat and Stick Powder and remove carefully. 


Heat set with the Heat Tool and then apply Gold Gilded Leafing by rubbing it onto the card and remove excess leafing with your fingers or a soft brush. Just be careful not to get the leafing go all over the place, so make sure you use only a little at a time.


The Friends Are Like Seashells Bundle page 27 in the Annual Catalogue coordinates with the Seashells 3D Embossing Folder. I've embossed the Seashells using Basic White Cardstock and then die cut using the large die from the Seaside Seashells Dies


To create a different look for my under the sea card, I've fussy cut out some of the seashells away from the embossed piece and coloured them in using different coloured Inks with the Blending Brushes. Then I added Clear Wink of Stella all over the seashells.


The two starfish are stamped in Versamark Ink onto Fresh Freesia and Coastal Cabana Cardstock, sprinkled with White Stampin' Powder and heat set with the Heat Tool. 


Before adding the seashells etc... I created the sparkly sandy seabed by mixing the Shimmery White Embossing Paste with a tiny drop of Coastal Cabana Ink, plus a tiny drop of Magenta Madness and Gorgeous Grape Ink. This Embossing Paste takes a lot longer to dry, so I added Sequins for Everything to the Shimmery White Paste.


To finish off the card I stamped the sentiment using Versamark Ink onto Basic Black Cardstock, added White Stampin' Powder and heat set with the Heat Tool. Then fussy cut out the greeting. I added more Wink of Stella and a few of the sequins from the Expressions in Ink Ephemera Pack.


Now it's time to visit the lovely Julie Beltramo to see her amazing creations and visit her blog. I'm looking forward to reading all about her project and I'm sure you will too.


Thank you for visiting my blog today, I would so love hear your thoughts on my project by leaving a comment below.

If you live in Australia, you can purchase any of the Stampin' Up! products by shopping with me at my online store here.

Happy Stamping 

Vicki Boucher


18 September 2019

Stampin' Up! 2019 Holiday Catalogue Art With Heart Team Blog Hop Week 5

Hello and welcome,

This is week 5 with the Art With Heart Team blog hop. The Stampin' Up! products that I've used is from the Itty Bitty Bundle combined with Black, White, Silver and a touch of sparkle. I wanted an elegant card using these colours and mediums.


Itty Bitty Christmas Bundle
Itty Bitty Christmas 
?dbwsdemoid=4013366
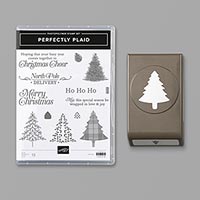
Perfectly Plaid


I haven't used the White Embossing Paste with the Pattern Party Decorative Masks for awhile now and for my card, I've used the Diamond shape mask. Once the Paste has been applied to a piece of Whisper White Cardstock and I quickly sprinkled the Stampin' Glitter in Dazzling Diamonds onto the paste. You can either wait until it dries or heat set with the Heat Tool. 


The next layer I've used is a piece of Black Foil Sheet and the star Die from Christmas Layers Dies. I just love the Black Foil Sheets it can make your card shine like a black diamond. To continue with the Black Foil I punched out a Christmas Tree using the Pine Tree Punch and before adding the tree to the card, I've placed Silver Metallic Thread underneath it.


To finish off my card I've used the greeting from the Itty Bitty Christmas Stamp Set which coordinates with the Christmas Layers Dies. The Season's Greetings has been inked up in Versamark Ink, adding Black Stampin' Emboss Powder and heat set with the Heat Tool. The sentiment is layered over the tree with Stampin' Dimensionals.


Thank you for visiting my blog today now it's time to visit Claire Dayl's blog and everyone from The Art With Heart Team. 

If you would like to purchase any of the Stampin' Up! products please click on my online store here.

Product List:

Stamp Set: Itty Bitty 
Dies: Christmas Layers Dies
Colouring Tools: Embossing Paste, Palette Knives, Pattern Party Decorative Masks, Dazzling Diamonds Stampin' Glitter, Versamark, Black Stampiun' Emboss Powder, Embossing Buddy and Heat Tool.
Cardstock/ Papers: Black Foil Sheets and Whisper White in Thick and Standard
Other Stampin' Up! products: Pine Tree Punch, Silver Metallic Thread and Big Shot (retired)