My name is Vicki Boucher and I'm from Melbourne, Australia. Today, I'll be sharing with you the third of many blog hops. It's Week 3 of Colour Creations with the Art With Heart Team in Australia.
The third colour is Moody Mauve which is part of the In Color Collection for 2023 - 2025 and Stampin' Up! have created a beautiful dusky pink and I've combined it with a favourite colour palette of mine.
Paper Florist Dies (161284)
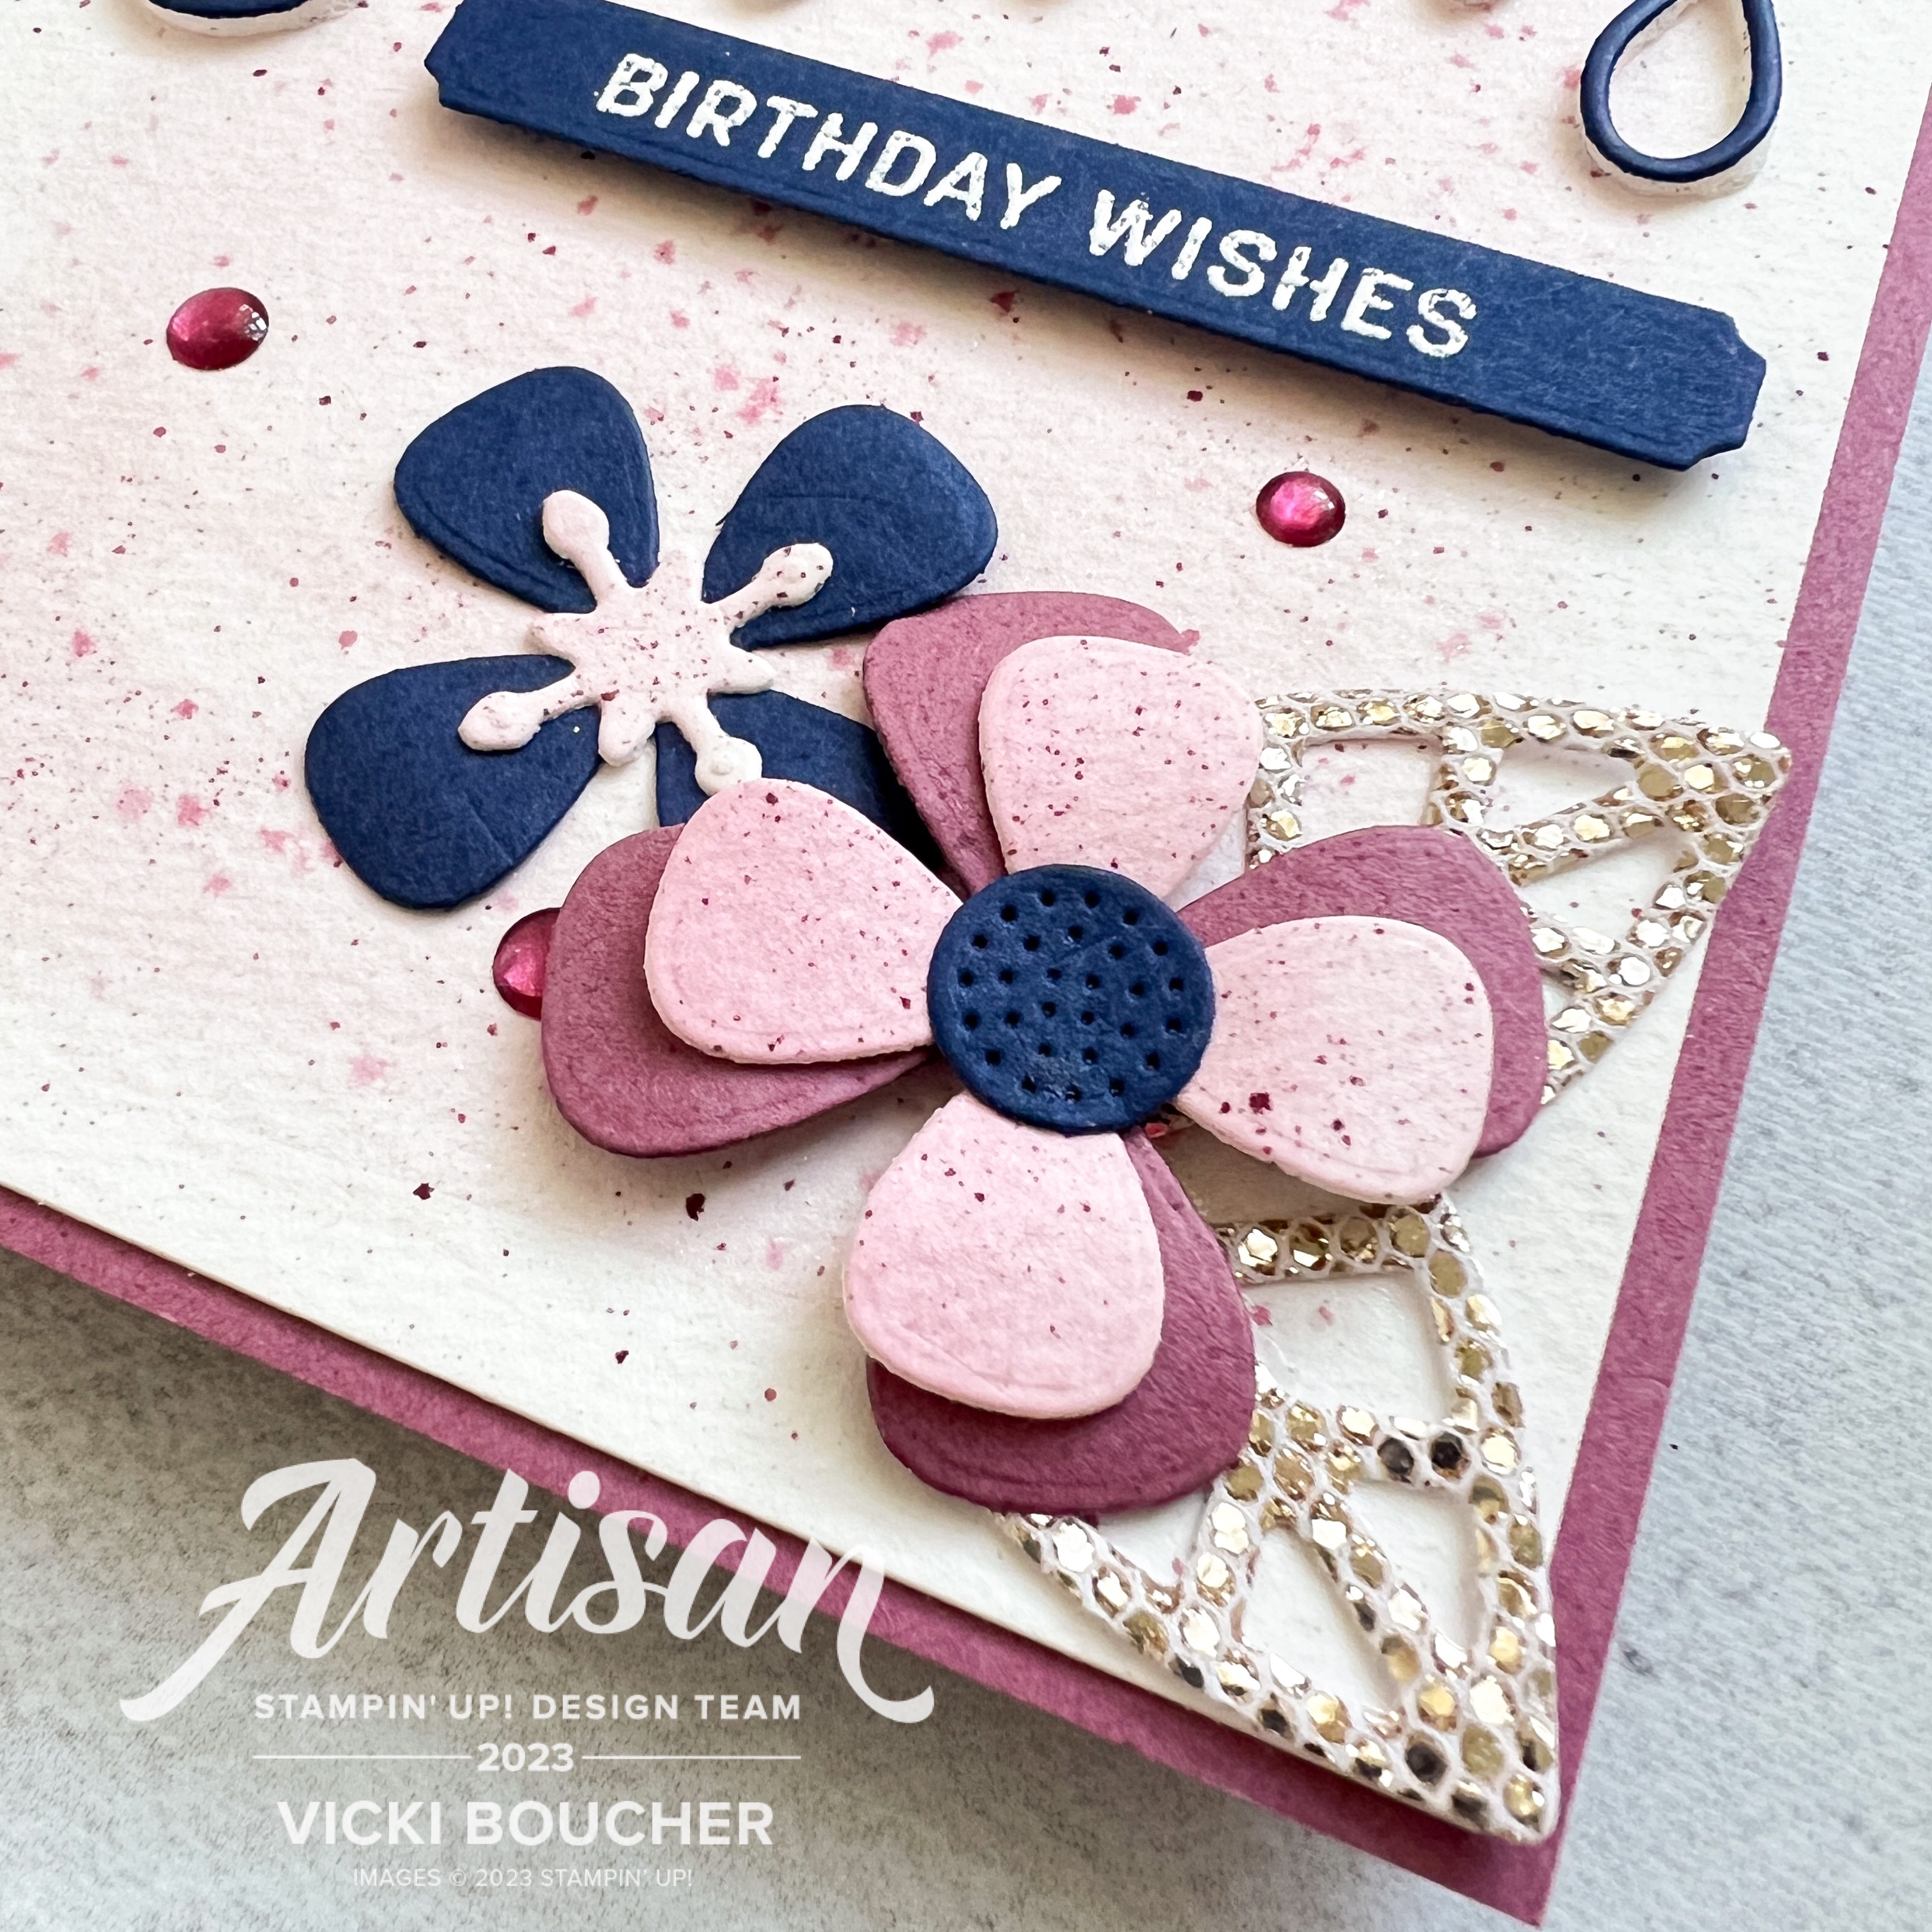
I just had to try out another new Stampin' Up! product from the Annual 2023 - 2024 Catalogue and I'll be showing you the Paper Florist Dies (161284) which is focused on page 33 of the catalogue. I just love the idea of creating paper flowers and with a little bling.
Moody Mauve is a dark pink, but I do like to wash it out for the flower petals by making a watercolor wash onto a piece of Fluid 100 Watercolor Paper. Once dry I then die-cut the flowers using the Paper Florist Dies. I also used Moody Mauve, Night of Navy Cardstock and More Dazzle 6" x 6" Specialty Paper in Champagne.
The background panel watercolor wash is Bubble Bath ink, water and Clear Wink of Stella. I like to mix the three together in the well of the Stampin' Pad and then add the glitter ink to the watercolor paper using Water Painter the large flat brush gives you a quicker application.
Once dry I then add Moody Mauve ink, I splatter the ink using one of the Water Painters and sometimes I add water to the ink for a lighter colour.
I used Night of Navy Cardstock and heat embossed using VersaMark, White Stampin' Emboss Powder and Sending Smiles Stamp Set, then die-cut the images using the coordinating Dies to create the sentiment. For some more bling I used Moody Mauve 2023-25 In Color Dots.
Thank you for visiting my blog today, I would so love to hear your thoughts on my projects by leaving a comment below.
Now for the next blog please visit the very talented Rachel Woollard on the link below.
If the next button link is not working or you'd like to see the entire list of participants go to Catherine Proctor's blog.
Please email me if you would like a copy of the new 2023-2024Annual Catalogue, please contact me here.
If you live in Australia and don't have a demonstrator, you can purchase any of the Stampin' Up! products by shopping with me at my online store here.
Make sure you follow me on social media via Facebook, Instagram and Pinterest.
It's Stamping 2nd Sunday latest blog hop for October and for this month the design team will be showcasing the theme 'Treats Not Tricks' in our projects. The list of participants will be at the end of this blog. Did you see follow Artisan, Tami Hewlett's amazing projects? I just love her creations!
Today, I'll be sharing with two projects and turning them into 3D gifts for a special occasion such as a birthday, anniversary, engagement, wedding etc...
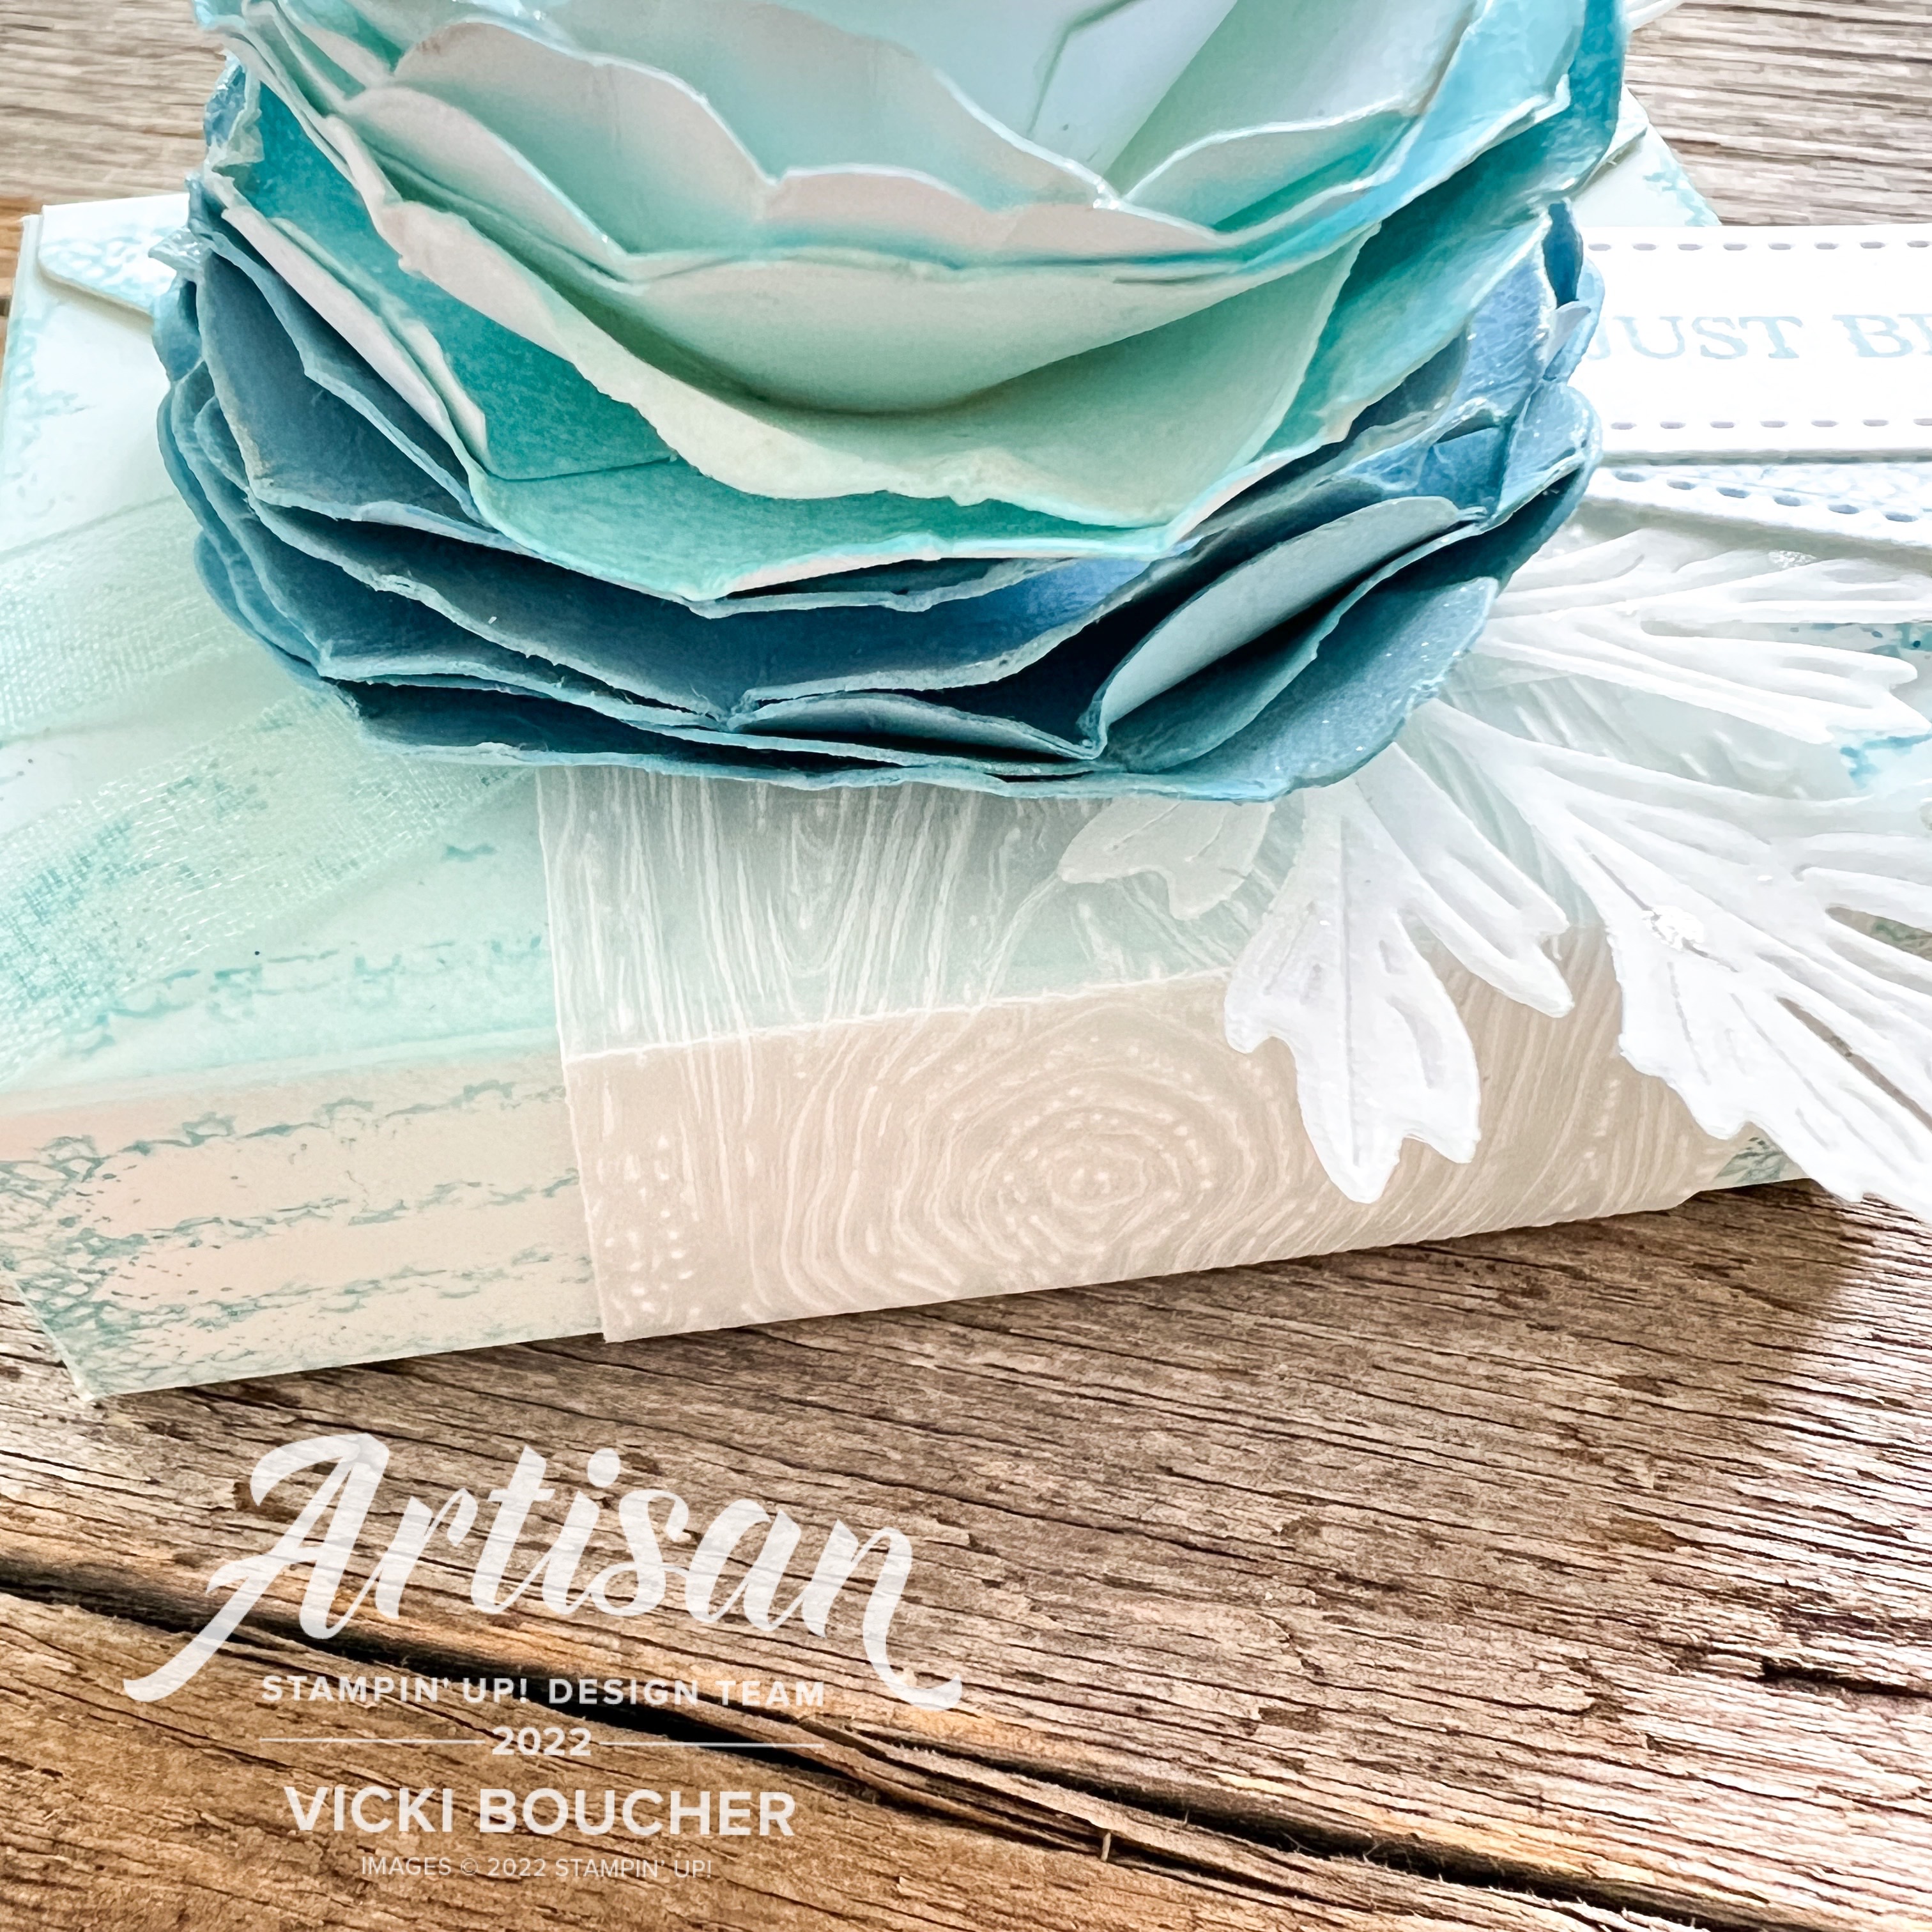
I've used the Ranunculus Romance Stamp Set and coordinating Ranunculus Dies which can be found in the Stampin' Up! Annual 2022-23 Catalogue. I haven't really used this stamp set and dies much in my projects, so this was the perfect opportunity to use them. I've also used the adorable Envelope Treat Boxes they came in a pack of 10 in white, they are easy to fold and ensemble. I've stamped images and added ink with a Blending Brush onto the box. I love the scripty stamp image, it's very vintage.
I have to give a shout out to Charlet Mallett who is an amazing paper crafter and is also on the Artisan Design Team for 2022. She created a beautiful 3D paper flower back in March 2022 and I've CASED her flower but changed up the colours.
Blushing Bride 3D Paper Flower and Box
I think Blushing Bride is my go-to colour at the moment and it's a pretty colour to use. To make the 3D paper flower you'll need to die-cut out about 12 outline flower shapes using the flower die. You will need about 5 in Blushing Bride and 7 in Basic White Cardstock. I added Blushing Bride ink with the Blending Brush to the edges of the Basic White die-cut flowers and left one white.
Here comes the fun part! You'll need a Bone Folder and Stampin' Spritzer filled with water. One layer at a time lightly spritz, then with the Bone Folder curve the edges inwards and crinkle the edges using your fingers. As you get closer to the center piece, cut a slit towards the middle of the flower layer and use adhesive such as Multi-Purpose Glue. You may want to cut up to four slits on the finale layer.
To assemble the flower, start at the bottom layer, add Multi-Purpose Glue as you go with each layer. To create the final center piece, I used a strip of Basic white Cardstock, coloured the edges using the Blending Brush and Blushing Bride ink. Then with Paper Snips snip all the way along the strip, creating fine slits and then roll up into a spiral. I used Stampin' Seal + to secure the spiral. To add the center piece to the flower I used the glue gun works best.
I wanted to add some sparkle to the flower, so I've used Clear Wink of Stella to the edges of each layer. It's hard to see in the photos but in real life it looks so pretty.
To create the belly band around the box I used Vellum cut the strip at 5cm x 19.5cm. Then dry embossed the Vellum strip using the Timeworn Type 3D Embossing Fold. Once embossed score at 4cm, 6.5cm, 12.5cm and 15cm to fit around the box and adhere using Stampin' Seal +
I added White Glittered Organdy Ribbon, two Vellum leaves and the sentiment stamped in Blushing Bride onto Basic White Cardstock and die-cut out using the Tailored Made Tag Dies.
Balmy Blue 3D Paper Flower and Box
I've used Balmy Blue for the second treat box and flower. Using the same technique as above. You'll need about 5 in Balmy Blue and 7 in Basic White Cardstock. I added Balmy Blue ink with the Blending Brush to the edges of the Basic White die-cut flowers and left one white. Then create your 3D flower as above directions.
To create the final center piece, I used a strip of Basic white Cardstock, coloured the edges using the Blending Brush and Balmy Blue ink. Then as above cut tiny slits all the way along the strip and roll up into a spiral. Adhere the center piece to the flower with a heat gun.
To create the belly band around the box I used Vellum cut the strip at 5cm x 19.5cm. Then dry embossed the Vellum strip using the Timber 3D Embossing Fold. Once embossed score at 4cm, 6.5cm, 12.5cm and 15cm to fit around the box and adhere using Stampin' Seal +
I added Pool Party 3/8" Sheer Ribbon, two Vellum leaves and the sentiment stamped in Balmy Blue onto Basic White Cardstock and die-cut out using the Tailored Made Tag Dies.
Thank you for visiting my blog today, I would so love to hear your thoughts on my project by leaving a comment below.
Please email me if you would like a copy of the 2022-2023Annual Catalogue and the July-Dec 2022 Mini Catalogue, please contact me here.
If you live in Australia and don't have a demonstrator, you can purchase any of the Stampin' Up! products by shopping with me at my online store here.
Make sure you follow me on social media via Facebook, Instagram and Pinterest.
Happy Stamping
Vicki Boucher
To see all of the amazing projects by the Stamping Sunday Design Team please click on their names below. Next up is the fabulous creative Mikaela Titheridge from the UK.
It's Stamping 2nd Sunday latest blog hop for July, hosted by Sara Levin and for this month the design team will be showcasing the theme 'Stitched' in our projects. The list of participants will be at the end of this blog.
Today's projects is a handmade card and 3D Mini Paper Pumpkin Box using Stampin' Up! products from the Annual Catalogue for 2021 - 2022. I've used the Pierced Blooms Dies as my main focal point plus adding the Stitched So Sweetly and Floral Heart Dies.
I love anything that has some sort of stitching for my projects, it just gives that extra special touch! Both the card and Mini Paper Pumpkin Box are very similar and are perfect as a gift set to someone special. I've just changed the layout of the flowers and leaves.
Card and Mini Paper Pumpkin Box
When it comes to creating quite a few die cuts I like to use a half sheet of Cardstock in this case Shimmery White and Watercolor Paper. I add a wash of water with using the wide brush tip of the Water Painter and then apply coloured ink. Sometimes I like to mix in the similar colours or even create light and dark with the same colour.
The colours for the flowers are Petal Pink, Blushing Bride and a little of Polished Pink Ink. For the leaves I've used Mint Macaron, Soft Succulent and a little of Evening Evergreen Ink. Then I'll die cut out the pieces. I used Soft Succulent Shimmer Vellum for the leaves.
To create some dimension to the flowers I've used the Bone Folder to curl the petals and the Stampin' Pierce Mat with the Take Your Pick Tool by creating a circular motion with the Stylus.
The card base is Thick Basic White Cardstock with a panel of Hand-Penned Designer Series Paper This DSP is on sale from 1st July until 2nd August 2021 with 15% discount. There are a total of 9 Designer Series Paper on sale, more details below and on my online store. I've used the Mint Macaron and white stripes DSP for my background panel.
The layout is on a Shimmery White die cut piece using the largest die from the Stitched So Sweetly Dies and I've added a Mint Macaron wash with the Water Painter.
The greeting is from Create With Friends Stamp Set, stamped in Soft Succulent and fussy cut out. It's layered out the stitched label die from Floral Heart Dies. I've added a few of the Mint Macaron Genial Gems to the card.
The Mini Paper Pumpkin Box is almost the same as the card except I've added the cute paper bow from the Pierced Blooms Dies and there are no Gems on the box.
Thank you for visiting my blog today. To see all of the amazing projects by the Stamping Sunday Design Team please click on their names below.
I’ve
entered into the latest Just Add Ink Sketch Challenge #492, this is a fun sketch challenge which Jackie Aitken has chosen.
My creation
is using a number of different products from the Annual, Mini, Saleabration Stampin’ Up! Catalogues to form this Mother’s Day card. I know Mother’s Day is still awhile
away, but I wanted to start now and create a 3D Flower as the main focal point for
the card.
I’ve used
the Heart Punch and punched out a number of hearts in Petal Pink Cardstock. I
started to sponge Petal Pink ink onto the edge of the hearts but I wanted more
depth, so I added Grapefruit Grove Ink. Punch out 1” Circle Punch as the flower
base, I’ve scrunched up each petal before I layered them on top of the circle
and add more of the petals to form the layers with adhesive. The black stamen
is a strip of Basic Black Cardstock 20cm x 2cm, snipped with Paper Snips all the
way along and then rolled up. Securing it with a couple of Mini Glue Dots and
fanning out the strips. I added two leaves from the Rooted In Nature Stamp Set
& Nature’s Roots Dies using Old Olive, Ink and Cardstock.
Now for the
card. The card base is Basic Black followed by the gorgeous black and white
striped paper – Golden Honey Specialty DSP which is from the Saleabration Catalogue.
I just love the bold stripes combined with the Petal Pink and Old Olive.
The black writing
is from the stamp set Very Versailles, which fits nicely inside the Heirloom
Frames Dies and 3D Embossing Folder.
I’ve used
White Stampin’ Emboss Powder for the sentiment, heat embossed and fussy cut out.
It’s layered over the Whisper White scalloped die cut from the Painted Labels Dies
and a strip of Basic Black Cardstock. I had to add some bling to the card, so I
added the Champagne Rhinestone Basic Jewels which complements well with Petal
Pink.
What do you
think of my card? It's not one for posting in the mail or even placing in an envelope, but it could be framed. Thank you for visiting my blog today.
To view all
of the amazing creations from the Just Add Ink crew please click on the linkhere.
Happy
Crafting
Vicki
Boucher
Product
List
Ink: Old Olive, Petal Pink, Grapefruit
Grove, Memento and Versamark
Paper/Cardstock:
Basic Black,
Whisper White, Petal Pink, Old Olive and Golden Honey Specialty DSP
Stamps: Rooted In Nature, Very Versailles
and Timeless Tulips
Dies: Heirlooms Frames Dies & 3D
Embossing Folders, Painted Labels and Nature’s Roots Dies
Punches:
Heart Punch Pack
and 1” Circle Punch
Other
Stampin’ Up! Products: Paper Snips, Mini Glue Dots, Champagne Rhinestone Basic Jewels, White
Stampin’ Emboss Powder, Embossing Buddy, Heat Tool and Sponge Dauber