Showing posts with label Blushing Bride. Show all posts

09 October 2022

Stamping Sunday Blog Hop - Treats Not Tricks


Hello and welcome,

It's Stamping 2nd Sunday latest blog hop for October and for this month the design team will be showcasing the theme 'Treats Not Tricks' in our projects. The list of participants will be at the end of this blog. Did you see follow Artisan, Tami Hewlett's amazing projects? I just love her creations!

Today, I'll be sharing with two projects and turning them into 3D gifts for a special occasion such as a birthday, anniversary, engagement, wedding etc...


I've used the Ranunculus Romance Stamp Set and coordinating Ranunculus Dies which can be found in the Stampin' Up! Annual 2022-23 Catalogue. I haven't really used this stamp set and dies much in my projects, so this was the perfect opportunity to use them. I've also used the adorable Envelope Treat Boxes they came in a pack of 10 in white, they are easy to fold and ensemble. I've stamped images and added ink with a Blending Brush onto the box. I love the scripty stamp image, it's very vintage. 

I have to give a shout out to Charlet Mallett who is an amazing paper crafter and is also on the Artisan Design Team for 2022. She created a beautiful 3D paper flower back in March 2022 and I've CASED her flower but changed up the colours.


Blushing Bride 3D Paper Flower and Box

I think Blushing Bride is my go-to colour at the moment and it's a pretty colour to use. To make the 3D paper flower you'll need to die-cut out about 12 outline flower shapes using the flower die. You will need about 5 in Blushing Bride and 7 in Basic White Cardstock. I added Blushing Bride ink with the Blending Brush to the edges of the Basic White die-cut flowers and left one white. 


Here comes the fun part! You'll need a Bone Folder and Stampin' Spritzer filled with water. One layer at a time lightly spritz, then with the Bone Folder curve the edges inwards and crinkle the edges using your fingers. As you get closer to the center piece, cut a slit towards the middle of the flower layer and use adhesive such as Multi-Purpose Glue. You may want to cut up to four slits on the finale layer.


To assemble the flower, start at the bottom layer, add Multi-Purpose Glue as you go with each layer. To create the final center piece, I used a strip of Basic white Cardstock, coloured the edges using the Blending Brush and Blushing Bride ink. Then with Paper Snips snip all the way along the strip, creating fine slits and then roll up into a spiral. I used Stampin' Seal + to secure the spiral. To add the center piece to the flower I used the glue gun works best.


I wanted to add some sparkle to the flower, so I've used Clear Wink of Stella to the edges of each layer. It's hard to see in the photos but in real life it looks so pretty.


To create the belly band around the box I used Vellum cut the strip at 5cm x 19.5cm. Then dry embossed the Vellum strip using the Timeworn Type 3D Embossing Fold. Once embossed score at 4cm, 6.5cm, 12.5cm and 15cm to fit around the box and adhere using Stampin' Seal +


I added White Glittered Organdy Ribbon, two Vellum leaves and the sentiment stamped in Blushing Bride onto Basic White Cardstock and die-cut out using the Tailored Made Tag Dies.


Balmy Blue 3D Paper Flower and Box

I've used Balmy Blue for the second treat box and flower. Using the same technique as above. You'll need about 5 in Balmy Blue and 7 in Basic White Cardstock. I added Balmy Blue ink with the Blending Brush to the edges of the Basic White die-cut flowers and left one white. Then create your 3D flower as above directions.


To create the final center piece, I used a strip of Basic white Cardstock, coloured the edges using the Blending Brush and Balmy Blue ink. Then as above cut tiny slits all the way along the strip and roll up into a spiral. Adhere the center piece to the flower with a heat gun.

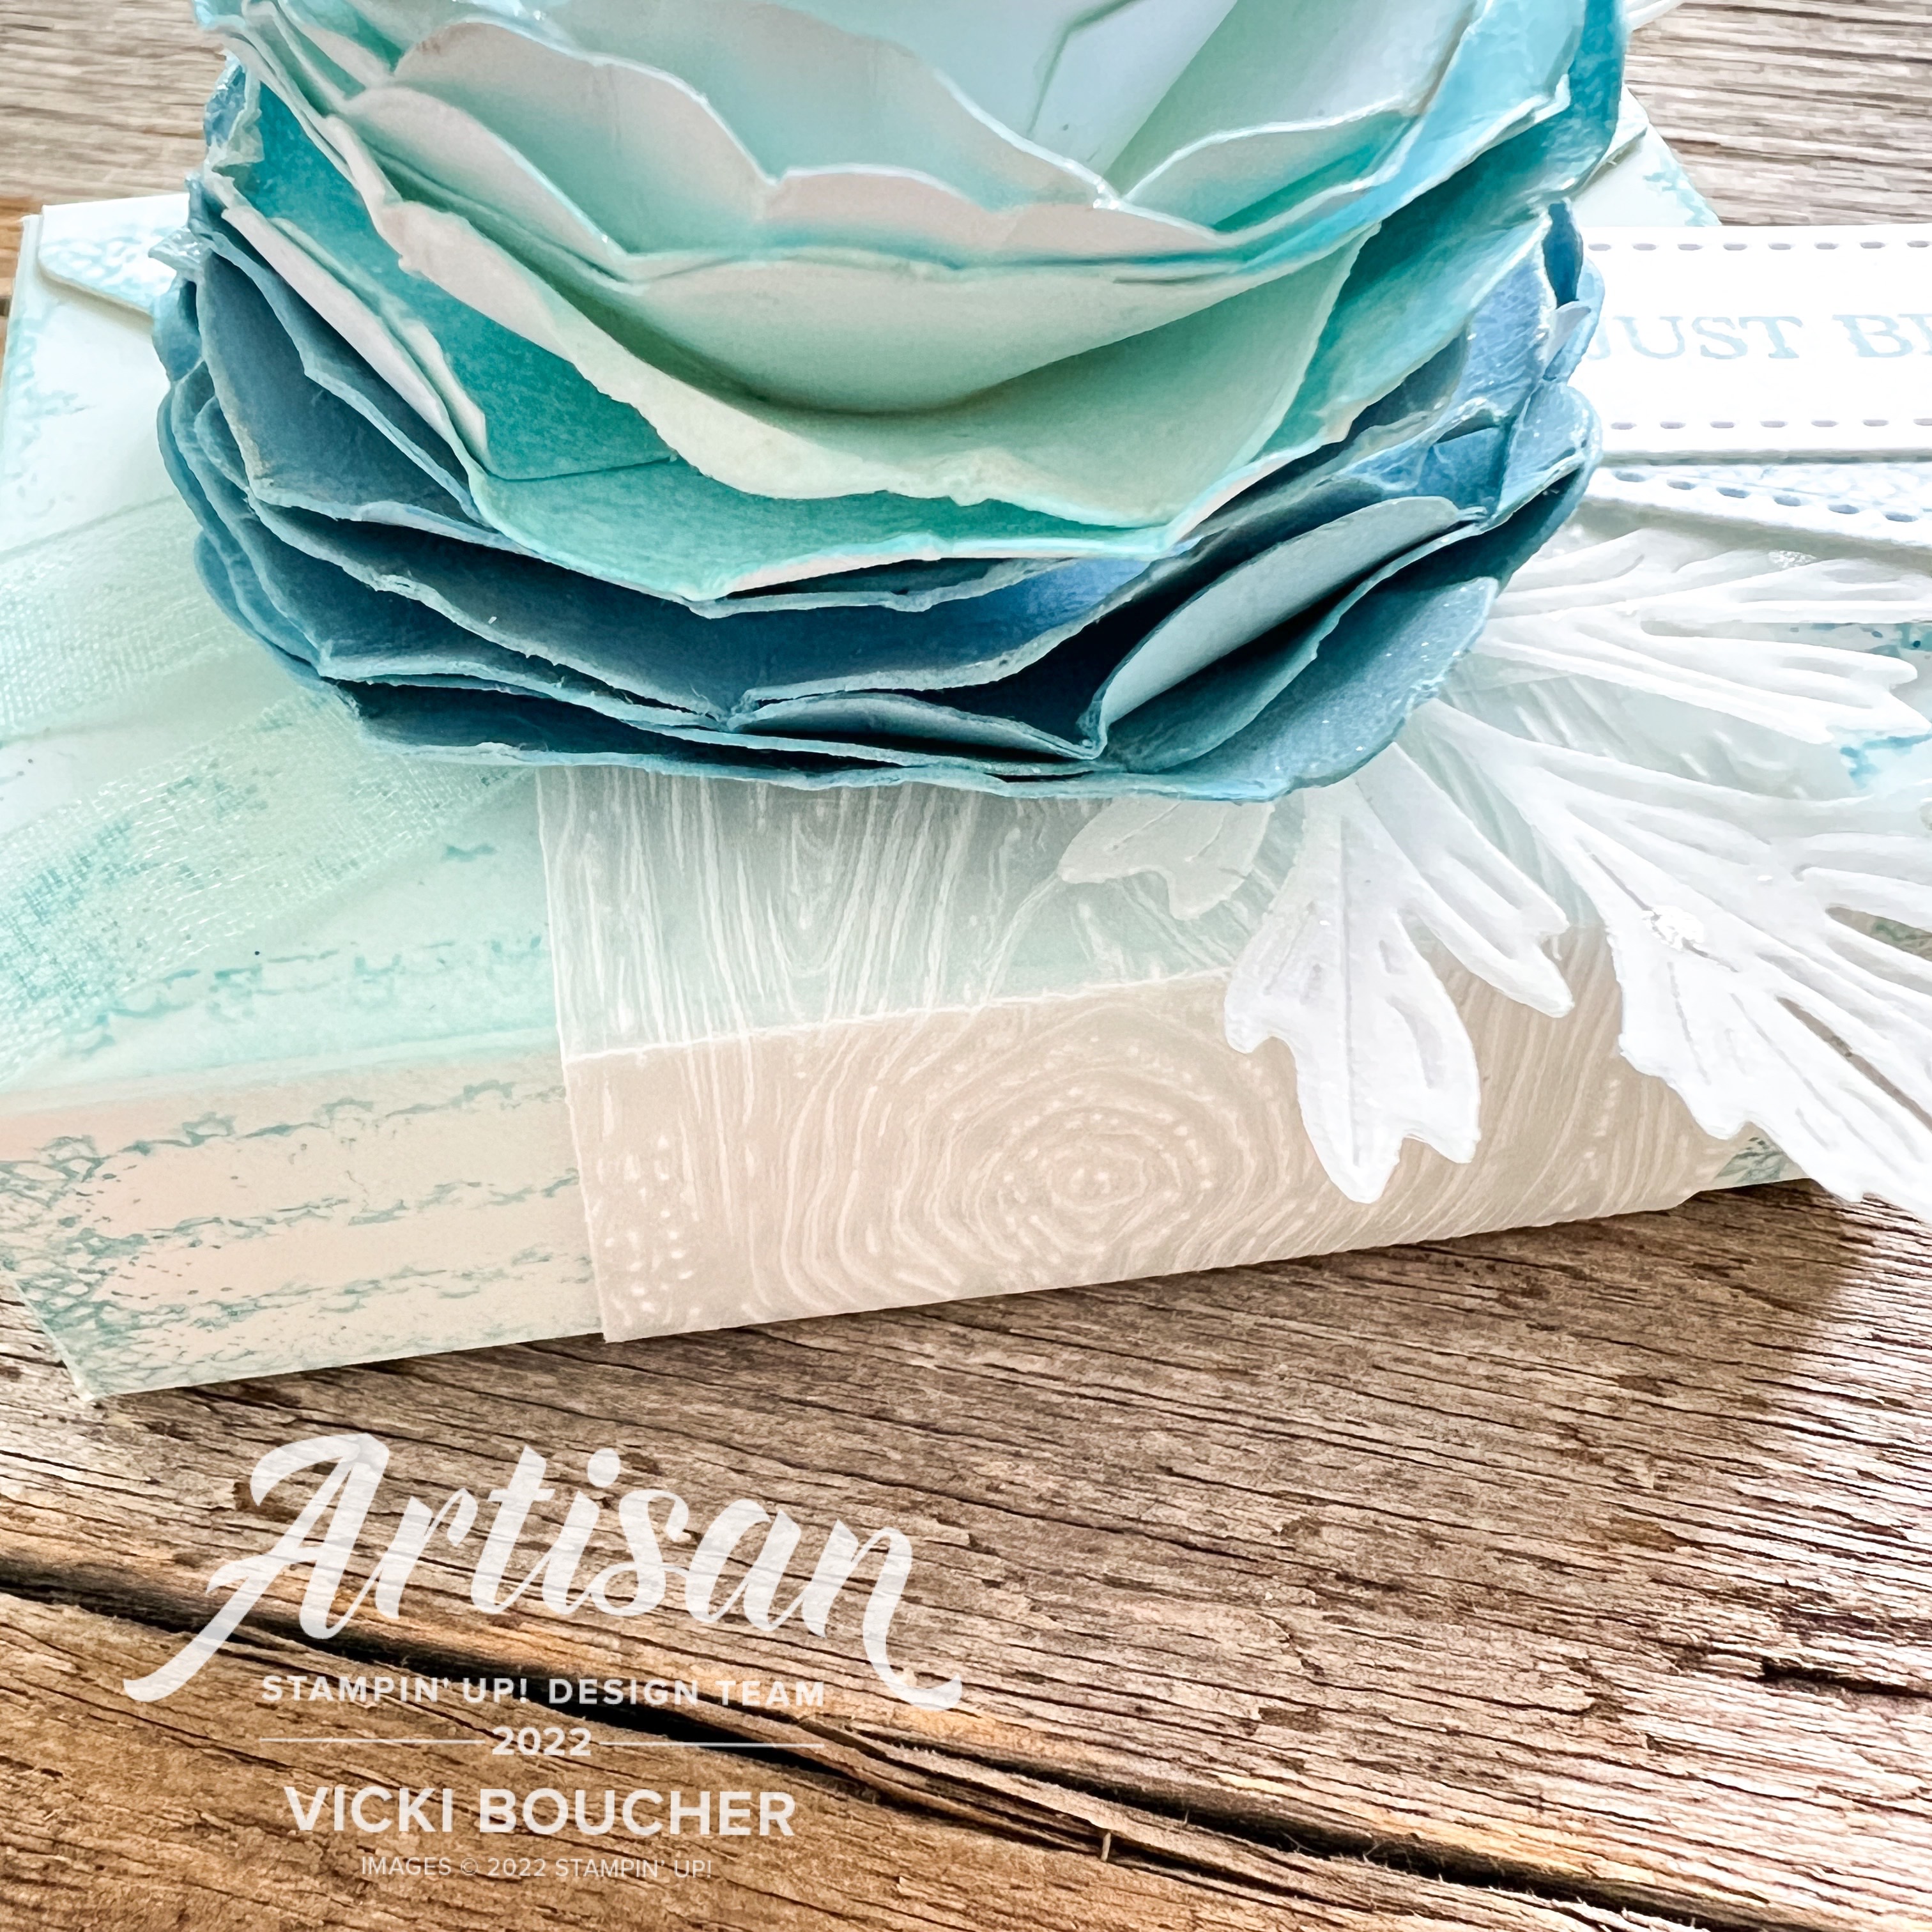


To create the belly band around the box I used Vellum cut the strip at 5cm x 19.5cm. Then dry embossed the Vellum strip using the Timber 3D Embossing Fold. Once embossed score at 4cm, 6.5cm, 12.5cm and 15cm to fit around the box and adhere using Stampin' Seal +


I added Pool Party 3/8" Sheer Ribbon, two Vellum leaves and the sentiment stamped in Balmy Blue onto Basic White Cardstock and die-cut out using the Tailored Made Tag Dies.


Thank you for visiting my blog today, I would so love to hear your thoughts on my project by leaving a comment below.

Please email me if you would like a copy of the 2022-2023 Annual Catalogue and the July-Dec 2022 Mini Catalogue, please contact me here

If you live in Australia and don't have a demonstrator, you can purchase any of the Stampin' Up! products by shopping with me at my online store here.

Make sure you follow me on social media via Facebook, Instagram and Pinterest.


Happy Stamping

Vicki Boucher


To see all of the amazing projects by the Stamping Sunday Design Team please click on their names below. Next up is the fabulous creative Mikaela Titheridge from the UK.


02 October 2022

Global Design Project #GDP362 Sketch Challenge

 Hello and welcome,

Today I'll be sharing with you the latest sketch challenge #GDP362 for Global Design Project make sure you check out their designs using the sketch below.


I've created a fun non-traditional Christmas card for the challenge using Blushing Bride with black & white elements. Have you seen the Stars Treat Bags (159833) in the Stampin' Up! Mini 2022 Catalogue? They are so adorable for gift packaging, but how about for a card front as well! I love the star cut outs. It really makes your card pop, by using Stampin' Dimensionals and layered over the card front.


Here I've used the Paper Snips Scissors and cut along the side of the Treat Bag. I used the Paper Trimmer to trim up the edges even and then run the blade along the edges to rough them up. I added Blushing Bride ink with the Blending Brush to Treat Bag panel.


The sentiment is from Celebrate with Tags Stamp Set, heat embossed using White Stampin' Emboss Powder and Basic Black Cardstock. I used the large label die from the Stylish Shapes Dies to die-cut the sentiment. 


My favourite combination of ribbons together would have to be the Black & White Gingham Ribbon and White Glittered Organdy Ribbon. I've snipped the ribbons in half and tied them in a bow together. The embellishments are Petal Pink Solid Faceted Gems which works well against Blushing Bride.


Thank you for visiting my blog today, I would so love to hear your thoughts on my project by leaving a comment below.


If you would like a copy of the Stampin' Up! Mini January to June 2022 Catalogue and Annual Catalogue 2022 - 2023 please contact me here

If you live in Australia and don't have a demonstrator, you can purchase any of the Stampin' Up! products by shopping with me at my online store here.


Happy Stamping

Vicki Boucher

08 June 2022

Colour INKspiration Challenge #CI123


   Hello and welcome,

My name is Vicki Boucher and I am from Melbourne, Australia. Tonight, it's the latest Colour INKspiration Challenge #CI123 and this photo was chosen by Lou Kitzelman. I love the colours in this photo. I just love green and pink together when it comes to paper craft.  

The colour combination for #CI123 is Blushing Bride, Soft Succulent, Shaded Spruce and Evening Evergreen. As well as the chosen colours you may also add Basic White, Very Vanilla, Basic Black, Crumb Cake, Sahara Sand and metallics to your project. We also allow 'Ivory' and 'Bronze' in the Stampin' Blends. If you don't have all the colour palette, feel free to use the closest SU substitute (ie: Mint Macaron instead of Soft Succulent .... you get the drift).


 The challenge will run for almost 2 weeks until 7pm (AEST) on Monday 20th June 2022 details to follow at the end of my blog.

Today's card is using the Cottage Rose Stamp Set and Cottage Flowers Dies which is on page 57 of the  2022-2023 Annual Stampin' Up! Catalogue. I just recently purchased it and i just couldn't wait to try it out. I love the large flower and foliage stamp the most.


Cottage Rose Bundle #159048 $93.50AUD


I've stamped the images using Versmark Ink onto Shimmery White Cardstock adding Gold Stampin' Emboss Powder and heat set with the Heat Tool. Then I got out my Water Painters and challenge colours ink pads to do some water colouring. Blushing Bride for the roses, Soft Succulent and Evening Evergreen for the leaves, It's such a pretty colour combination. 


Next I had to use Shaded Spruce for the challenge, so I used my Blending Brush and lightly added Shaded Spruce ink onto Basic White Cardstock. I also stamped lightly using the leaf image a number of times onto the panel. In each of the corner of the Basic White panel, I added Blushing Bride ink with the Blending Brush to give it some warmth.


To finish off the card, I used Blushing Bride Cardstock for the card base, I splattered Shaded Spruce ink using the Stampin' Blend and also Blushing Bride Write Marker. The greeting is from the Cottage Rose Stamp Set and stamped in Shaded Spruce ink. I also added Linen Thread and Polished Dots to the card.


I hope I've inspired you with the latest challenge and I do hope you'll join in. We so look forward to seeing a variety of projects using the challenge colours. Please ensure that your project is new and made specifically for this challenge.

Use all of the challenge colours (or close substitutions) unless stated.

Upload only one picture per entry straight to the discussion wall and not in an album

Colour INKspiration Challenge #CI123 will run until 7pm (ADET) on Monday 20th June 2022.

To get your creative ideas flowing, make sure you check out the Crew's Project in the CI123 Album.

Please click on the link here to join the challenge.


Thank you for visiting my blog today, I would so love hear your thoughts on my project by leaving a comment below.


Please email me if you would like a copy of the new 2022-2023 Annual Catalogue and the upcoming July-Dec 2022 Mini Catalogue, July-August Saleabration Catalogue please contact me here

If you live in Australia and don't have a demonstrator, you can purchase any of the Stampin' Up! products by shopping with me at my online store here.

Make sure you follow me on social media via Facebook, Instagram and Pinterest.


Happy Stamping

Vicki Boucher


07 July 2021

Colour Creations Blog Hop Blushing Bride


 Hello and welcome

Tonight I'll be sharing with you Week 6 of Colour Creations Blog Hop with the Art With Heart Team in Australia. 

Each week there will be a Colour Creations blog hop showcasing Stampin' Up! Colors with a selection of members from the Art With Heart Team who will be joining in. I'm looking forward to seeing their beautiful projects using the Stampin' Up! Colors. You'll be able to hop around by clicking on the next link at the end of my blog.


The colour for tonight is Blushing Bride which is part of the Subtles Collection and comes in a number of different mediums such as Ink, Cardstock, DSP etc....I've used Blushing Bride with Early Espresso and Balmy Blue for my handmade card.


I've created a vintage/shabby chic style card to show off Blushing Bride by using Ink, Cardstock, Designer Series Paper and Ink Blending Technique. I love to use layers and textures when it comes to this style of card. 


I was inspired by a couple of paper crafters which I follow on Instagram and I really like how they used the three flower watercolour images and coordinating dies from the Artistically Inked Bundle. Emma from @Coastalcrafter recently used the flower crunching technique, adding layers and giving depth to her card. Sandra from @sandra_helbel_dieburg creates amazing cards and she too used this technique.


Another amazing crafter is Tammy from @Stampspaperscissors an Artisan for Stampin' Up! used the In Good Taste Designer Series Paper with the Artistically Bundle. I love this wood look with this bundle. I've embossed the DSP using a new Timeworn Type 3D Embossing Folder from the Mini July - August 2021 Stampin' Up! Catalogue. When it comes to vintage cards I like to rough up the edges of the paper with my paper snips.


The beautiful floral Brushing Bride paper is from the Hand-Penned Designer Series Paper. This DSP as well as In Good Taste DSP is on sale from 1st July until 2nd August 2021 with 15% discount. There are a total of 9 Designer Series Paper on sale, more details below and on my online store.


For the leaves and butterfly I've used Basic White Cardstock, inked up the Cardstock using Blushing Bride and Balmy Blue Ink with the Blending Brush. Then using the leaf die from Artistic Dies and the butterfly from the Brilliant Wings Dies to die-cut them out.


I've added White Baker's Twine and the greeting stamped in Balmy Blue on a strip of Basic White Cardstock. 

Now it's time to hop along and visit the lovely Tina Gillespie to see her project please click on the link below


If you find a broken link or have come to this blog hop from a different entry point, you can view the full list of participants on Catherine Proctor’s blog.


Thank you for visiting my blog today, I would so love hear your thoughts on my project by leaving a comment below.


Here is the list of Designer Series Paper which is on sale with 15% off discount and is available for purchase from my online store.


If you live in Australia, you can purchase any of the Stampin' Up! products by shopping with me at my online store here.

Happy Stamping 

Vicki Boucher


16 June 2021

Colour Creations Blog Hop Basic Gray Week 3 Art With Heart Team Australia


 Hello and welcome

Tonight I'll be sharing with you Week 3 of Colour Creations Blog Hop with the Art With Heart Team in Australia. 

Each week there will be a Colour Creations blog hop showcasing Stampin' Up! Colors with a selection of members from the Art With Heart Team who will be joining in. I'm looking forward to seeing their beautiful projects using the Stampin' Up! Colors. You'll be able to hop around by clicking on the next link at the end of my blog.


The colour for tonight is Basic Gray which is part of the Neutrals Collection and comes in a number of different mediums such as Ink, Cardstock, DSP etc.... I've used Basic Gray with Blushing Bride and Basic White for my handmade card.


I just couldn't resist in using the koala stamp from the Count On Me Stamp Set, I used the fine Water Painter and Water Color Paper using Basic Gray and Blushing Bride Ink. This was the base for my card and I went through my stash of DSP to use up scraps in the same shades of colours. 


I love to create lots of layers with the different types of papers/DSP here I've used strips of In Good Taste and Handed Penned 12" x 12" DSP plus Basic White Cardstock for the dies. It's a good way to use up those unwanted strips for your paper craft.


The Forever Flourishing Dies was used adding Ink with the Blending Brush using Basic Gray and Blushing Bride Ink to the images.


I've layered two of the tags from the Tailor Made Tags Dies. The largest using the Basic Gray sheet from In Good Taste DSP and a smaller one in Basic White Cardstock, adding Basic Gray Ink and embossed it using the Tasteful Textile 3D Embossing Folder. I've added pink and white Snail Mail Baker's Twine to the tags.


The two koalas look so cute sitting behind the pink sponged leaf die and I've adhered to the tag using Stampin' Dimensionals. The sentiment is from the Biggest Whish Stamp Set and heat set with Versmark Ink, White Stampin' Emboss Powder and Heat Tool. The card base and panel is in Basic Gray Cardstock.


Now it's time to hop along and visit the lovely Andrea Sargent to see her project please click on the link below.


The list of participants are listed below.

Michele Taylor 

Kate Morgan

Sharon Davern

Ros Davidson

Catherine Proctor

Rachel Palmieri

Theresa Gerrard

Kristine D'Auria

Tina Gillespie

Rachel Woollard

Di Furniss

Claire Daly

Christine Blain

Fiona Ryan

Caroline Manwaring

Vicki Boucher

Andrea Sargent

Rosa Leyden 


Thank you for visiting my blog today, I would so love hear your thoughts on my project by leaving a comment below.

If you live in Australia, you can purchase any of the Stampin' Up! products by shopping with me at my online store here.

Happy Stamping 

Vicki Boucher


01 July 2020

Week 5 Art With Heart Colour Creations Weekly Showcase Blushing Bride


Hello to all the lovely stampers out there! Welcome to Week 5 with the Art With Heart Colour Creations weekly Showcase which the lovely Catherine Proctor is running our weekly blog and with a selection of other Stampin' Up! Demonstrators from the Art With Heart Team. This week we are featuring Blushing Bride and I hope we will inspire you with our creations of this beautiful colour.


Blushing Bride is from the Subtles Collection and comes in a range of Stampin' Up! products from the Classic Stampin' Pad, Cardstock, DSP and more. 

I do love pink, so mixing Blushing Bride with Rococo Rose and Gray Granite was an easy choice for me as I love this combination of colours together. I've used a new stamp set from my latest Stampin' Up! order it's called Fancy Phrases, I love the different greetings and the hand drawn stamp images in the set. The shading of the images makes colouring in easy. 


I've stamped the image in Gray Granite, using a Blender Pen, coloured Ink and a Clear Block as shown below. I can then add ink to paper by adding a little ink as I go until I'm happy with the shading. The stamped images have been fussy cut out.


Using a panel of Blushing Bride Cardstock, I've stamped the smaller flower image randomly in Blushing Bride ink onto the Cardstock and embossed the panel with the Subtle 3D Embossing Folder. This Embossing Folder gives an antique look to the card and I like to ruff up the edges with the Paper Snips.


The new Meadow Moments Embossing Folder is a smaller size, I've used a piece of Whisper White Cardstock and ran it through the Die Cutting Machine. Using a Sponge Dauber and Blushing Bride Ink, I've softly added ink to the raised up edges. 


A few more added layers to the card is a strip of Blushing Bride Subtles 6"x 6" DSP and the Flowers for every season Ribbon in Whisper White. I like to fray the edges of the ribbon for a little something different.

Adhere the layers onto the Brushing Bride card base with your preferred adhesive and for the sentiment I've added Stampin' Dimensionals. To finish off the card, I've added 3 of the Pearl Basic Jewels.  


Please visit Catherine's Blog to see her creation and all the links are there as well, so you’ll be able to see everyone’s creations for this week’s showcase.

Thank you for visiting my blog today, I hope you’ve enjoyed how I’ve used Blushing Bride. Make sure you come back next week to see the colour Bumble Bee in our projects.

If you would like the new Stampin’ Up! 2020-2021 Annual Catalogue, I would be happy to send you a copy out to you. Please contact me here.

Happy Stamping

Vicki Boucher


Product List

Ink: Blushing Bride, Gray Granite and Rococo Rose

Cardstock and Paper: Blushing Bride, Gray Granite and Whisper White

Stamp Set: Fancy Phrases

Embossing Folders: Meadow Moments and Subtle 3D Embossing Folder

Ribbon: Flowers for Every Season Ribbon Combo Pack Whisper White 1/2" 

Other Stampin' Up! products: Pearl Basic Jewels, Sponge Dauber, Paper Snips, Blender Pen and Clear Block