Showing posts with label Gold Embossing Powder. Show all posts

04 September 2022

Creation Station Blog Hop - Gold


 Hello and welcome

My name is Vicki Boucher, and I am from Melbourne, Australia. This is the latest hop with the design team at Creation Station, if you have come from Denita Wright-Smee or you may have started with me. Please make sure you hop around and see everyone's amazing projects. I'll pop a link at the end of my blog to hop around....

The design team at Creation Station are presenting their projects with the theme "Gold" which I just love to use in my paper craft and it's so elegant especially with green. 


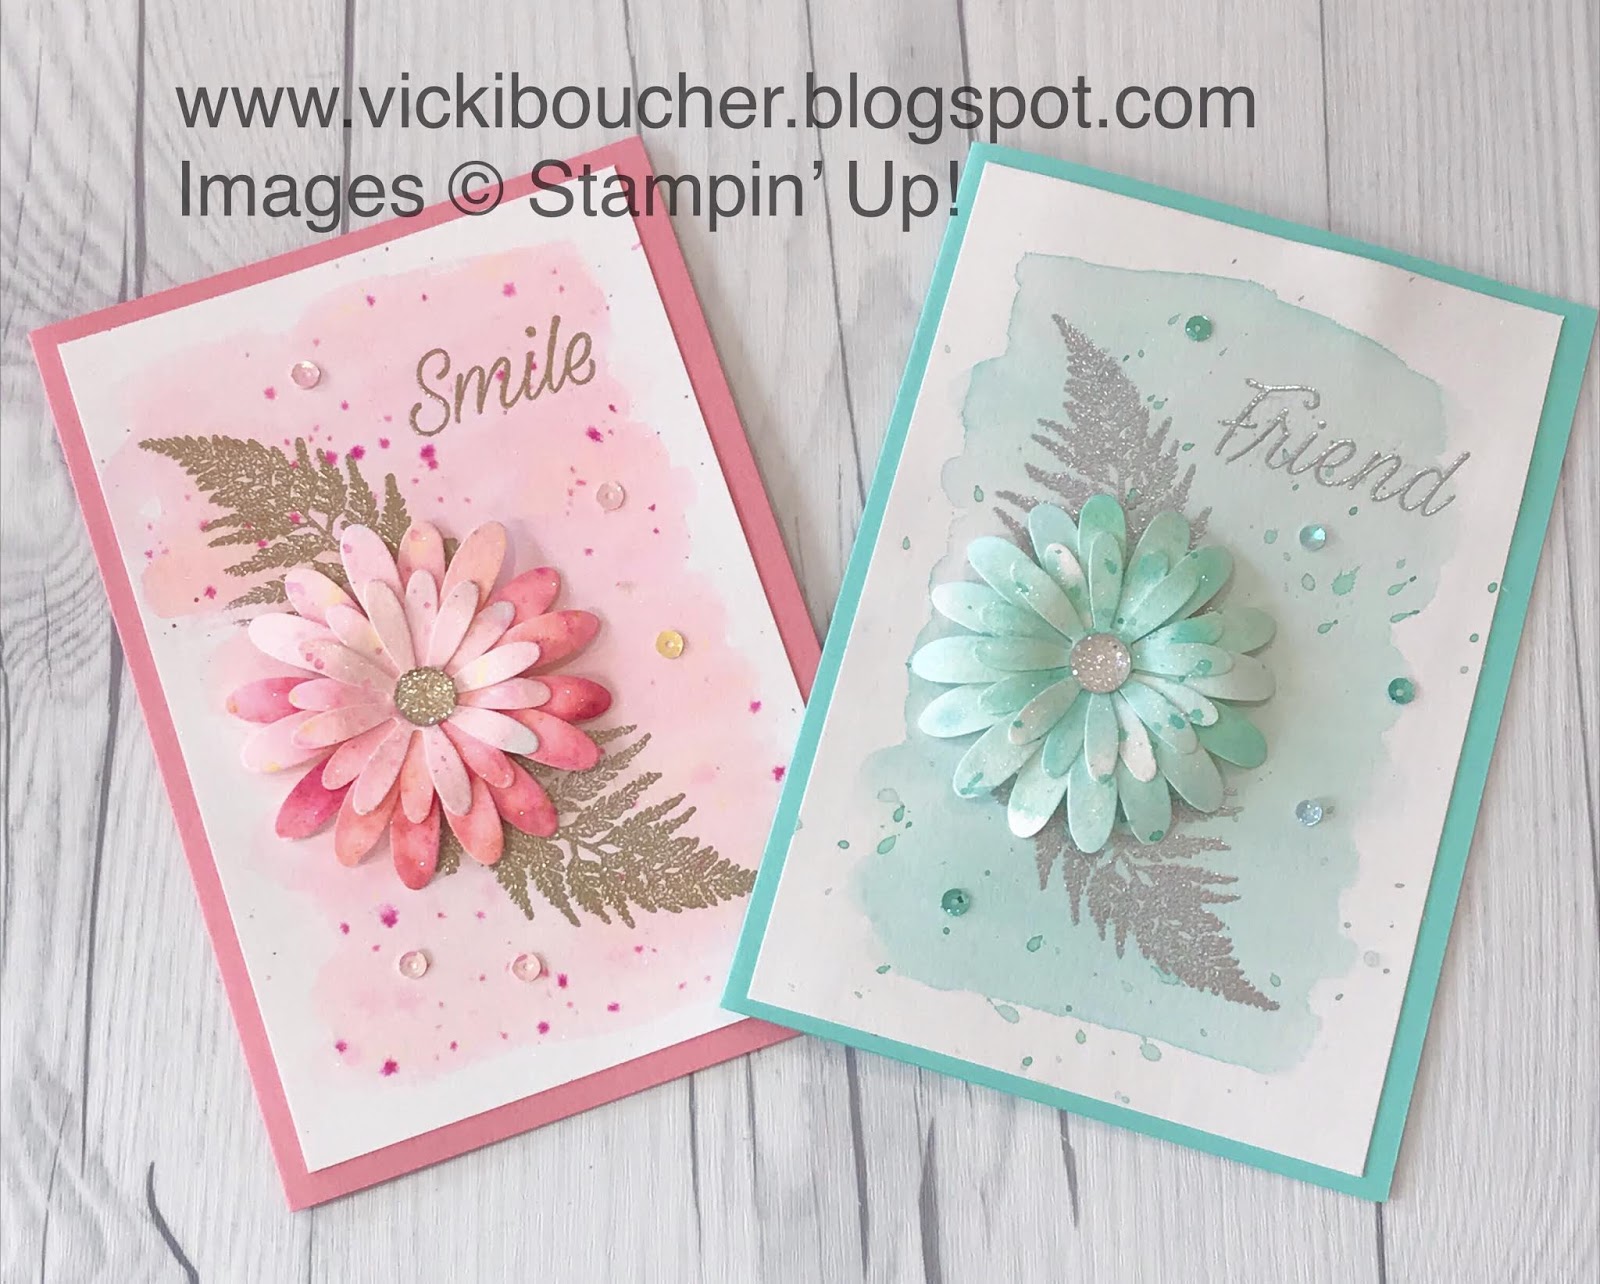
Today's slimline card I've used a variety of different Stampin' Up! products from the Annual Catalogue. Starting with inking Soft Succulent cardstock panel, I've stamped a number of different images in Soft Succulent, Evening Evergreen, Garden Green and Shaded Spruce ink. Here is the list of stamp sets used: Season of Chic, True Beauty, Honey Bee Home and Celebrating You for the Gold Embossed Sentiment.


I added Gold Gilded Leafing to the edges of the stamped panel, to do this I use a Sponge Dauber and add a little of Multipurpose Glue, then run it along the cardstock. You can either wait for it to dry or hurry it with the Heat Tool, then add Gold Gilded Leafing and brush off with your fingers or a brush.


I've used the Organic Beauty and Meadow Dies, die-cut out using the detailed dies in Evening Evergreen, Soft Succulent and Distressed Gold Specialty Paper. I also added Gold Gilded Leafing to the die-cut pieces for an interesting effect.


Other gold items I've used on the card are Texture Chic Specialty Designer Series Paper, Gold Shimmer Ribbon, Gold Simply Elegant Trim and Brushed Brass Butterflies, they seem to have a gold feel about them.


Thank you for visiting my blog today, I would so love to hear your thoughts on my project by leaving a comment below. Make sure you pop over to Julie Mercer Beltramo for lots of inspiration using gold.


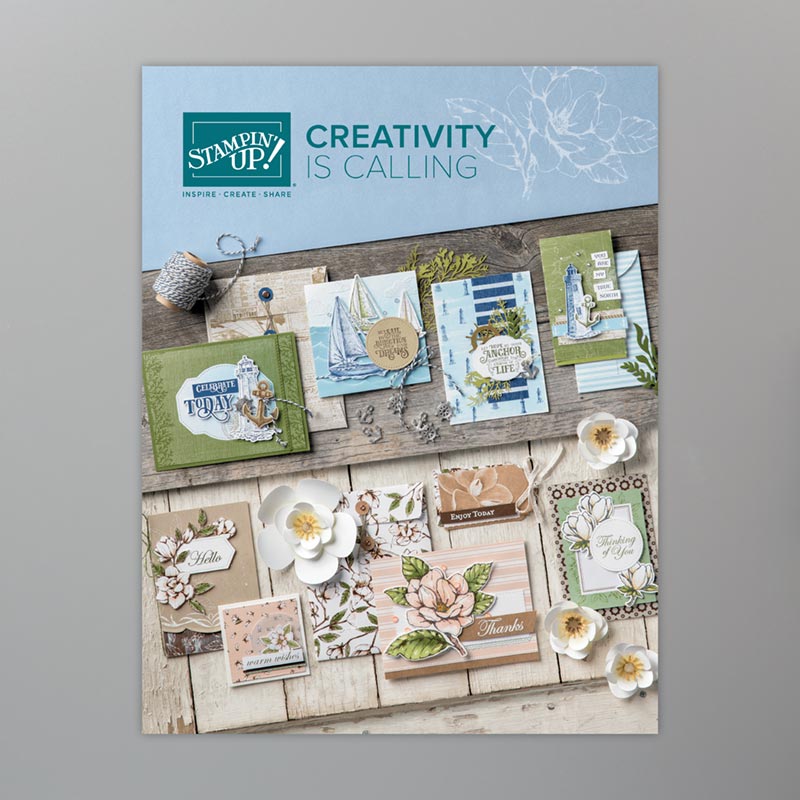
Please email me if you would like a copy of the 2022-2023 Annual Catalogue and the July-Dec 2022 Mini Catalogue, please contact me here

If you live in Australia and don't have a demonstrator, you can purchase any of the Stampin' Up! products by shopping with me at my online store here.

Make sure you follow me on social media via Facebook, Instagram and Pinterest.


Happy Stamping

Vicki Boucher


03 May 2020

Creation Station May Blog Hop "Mad as a Hatter Mash Up"


Hello and welcome,

Today, I will be sharing with you a card that I’ve created for the latest Creation Station blog hop. This month’s theme is “Mad as a Hatter Mash Up” which means create something unexpectedly with different Stampin’ Up! products or use an outlandish colour palette.


It was so nice to get back into the craft room and create something a little bit different for a change. I had no idea what I was going to do but after a few days later I started to get some ideas in my head. I wanted to use bright colours and I thought what are the opposite colours in the colour wheel? Purple and yellow was a good colour combination to start with.


The main medium for my card is using the Pigment Sprinkles they are bright and fun to play with, so I started with the Bermuda Bay and a panel of water color paper for my under the sea card. The layer underneath is Mango Melody Pigment Sprinkles and water color paper. Around the edges of the water color paper I’ve applied Versamark Ink to the paper, sprinkled Gold Stampin’ Emboss Powder and heat set with the Heat Tool.


Through out the card I’ve applied Gold Embossing or I’ve used Gold Foil. I just had to use Gorgeous Grape as my card base as I’ve used the colour through out the card. I’ve Embossed a panel of Gorgeous Grape with the Parisian Flourish 3D Embossing Folder and added Gold Embossing Powder. 


I liked the idea of adding different Dies or Punches to the card, the leaf Die from the Seasonal layers was fun to play with, using it with the Gold Foil and also combing Pigment Sprinkles with water color paper. The Medium Daisy Punch is so cute and using Mango Melody with Gorgeous Grape really stands out in the card.


I’ve so enjoyed creating this card and playing with the Pigment Sprinkles, they will be missed as they are retiring as of the 3rd June from the Annual 2019-2020 Stampin’ Up! Catalogue. The fun part with Pigment Sprinkles is you just never know how your card will turn out and no two cards will ever look the same.


Be sure to visit everyone’s blog and see their amazing creations for the month of May. Make sure you come back next month for more inspiration and to see our creations.

 Dani

Now it’s time to head on over to Dani Dziama to see her amazing project.

Thanks for stopping by!

Vicki Boucher


Product List
Stamps: Seaside Notions and Daisy Lane
Dies: Seasonal Layers
Punches: Medium Daisy Punch
Ink: Lovely Lipstick
Colouring Tools: Pigment Sprinkles, Aqua Painter, Stampin’ Spritzer, Versamark, Heat Tool, Embossing Buddy and Gold Stampin’ Emboss Powder
Cardstock/Paper: Fluid 100 Water Color Paper, Shimmery White, Gorgeous Grape and Gold Foil Sheets
Ribbon and Embellishments: 3/8” Tricolor Ribbon Purple, Iridescent Sequin Assortment and Woven Threads Sequin Assortment
Embossing Folders: Parisian Flourish 3D Embossing Folder


11 September 2019

Stampin' Up! 2019 Holiday Catalogue Art With Heart Team Blog Hop Week 4


Hello and welcome,

I'm so excited to be back with the Heart of Christmas blog hop for week 4 and we will be sharing products from the 2019 Holiday Catalogue.


This week's card is all about Melon Mambo and Gold, using the Perfectly Plaid Bundle which comes with the Perfectly Plaid Stamp Set and Coordinating Pine Tree Punch. I just love pink and gold together it just gives you that pop of fun when creating a Christmas card.


I've used the Pigment Sprinkles in Melon Mambo and the Fluid 100 Watercolor Paper. I've used this technique before when I created the Daisy Lane card in the same colours a few weeks ago. I've spritzed water onto a piece of Watercolor Paper, adding a few sprinkles of the Pigment Sprinkles and blending ink with the Aqua Painter. Dry it with the Heat Tool and add a few more Pigment Sprinkles.


I've used one of the tree stamps from the Perfectly Plaid Stamp Set, stamped in Versamark Ink, Gold Stampin' Emboss Powder and heat set with the Heat Tool. Punch out three Christmas trees with the Pine Tree Punch and place Stampin' Dimensionals on the back on the tree.


Using a piece of Shimmery White Cardstock I've spritzed water and add a little of the Melon Mambo Pigment Sprinkles onto a Clear Block. Then with a Aqua Painter lightly brush the colour onto the Cardstock and I also added a few splatter effects with the Painter too.


I've only used part of the greeting for the sentiment by covering up the words that I didn't want to use with a posted note, ink up with Versamark Ink and remove posted note before stamping onto a piece of Shimmery White Cardstock. Sprinkle Gold Stampin' Emboss Powder and heat set with the Heat Tool.

The card base is Melon Mambo Cardstock, layered with a sheet of Gold Foil, add the inked up Shimmery White Cardstock, place the three trees and snipped out greeting.  

To purchase products from my online store you can click here.


You can see the rest of this weeks Heart of Christmas team creations over at Claire Daly's blog.

Thank you for visiting my blog today.


Happy Crafting


Vicki Boucher


Product List


Stamp Set: Perfectly Plaid
Punch: Pine Tree Punch
Papers: Melon Mambo, Gold Foil Sheet, Fluid 100 Watercolor Paper and Shimmery White Cardstock
Colouring Tools: Pigment Sprinkles, Aqua Painter, Stampin' Spritzer, Versamark, Heat Tool, Embossing Buddy and Gold Stampin' Emboss Powder
Other Stampin' Up! Products: Stampin' Dimensionals and Tear & Tape Adhesive


14 August 2019

Stampin' Up! Pigment Sprinkles and Daisy Lane Bundle


Hello and welcome,

Today I will be sharing with you two cards that I’ve created using the Daisy Lane Bundle and Pigment Sprinkles. I just love these two products together.


I recently watch a YouTube video by Eva Dobilos who is a Canadian Stampin’ Up! Demonstrator and she showed how to use the Stampin' Up! Pigment Sprinkles. I love her cards so much.


https://www3.stampinup.com/ecweb/product/149663/pigment-sprinkles
Pigment Sprinkles

Daisy Lane Bundle


My first card I used Melon Mambo from the Pigment Sprinkles, I spritzed water onto the Fluid 100 Water Color Paper and then sprinkled a little of the pigment. Not too much as the colour will be a lot brighter. To wash out the colour I used my Aqua Painter and lightly mixed the water with the pigments. Once completely dry, punch out with the Medium Daisy Punch and the larger Daisy Punch. I also used Wink Of Stella to add some sparkle.


For the water coloured background I’ve used the same colour onto a piece of Shimmery White Cardstock. Just add a little of the Pigment sprinkled onto a Clear Block, with a drop or two of water from my Aqua Painter and then add to the Cardstock.


Once dry I then added droplets of Pigment Ink onto the Cardstock as well as the Daisies. I added Gold Stampin' Powder, heat Embossed the stamped images of the leaves and greeting. Once I layered the punch out Daisies together and placed a Gold Facetted Gem to the center.


My card base is Flirty Flamingo Cardstock I think the colour goes well with Melon Mambo Pigment Sprinkles. I also added a few of the Iridescent Sequin Assortments to finish off the card.


My next card is similar but I just changed the colours by using Bermuda Bay Pigment Sprinkles, Sliver Stampin’ Emboss Powder, Coastal Cabana for the card base, a Clear Facetted Gem and a few of the Woven Threads Sequin Assortments. 


Thank you for visiting my blog today and I would love to hear which card you liked? You can shop for all of these supplies in my Stampin’ Up! Store by clicking here or the above product photos.


Happy Crafting

Vicki Boucher


Stampin' Up! Annual Catalogue 2019-2020
Product List

Pigment Sprinkles, Daisy Lane Bundle, Daisy Punch, Bone Folder, Take Your Pick Tool, Aqua Painter, Stampin' Spritzer, Wink of Stella, Fluido 100 Water Color Paper, Shimmery White Cardstock, Clear Faceted Gems, Gold Faceted Gems, Iridescent Sequin Assortment, Woven Threads Sequin Assortment, Embossing Buddy, Heat Tool, Versamark, Gold Stampin' Emboss Powder, Silver Stampin' Emboss Powder, Flirty Flamingo Cardstock and Coastal Cabana Cardstock 


01 August 2019

Stampin' Up! Pigment Sprinkles Unicorn Card


Welcome to my first card using the Pigment Sprinkles and Leave a Little Sparkle Stamp Set. This card was created for my daughter who just loves Unicorns and Galaxies, I think she’s going to like it.


The Pigment Sprinkles comes in six vibrant colours, I used four of the colours – Gorgeous Grape, Bermuda, Granny Apple Green and Melon Mambo. A good tip is to cover two of the holes with Washi Tape to control less powder onto your paper or block.

Pigment Sprinkles
Leave a Little Sparkle Stamp Set


To create my galaxy background I heat embossed in White Stampin’ Emboss Powder with the tiny stars stamp which is from the Little Twinkle Stamp Set onto a piece of Watercolor Paper. Then the fun begins with first using your Stampin’ Spritzer spray water lightly onto the Watercolor paper and then add a little of the four colours until you are happy. I then used my Aqua Painter to mix the colours together. 

While the galaxy card piece was drying, I started on my unicorn using a piece of Shimmery White Cardstock I stamped the unicorn image in Versmark and sprinkled Gold Stampin’ Emboss Powder. I also did this for the sentiment as well. The unicorn was coloured in with Pigment Sprinkles using Melon Mambo, Gorgeous Grape and Bermuda Bay. To add a little sparkle, I used Wink of Stella and coloured in the unicorn.


In another Stampin’ Spritzer I put Rubbing Alcohol and a couple of drops of Frost White Shimmer Paint and spritzed onto Gorgeous Grape card base. I also did this with a piece of Bermuda Bay and the dried galaxy panel. To finish off my card I placed the pieces of Cardstock together to my liking, adhered the unicorn and added Stampin’ Dimensionals to the backing of the sentiment.


Thank you for coming along and seeing my card today. I’ve already created more cards using the Pigment Sprinkles and I’ll be sharing them with you very soon.


Happy Crafting,

Vicki Boucher


Product List:

Stamps: Leave a Little Sparkle and Little Twinkle

Papers: Shimmery White Cardstock, Fluid 100 Watercolor Paper, Gorgeous Grape and Bermuda Bay Cardstock

Colouring Tools: Pigment Sprinkles, Aqua Painter, Stampin’ Spritzer, Wink Of Stella, Frost White Shimmer Paint, Versamark, Heat Tool, Embossing Buddy, Gold Stampin’ Emboss Powder and White Stampin’ Emboss Powder

Non Stampin’ Up! Products: Rubbing Alcohol


26 June 2019

Colour INKspiration Challenge #58


Hello and welcome to my card creation as guest designer for this Colour INKspiration Challenge for #CI58


The beautiful colours for this challenge are Blushing Bride, Crumb Cake, Whisper White and Gold. 


I love the photo they had chosen for the challenge especially the pink faux fur stool.


I decided to use the Bloom & Grow Bundle which is on page 131 in the Stampin’ Up! Annual Catalogue.


I used one of the beautiful flower images and embossed it with Gold Embossing Powder onto Shimmery White Cardstock. With my Aqua Painter I water coloured the image in Blushing Bride and Crumb Cake. This set has coordinating Dies so no fussy cutting was needed. 


The sentiment was also Gold Embossed on Whisper White Cardstock and then I die cut the greeting out with the edge scalloped dies.


My favourite die at the moment is the Stitched Lace Die it’s so beautiful and delicate with the stitching. I used the edge die to form the scalloped boarders on either side. 


I just had to create another layer for my card, so I used the Tin Tile 3D Embossing Folder with Blushing Bride Cardstock and then I layered the Lace Die on top. I wound some Solid Baker’s Twine around the Lace Die, Tin Tile Cardstock and then attached to the base of Blushing Bride Cardstock.


I added some Stampin’ Dimensionals to make the flower images and greeting pop up from the card. For the final touch I added some Wink Of Stella onto the flowers to make them sparkle. 


Thank you for joining us today on the Colour INKspiration hop.


To see more great projects, please keep on hopping along and up next is Kelly Kent please see her beautiful creation. 


Happy Crafting

Vicki Boucher

Product List

Stamps: Bloom & Grow

Dies: Budding Blooms Dies and Stitched Lace Dies

Inks: Blushing Bride, Crumb Cake and Versamark

Cardstock: Blushing Bride, Whisper White and Shimmery White Cardstock

Colouring Tools: Gold Stampin’ Emboss Powder, Embossing Buddy, Heat Tool, Big Shot, Aqua Painter and Wink Of Stella

Other Stampin’ Up! Products: Whisper White Solid Baker’s Twine, Tin Tile 3D Embossing Folder and Stampin’ Dimensionals


11 June 2019

Stampin' Up! Week 52 Art With Heart Colour Creations Blog Hop Pretty Peacock


Hello and welcome back to my blog with the lovely ladies from Art With Heart Colour Creations Blog Hop.


Today is week 52 and we are playing along with one of the new In-Colours called Pretty Peacock for 2019-2021.


This new colour is available to purchase in Ink, Cardstock, Ribbon, DSP and much more. 


I’ve decided to use Bermuda Bay, Coastal Cabana and Gold with the new in colour for my card this week. I just love how the gold and these colours goes so nicely together.


I was so happy to see the Magical Mermaid Stamp Set in the new Annual Catalogue for 2019-2020. I just love to water colour and emboss the mermaid. I’ve used Shimmery White Cardstock and Gold Embossed her. Then with my Aqua Painter I’ve used Pretty Peacock ink for her tail. I’ve used my Blends in Petal Pink light for the skin and Daffodil Delight for the hair.


For the background I wanted to try out the Ink blending technique on Shimmery White Cardstock. Using the Stampin’ Sponges I blended the colours together starting with Pretty Peacock. This was so much fun! Then I splatted water onto the Cardstock which has created underwater bubbles. I really loved using this technique, I might try using different colours next time.


The gold scalloped look around the edge of the cardstock is using the Decorative Ribbon Border Punch. I think it gives a nice finish to the card.


For the gold seaweed I’ve used the Dies from the Bouquet Bunch and die cut them out using Gold Foil. To finish off the card I’ve gold embossed the greeting and placed a few sequins from the Iridescent Sequin Assortment. 


Thank you for visiting my latest blog and I hope you've enjoyed how I created my Pretty Peacock card. 

If you would like a new catalogue, please contact me today and I can send one out to you. 


Happy crafting

Vicki

Please visit Catherine’s blog where you’ll find the links to the other participants.


Product List


Ink: Pretty Peacock, Bermuda Bay, Coastal Cabana and Versamark Ink.


Papers: Pretty Peacock Cardstock, Gold Foil and Shimmery White Cardstock


Stamps: Magical Mermaid


Dies: Bouquet Bunch


Punch: Decorative Ribbon Boarder


Colouring Tools: Blends in Petal Pink, Daffodil Delight. Stamping Sponges, Gold Stampin’ Emboss Powder, Aqua Painter and Heat Tool.
Other Items: Big Shot and Iridescent Sequins Assortment